Improved Double-Sided Toner Transfer Method

In the era before PCB shops would make almost any PCB imaginable, as well making many other manufacturing processes for prototypes available to hobbyists, there were several ways of making PCBs at home. Many of which involve harsh chemicals and were easy to mess up. Getting a single-layer PCB using the toner transfer method, for example, took a bit of practice (and a fume hood) to get right. [Bettina Neumryr] is working on a custom two-layer PCB, and has a new trick to get it to come out right despite the added complexity of the second layer.

The method starts out as a standard single-layer board in effect. Toner is ironed onto a copper board, in this case using a laminator, which allows the board to go into an acid bath which washes away all of the un-tonered copper. But with the second layer exposed, this would wash away the other side of the board completely. [Bettina] is using a new method here to protect that layer during the first bath: covering it in ink from a magic marker. With the first board etched, the ink and toner get washed off and the second layer is carefully lined up, put through the laminator, and then the opposite side gets covered in ink for the second acid bath.

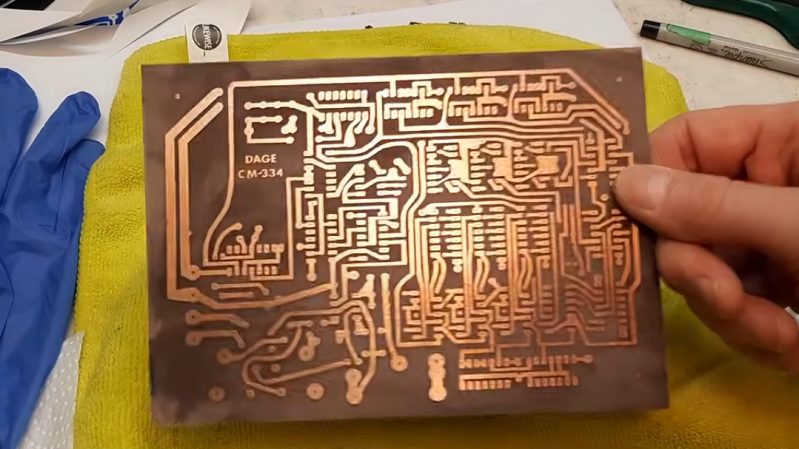
After the process is complete and many layers of ink and toner are removed, [Bettina] is left with a PCB that’s ready to receive electronic components, if a little stained from all the ink. As to what this specific board is going to be used for, she’s kept that a bit cryptic as it’s the subject of a future video. Her builds usually revolve around designs from antique elecronics magazines, so it’s almost certainly something of that nature, and that’s also why this specific design couldn’t be just sent off to a board shop.

Continue reading “Improved Double-Sided Toner Transfer Method” →
Electromechanical TV Goes 3D With This Light-field Display

A mechanical TV — the kind that makes an image with a Nipkow disk and a single lamp with some help from persistence of vision — is easy enough to wrap your head around. Moving that technique into the third dimension, though? That’s a bit of a head scratcher. Luckily for us [AncientJames] provides a simple visual explanation for how the magic happens.

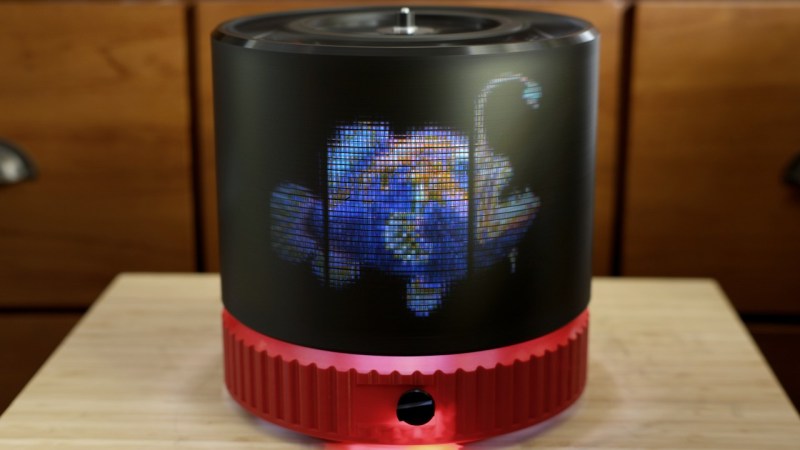
Instead of a disk doing a raster scan of the display, he’s using a rapidly-spinning drum with holes in it. In place of a single lamp, he’s got an array of LED matrix displays, each 32 pixels by 64 pixels in resolution. The trick is splitting the model up into a light field, so each hole projects its own image of the object at the proper angle.

In this demo there are three matrix displays, though that does limit the viewing angle as they’re arranged as one half of a hexagonal prism — you’d need more screens to get a full 360. The effective resolution through the drum is only about 100 pixels by 48 pixels per eye, but that’s still enough to play DOOM with.

This isn’t the first time this particular [Ancient] has got DOOM going on a volumetric display, and based on previous results, it probably won’t be the last time either. This implementation, which keeps the displays stationary and does not require a pricey laser projector, looks the most accessible to us, as long as you watch your fingers.

Continue reading “Electromechanical TV Goes 3D With This Light-field Display” →

Geothermal Cooling For New York’s Subways

You might think that if you dug some tunnels down into the ground where you could be out of the sunshine, that you might find them to be relatively cool and comfortable inside. Yet, fill those tunnels with trains and supporting equipment and millions of commuters, and you’ll instead find yourself sweltering in the heat.

New York’s subways are too hot for comfort, and have been for some time. Unfortunately, unlike any old regular building, you can’t just air condition a subway and call it done. Instead, authorities are looking for other solutions to beat the heat on the famous underground transit network.

Continue reading “Geothermal Cooling For New York’s Subways” →

Testing Coulomb’s Law And Similar Fundamentals Yourself Remains Tricky

How easy is it to build a simple demonstration at home that proves fundamental law of physics, such as Coulomb’s inverse square law, or Maxwell’s equations? This is one of those questions that always nagged at [Casual Physics Enjoyer] as they sought to find ways to develop a more intuitive understanding of these fundamentals with simple DIY-at-home experiments. Unfortunately this turned out to be rather tricky for Coulomb’s law.

Us H. sapiens – courtesy of a few bright individuals – have figured out many of the fundamentals that underlie this physical world over the past few thousands of years. Even if we still got some pretty massive fundamentals left today for equally bright-minded folk to bash their collective heads against, basics like Coulomb’s law or Maxwell’s equations ought to be a snap now for the average person to replicate since they were after all performed in an era before quantum mechanics, computers or even electrification.

To the dismay of the average physics student, experiments that demonstrate these fundamental laws of physics are still pretty hard to replicate without some solid time and monetary investment. This is demonstrated quite succinctly in the linked article, where the question of how to demonstrate the force between two charged particles, as in Coulomb’s law, and that it is an inverse square relationship is attempted.

Whereas the Wikipedia entry claims it to be a ‘simple experiment’ with just two identical spheres, in a DIY setting this is somewhat tricky, including the part where you have to charge up the spheres and measure the force. Using some aluminium foil and wires you can get the two ends to separate as you’d expect, but quantifying the force is a whole other matter.

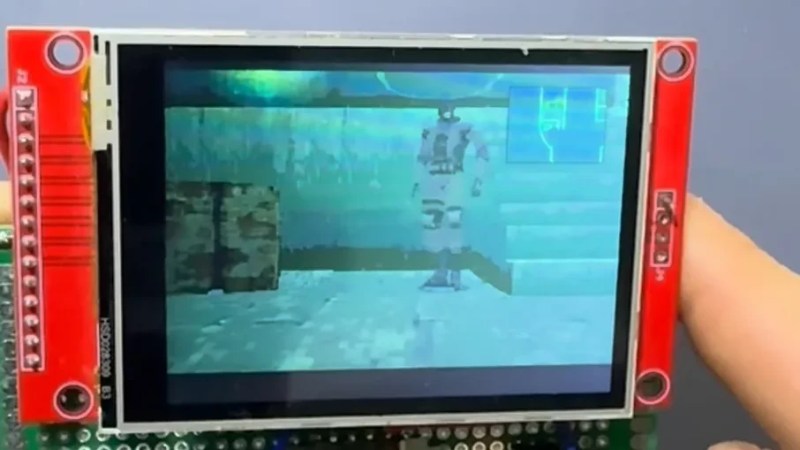
The many polygons of Solid Snake on an ESP-driven LCD

Metal Gear Solid Moves From PlayStation To ESP32

If you haven’t heard of Metal Gear, you probably haven’t played video games these last few decades. The original Metal Gear dates back to 1987 and launched on the MSX, but the real rise to fame probably started with Metal Gear Solid on the original PlayStation in 1998. What needed a hefty console in 1998 can comfortably fit on a microcontroller in 2026, though, as [David Montero Crespo] demonstrates with his port of MGS to the ESP32-S3.

[David] is — as we always are — standing on the shoulders of giants with this hack. Most specifically, the project relies entirely on the [FoxdieTeam] MGS Reversing decompliation project. Of course what one team decompiles, another can recompile, and in this case [David] chose to recompile the game for Expressif’s exceptional ESP32. It wasn’t quite as easy as just forking the repo and compiling with the ESP32 as a target though, as the blog post explains.

We won’t spoil it, but [David] did have to make some changes to account for the different quirks the MIPS processor in the PlayStation has compared to the Xtensa cores on the microcontroller. Then to make it playable, he put the ESP32-S3 module onto some perfboard with an analog stick from a drone controller, an ILI9341 LCD panel, and a resistor ladder to run the buttons for a barebones handheld.

Fans of MSG and its many sequels may appreciate this replica of the codex communicator. Fans of the ESP32 may remember the Wipeout clone we featured earlier, which already proved the popular microcontroller could handle PlayStation-level graphics. If you were hoping for actual solid metal gears, you can cut your own at home.

Pitting A CFD-Optimized Toroidal Propeller Against A Conventional One

Although we often think that we got certain aspects of aerodynamics pretty much licked at this point, details like the optimal shape of a propeller remains hotly debated, both in- and outside of academia. This also includes wilder designs like toroidal propellers that even after more than a hundred years are still mostly just being evaluated. Recently [Neuronautics] took a shot at figuring out whether toroidal propellers even make sense.

In order to do this, first an efficiency baseline was established using a conventional and highly optimized propeller. After scanning it in to get its exact geometry and running it through a computational fluid dynamics (CFD) simulation, the software spat out a number of about 73%.

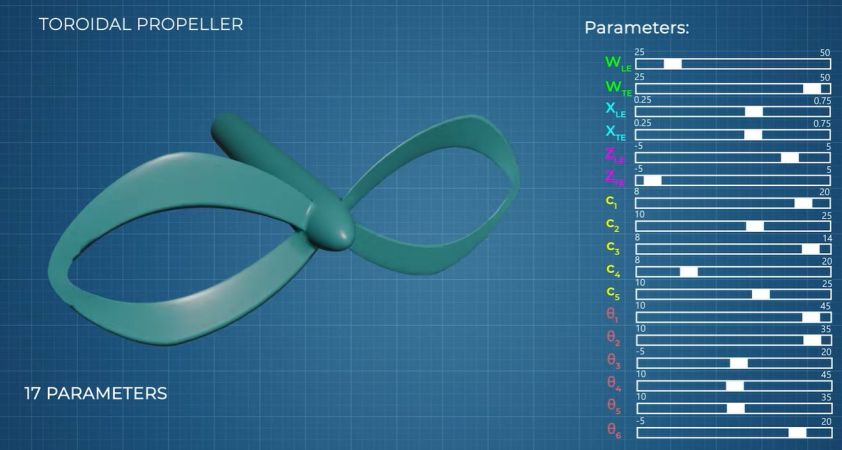
This left figuring out an optimized shape for the toroidal propeller to pit against it. While you can absolutely brute-force the seventeen shape parameters being considered here and test them in CFD, this would take insanely long. The hack here is to use multiple reference frame (MRF) to drastically speed up the selection process, though even then it still took two months. An example of using MRF with regular propellers is discussed  in a 2019 paper by [Randi Franzke] et al. in Energies.

Although MRF saves a lot of simulation time, you still end up with a lot of data that has to be analyzed for interesting patterns. For this [Neuronautics] trained a artificial neural network to automate filtering the many options for the most optimal ones, until converging onto a single design.

This G1401 design was the lucky winner, though with only a simulated 62.9% efficiency. Subsequently the one aspect that had been left unchanged was also iterated through, in the form of many different airfoil shapes until the final design appeared.

This design was then 3D printed in resin, which showed the first hurdle with the selection process, in that the printed versions were too thin and flexible to be usable as propellers. Cue many hours of manual tweaking of the design to make it actually printable.

Although the final design didn’t exceed 62% efficiency in a final test, the comment section to the video rightfully points out that the comparison was between a commercially made propeller and a DIY resin-printed one, which adds a whole other batch of variables. That said, it’s unlikely that there’d have been an obvious improvement either way, otherwise we’d already have seen toroidal propellers pop up everywhere on drones and aircraft.

Continue reading “Pitting A CFD-Optimized Toroidal Propeller Against A Conventional One” →

Two-Dimensional Material Now Easier To Manufacture

We often see scientific breakthroughs in journals or other media that’s reported on as if it’s a revolutionary technology guaranteed to reshape human existence, only to never hear about it again. A more cynical reason for this phenomenon is a certain amount of clickbait or engagement farming, but the real culprit often tends to be the discovery of a process that can’t produce the new material or effect at a scale that makes sense for mass production. One of those are MXenes (“max-enes”), a two-dimensional material first produced over a decade ago, but new research into them has developed a much more efficient way of producing them.

Before this discovery, these materials were produced in a convoluted process involving the MXene precursor materials, combining them with an etchant, washing them off, and then repeatedly spinning them in a centrifuge to separate out unwanted byproducts. As one can imagine, this doesn’t produce material in an industrial quantity. But the new method uses a vapor deposition process which simplifies the precursor steps using less expensive materials, as well as skips the etching step. After that, the researchers have found that the MXenes can grow in a much more controlled way, allowing for greater production amounts and higher quality.

In the intervening years since their discovery and first synthesis MXenes have shown potential for wide-ranging applications, from battery production to antennas to water purification. Another interesting application is as a switchable Faraday cage, as we’ve covered in the past. Hopefully the slow plod of scientific discovery continues and we can start seeing more of these incremental gains improving our lives, even if we don’t get a sudden technological revolution from it.