A person putting a screw into a CNC spoil board on the left of the image. Their drill is chartreuse and black. Clamps hold a rectangular board down at all four corners. The spindle of the CNC is just visible on the right hand side of the image.

Workholding Options For The Beginner CNC Operator

Designing a file to cut on a CNC is only part of the process. You also have to keep it in place while the machine does its work. [Garrett Fromme] walks us through five different work holding techniques.

Since every project is different and stock material can vary from thin veneer to much larger pieces, there’s no one right work holding method for every project, and not all methods are applicable to all materials. A vise is great for small projects that need to be held very securely and won’t be damaged, vacuum tables can make switching pieces quick in a production environment, fasteners will hold a piece securely at the expense of your spoil board, clamps are fairly versatile but fiddly to setup, and tape and CA glue are quick but require more consumables.

[Fromme] does a quick demonstration of setups with these different methods and their limitations, which is a great place to start for the beginner CNC operator. Just like 3D printers, CNCs are a far cry from the replicators in Star Trek that can automagically create what you ask it to, but proper workholding lets you waste less material and operate the machine more safely.

Our own [Elliot Williams] had a look at how CNCs aren’t as automated as you think. If you do need some CNC clamps, you might try these printable parametric clamps, or if you want something more beautiful, give these metal toe clamps a go.

Continue reading “Workholding Options For The Beginner CNC Operator”

Reviving A Free 1990s Millport CNC Vertical Mill

When faced with the offer of free machining equipment, there is no realistic way to say ‘no’. This is how [Anthony Kouttron]’s brother [Thomas] got to pick up a large 1990s-era CNC machine as a new companion for his growing collection of such equipment. The trickiest part of the move to the new location was getting the machine to fit through the barn doors, requiring some impromptu disassembly of the Z-axis assembly, which required the use of an engine crane and some fine adjustments with the reinstallation. With that [Thomas] and [Anthony] got to gawk at their new prize in its new home.

This Millport vertical mill is effectively a Taiwanese clone of the Bridgeport vertical mill design, though using an imported servo control system from Anilam. The most exciting part about a CNC machine like this is usually the electronics, especially for a well-used machine. Fortunately the AT-style PC and expansion cards looked to be in decent condition, and the mill’s CRT-based controller popped up the AMI BIOS screen before booting into the Anilam S1100 CNC software on top of MS-DOS, all running off a 1 MB Flash card.

Which is not to say that there weren’t some issues to be fixed. The Dallas DS12887 real-time clock/NVRAM module on the mainboard was of course dead. After replacing it, the BIOS finally remembered the right boot and input settings, so that the CNC machine’s own controls could be used instead of an external keyboard. This just left figuring out the Anilam controls, or so they thought, as a range of new errors popped up about X-lag and the Distribution Board. This had [Anthony] do a deep-dive into the electronics cabinets to clean metal chips and repair broken parts and floating pins. After this and a replacement Anilam Encoder this Millport vertical mill was finally ready to be put back into service.

Continue reading “Reviving A Free 1990s Millport CNC Vertical Mill”

A LEGO CNC Pixel Art Generator

If you are ever lucky enough to make the trip to Billund in Denmark, home of LEGO, you can have your portrait taken and rendered in the plastic bricks as pixel art. Having seen that on our travels we were especially interested to watch [Creative Mindstorms]’ video doing something very similar using an entirely LEGO-built machine but taking the images from an AI image generator.

The basic operation of the machine is akin to that of a pick-and-place machine, and despite the relatively large size of a small LEGO square it still has to place at a surprisingly high resolution. This it achieves through the use of a LEGO lead screw for the Y axis and a rack and pinon for the X axis, each driven by a single motor.

The Z axis in this machine simply has to pick up and release a piece, something solved with a little ingenuity, while the magazine of “pixels” was adapted with lower friction from another maker’s design. The software is all written in Python, and takes input from end stop switches to position the machine.

We like this build, and we can appreciate the quantity of work that must have gone into it. If you’re a LEGO fan and can manage the trip to Billund, there’s plenty of other LEGO goodness to see there.

Continue reading “A LEGO CNC Pixel Art Generator”

OpenSCAD Cranks Out Parametric CNC Clamps

If you’ve ever used a CNC router or mill, you’ll know how many little things need to go right before you get anything resembling acceptable results. We could (and probably should?) run a whole series of posts on selecting the correct bit for the job at hand and figuring out the appropriate feeds and speeds. But before you even get to that point, there’s something even more critical you need to do: hold the workpiece down so it doesn’t blast off into orbit when the tool touches it.

Now that might sound like an easy enough job, and for basic flat stock, it often is. But if you’ve got an oddly shaped piece of material, you’ll quickly realize how inadequate those trusty c-clamps really are. When you get to that point, it might time to check out these OpenSCAD hold down clamps from [ostat]. Thanks to its parametric nature, you can plug whatever dimensions you need into the script, and in a few seconds it will spit out an STL file for a bespoke clamp that you can print out and put to work.

Continue reading “OpenSCAD Cranks Out Parametric CNC Clamps”

The Cheap CNC3018 Gets A Proper Revamp

Many people have been attracted to the low price and big dreams of the CNC3018 desktop CNC router. If you’re quick, you can pick one up on the usual second-hand sales sites with little wear and tear for a steal. They’re not perfect machines by any stretch of the imagination, but they can be improved upon, and undoubtedly useful so long as you keep your expectations realistic.

[ForOurGood] has set about such an improvement process and documented their journey in a whopping eight-part (so far!) video series. The video linked below is the most recent in the series and is dedicated to creating a brushless spindle motor on a budget.

As you would expect from such a machine, you get exactly what you pay for.  The low cost translates to thinner than ideal metal plates, aluminium where steel would be better, lower-duty linear rails, and wimpy lead screws. The spindle also suffers from cost-cutting, as does the size of the stepper motors. But for the price, all is forgiven. The fact that they can even turn a profit on these machines shows the manufacturing prowess of the Chinese factories.

We covered the CNC 3018 a while back, and the comments of that post are a true gold mine for those wanting to try desktop CNC. Warning, though: It’s a fair bit harder to master than 3D printing!

Continue reading “The Cheap CNC3018 Gets A Proper Revamp”

Mostly Printed CNC Gets A Few Upgrades

The Mostly Printed CNC is famous for two things. First, being made mostly from 3D printed parts and commonly available steel tubing. Second, because of the materials used, its rigidity isn’t fantastic. But any CNC router is better than no CNC router, and [Alan Reiner]’s “Mostly Mostly Printed CNC” upgrades the base MPCNC into a much more capable unit.

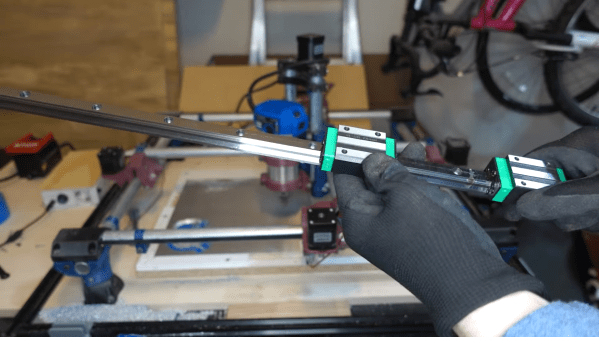
MPCNC purists may want to look away, as the video below shows [Alan] committing the heresy of adding linear rails to his machine. The rails were sourced from VEVOR and at less than $100 for 10 meters, it must have been hard to resist. The rigidity wasn’t amazing — witness the horrific chatter at around the 5:15 mark — but [Alan] sorted that out with some aluminum extrusion and printed adapters.

Those upgrades alone were enough to let [Alan] dive into some aluminum cutting, but he also wanted to address another gripe with his base build: the Z-axis backlash. The fix there was to add another lead screw nut on an adjustable carrier. By tweaking the relative angles of the two opposed nuts, almost all of the backlash was taken up. [Alan] also replaced the motor coupling on the Z axis with a Lovejoy-style coupler, to remove as much axial compliance as possible.

Along with the motion control mods, [Alan] improved work holding and added an enclosure to tame the chip beast, along with some upgrades to the control electronics. The results are pretty good and appear well worth the modest added expense. Maybe a wireless controller can be next on the upgrade list?

Continue reading “Mostly Printed CNC Gets A Few Upgrades”

Plasma Cutter Gets CNC Treatment At Low Cost

[Daniel] has been metalworking on a budget for a while now. Originally doing things like plasma cutting on old bricks, he used his original plasma cutter to make an appropriate plasma cutting table complete with a water bath which we presume was not only safer but better for his back. Since then he’s stepped up a little more with what might be the lowest-cost CNC plasma cutter that can reliably be put together.

The CNC machine uses a handheld plasma cutting torch as its base, which uses a blowback start mechanism making it usable in an automated CNC setup without interfering with the control electronics. This is a common issue with other types of plasma cutters not originally meant for CNC. The torch head only needs slight modifications to fit in a 3D printed housing designed for the CNC machine which involves little more than slightly changing the angle of the incoming copper tubing and wire and changing the location of the trigger.

With those modifications done, the tool head is ready to be mounted to the CNC machine. [Daniel] has put together a bill of materials for building the entire project for less than $400, which includes the sub-$200 plasma cutter. It’s an impressive bit of sleuthing to get the price down this low, but if you’re still using your plasma cutter by hand on bricks in the yard like [Daniel] used to do make sure to check out that DIY plasma cutting table he built a few years ago too.

Continue reading “Plasma Cutter Gets CNC Treatment At Low Cost”