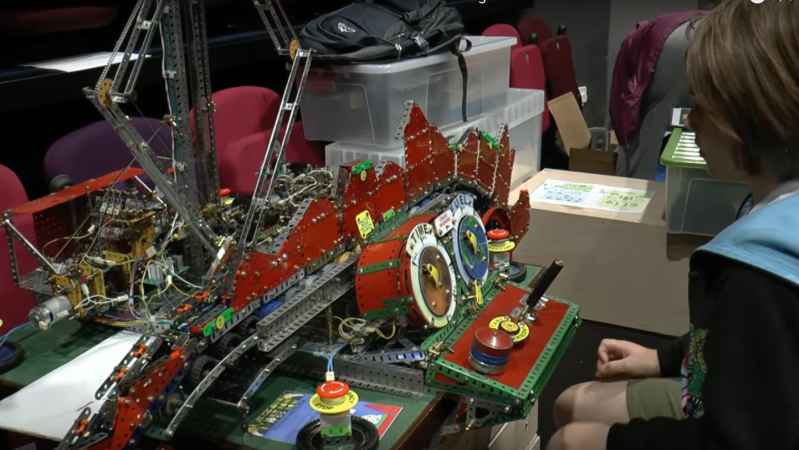
If William Gibson and Bruce Sterling had written an arcade scene into “The Difference Engine”, it probably would have looked a lot like [Pete Wood]’s Meccano Martian Mission, as illustrated in the video below by the [London Meccano Club]. Meccano Martian Mission is an homage to Atari’s 1978 Lunar Lander video game, but entirely electromechanical and made of– you guessed it– Meccano.
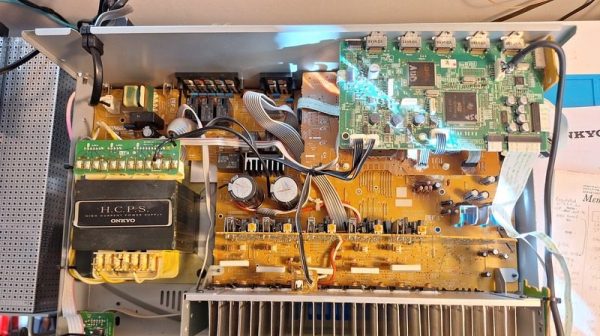
[Bill Dudley] had a problem. He had an Onkyo AV receiver that did a great job… until it didn’t. A DSP inside failed. When that happened, the main microprocessor running the show decided it wouldn’t play ball without the DSP operational. [Bill] knew the bulk of the audio hardware was still good, it was just the brains that were faulty. Thus started a 4-month operation to resurrect the Onkyo receiver with new intelligence instead.
[Bill’s] concept was simple. Yank the dead DSP, and the useless microprocessor as well. In their place, an ESP32 would be tasked with running things. [Bill] no longer cared if the receiver had DSP abilities or even the ability to pass video—he just wanted to use it as the quality audio receiver that it was.
His project report steps through all the hard work he went through to get things operational again. He had to teach the ESP32 to talk to the front panel display, the keys, and the radio tuner. More challenging was the core audio processor—the obscure Renaisys R2A15218FP. However, by persevering, [Bill] was able to get everything up and running, and even added some new functionality—including Internet radio and Bluetooth streaming.
It’s a heck of a build, and [Bill] ended up with an even more functional audio receiver at the end of it all. Bravo, we say. We love to see older audio gear brought back to life, particularly in creative ways. Meanwhile, if you’ve found your own way to save a piece of vintage audio hardware, don’t hesitate to let us know!
With all the attention on LLMs (Large Language Models) and image generators lately, it’s nice to see some of the more niche and unusual applications of machine learning. GARF (Generalizeable 3D reAssembly for Real-world Fractures) is one such project.
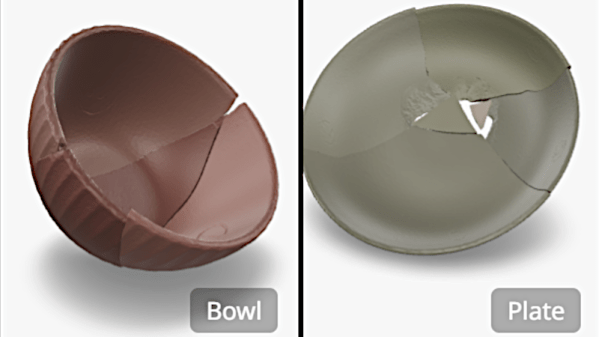
GARF may play fast and loose with acronym formation, but it certainly knows how to be picky when it counts. Its whole job is to look at the pieces of a broken object and accurately figure out how to fit the pieces back together, even if there are some missing bits or the edges aren’t clean.
Re-assembling an object from imperfect fragments is a nontrivial undertaking.
Efficiently and accurately figuring out how to re-assemble different pieces into a whole is not a trivial task. One may think it can in theory be brute-forced, but the complexity of such a job rapidly becomes immense. That’s where machine learning methods come in, as researchers created a system that can do exactly that. It addresses the challenge of generalizing from a synthetic data set (in which computer-generated objects are broken and analyzed for training) and successfully applying it to the kinds of highly complex breakage patterns that are seen in real-world objects like bones, recovered archaeological artifacts, and more.
The system is essentially a highly adept 3D puzzle solver, but an entirely different beast from something like this jigsaw puzzle solving pick-and-place robot. Instead of working on flat pieces with clean, predictable edges it handles 3D scanned fragments with complex break patterns even if the edges are imperfect, or there are missing pieces.
GARF is exactly the kind of software framework that is worth keeping in the back of one’s mind just in case it comes in handy some day. The GitHub repository contains the code (although at this moment the custom dataset is not yet uploaded) but there is also a demo available for the curious.
The advantage of a radio-controlled clock that receives the time signal from WWVB is that you never have to set it again. Whether it’s a little digital job on your desk, or some big analog wall clock that’s hard to access, they’ll all adjust themselves as necessary to keep perfect time. But what if the receiver conks out on you?
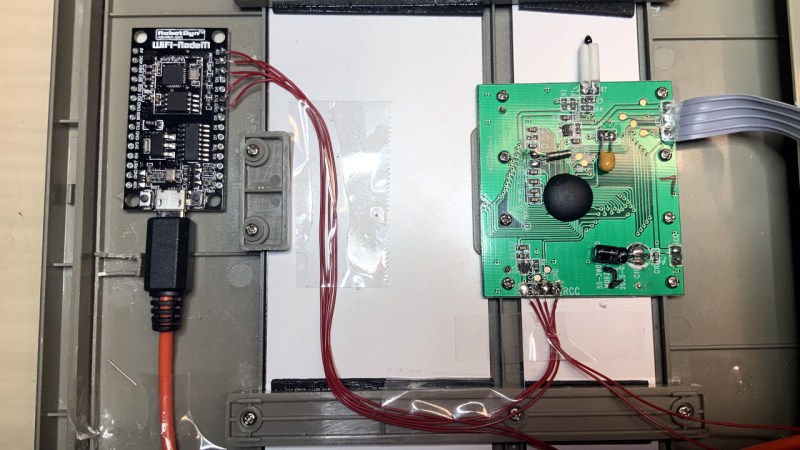
Well, you’d still have a clock. But you’d have to set it manually like some kind of Neanderthal. That wasn’t acceptable to [jim11662418], so after he yanked the misbehaving WWVB receiver from his clock, he decided to replace it with an ESP8266 that could connect to the Internet and get the current time via Network Time Protocol (NTP).
If Clive Sinclair’s genius in consumer electronics was in using ingenious hacks to make cheaper parts do greater things, then his Amstrad competitor Alan Sugar’s was in selling decade-old technology to consumers as new and exciting. His PCW series of computers are a great example, 1970s CP/M machines smartly marketed for late 1980s home offices. They were a popular choice at the time, and [Retro Recipes] has one. In a video filmed in period standard definition he’s taking us through a repair to its Gotek drive, and then a RAM upgrade.
The repair and upgrade are fairly straightforward, the former being a failed OLED screen on the drive and the latter being the installation of a bank of DIP memory chips. The interest lies in how they cost-minimised a CP/M machine as a consumer product. The board relies heavily on custom chips as you might expect, and there’s a brief glimpse of one of those unusual 3″ floppy drives. The power supply is part of the monitor board as was often the case with Amstrad machines, and the whole thing is about as simple as it can be. The full video can be found below the break.
We’re guessing that particularly in the UK there will be plenty of PCWs still languishing in dusty attics, but surprisingly given their popularity at the time we see less of them that might be expected. There has been a significantly upgraded model on these pages though.
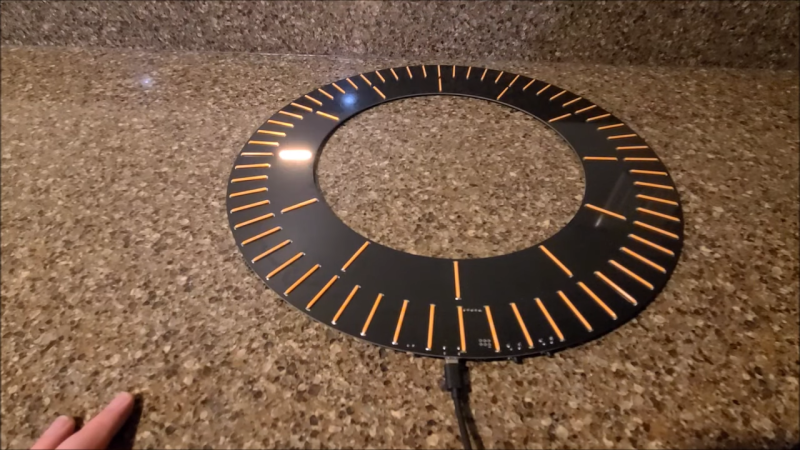
LED filaments are still relatively new on the scene. They’re basically a bunch of tiny LEDs mounted in a single package to create a single “filament” of light that appears continuous. It’s great if you want to create a bar of light without messing around with populating tons of parts and having to figure out diffusion on your own.
[sjm4306] used them to create glowing bar elements in a clock for telling the time. The outer ring contains 60 filaments for the 60 minutes in an hour, while the inner ring contains 12 filaments to denote the hours themselves. To handle so many LEDs, there are 9 shift registers on board. They’re driven by an ATmega328P which runs the show, with a DS3232MZ real-time clock onboard for keeping time. As you might imagine, creating such a large circular clock required a large PCB—roughly a square foot in size. It doesn’t come cheap, though [sjm4306] was lucky enough to have sponsorship to cover the build. [sjm4306] is still working on the firmware, and hopes to build a smaller, more compact version, which should cut costs compared to the large single board.
It all started with a gift idea: a star-field lamp in the form of a concrete sphere with lightpipes poking out where the stars are, lit up from the inside by LEDs. When you’re making one of these, maybe-just-maybe you’d be willing to drill a thousand holes and fit a thousand little plastic rods, but by the time you’re making a second, it’s time to build a machine to do the work for you.
The video goes through all of the design thoughts in detail, but it’s when it comes time to build the machine that the extra-clever bits emerge. For instance, [UA] used a custom 3D-printed peristaltic pump to push the glue out. Taking the disadvantage of peristaltic pumps – that they pulse – as an advantage, a custom housing was designed that dispensed the right amount between the rollers. The rolling glue dispenser mechanism tips up and back to prevent drips.
There are tons of other project-specific hacks here, from the form on the inside of the sphere that simplifies optic bundling and routing to the clever use of a razor blade as a spring. Give it a watch if you find yourself designing your own wacky machines. We think Rube Goldberg would approve. Check out this video for a more software-orientated take on fiber-optic displays.