Old Chart Recorder Becomes Single-Pixel Scanner

With so many ways to capture images from paper, do we really need another one? Especially one that takes 15 minutes to capture a 128×128 pixel image? Probably not, but building a single-pixel RGB scanner is pretty instructive, and good clean fun to boot.

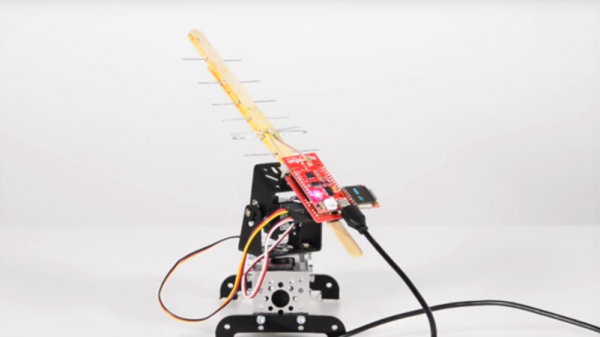
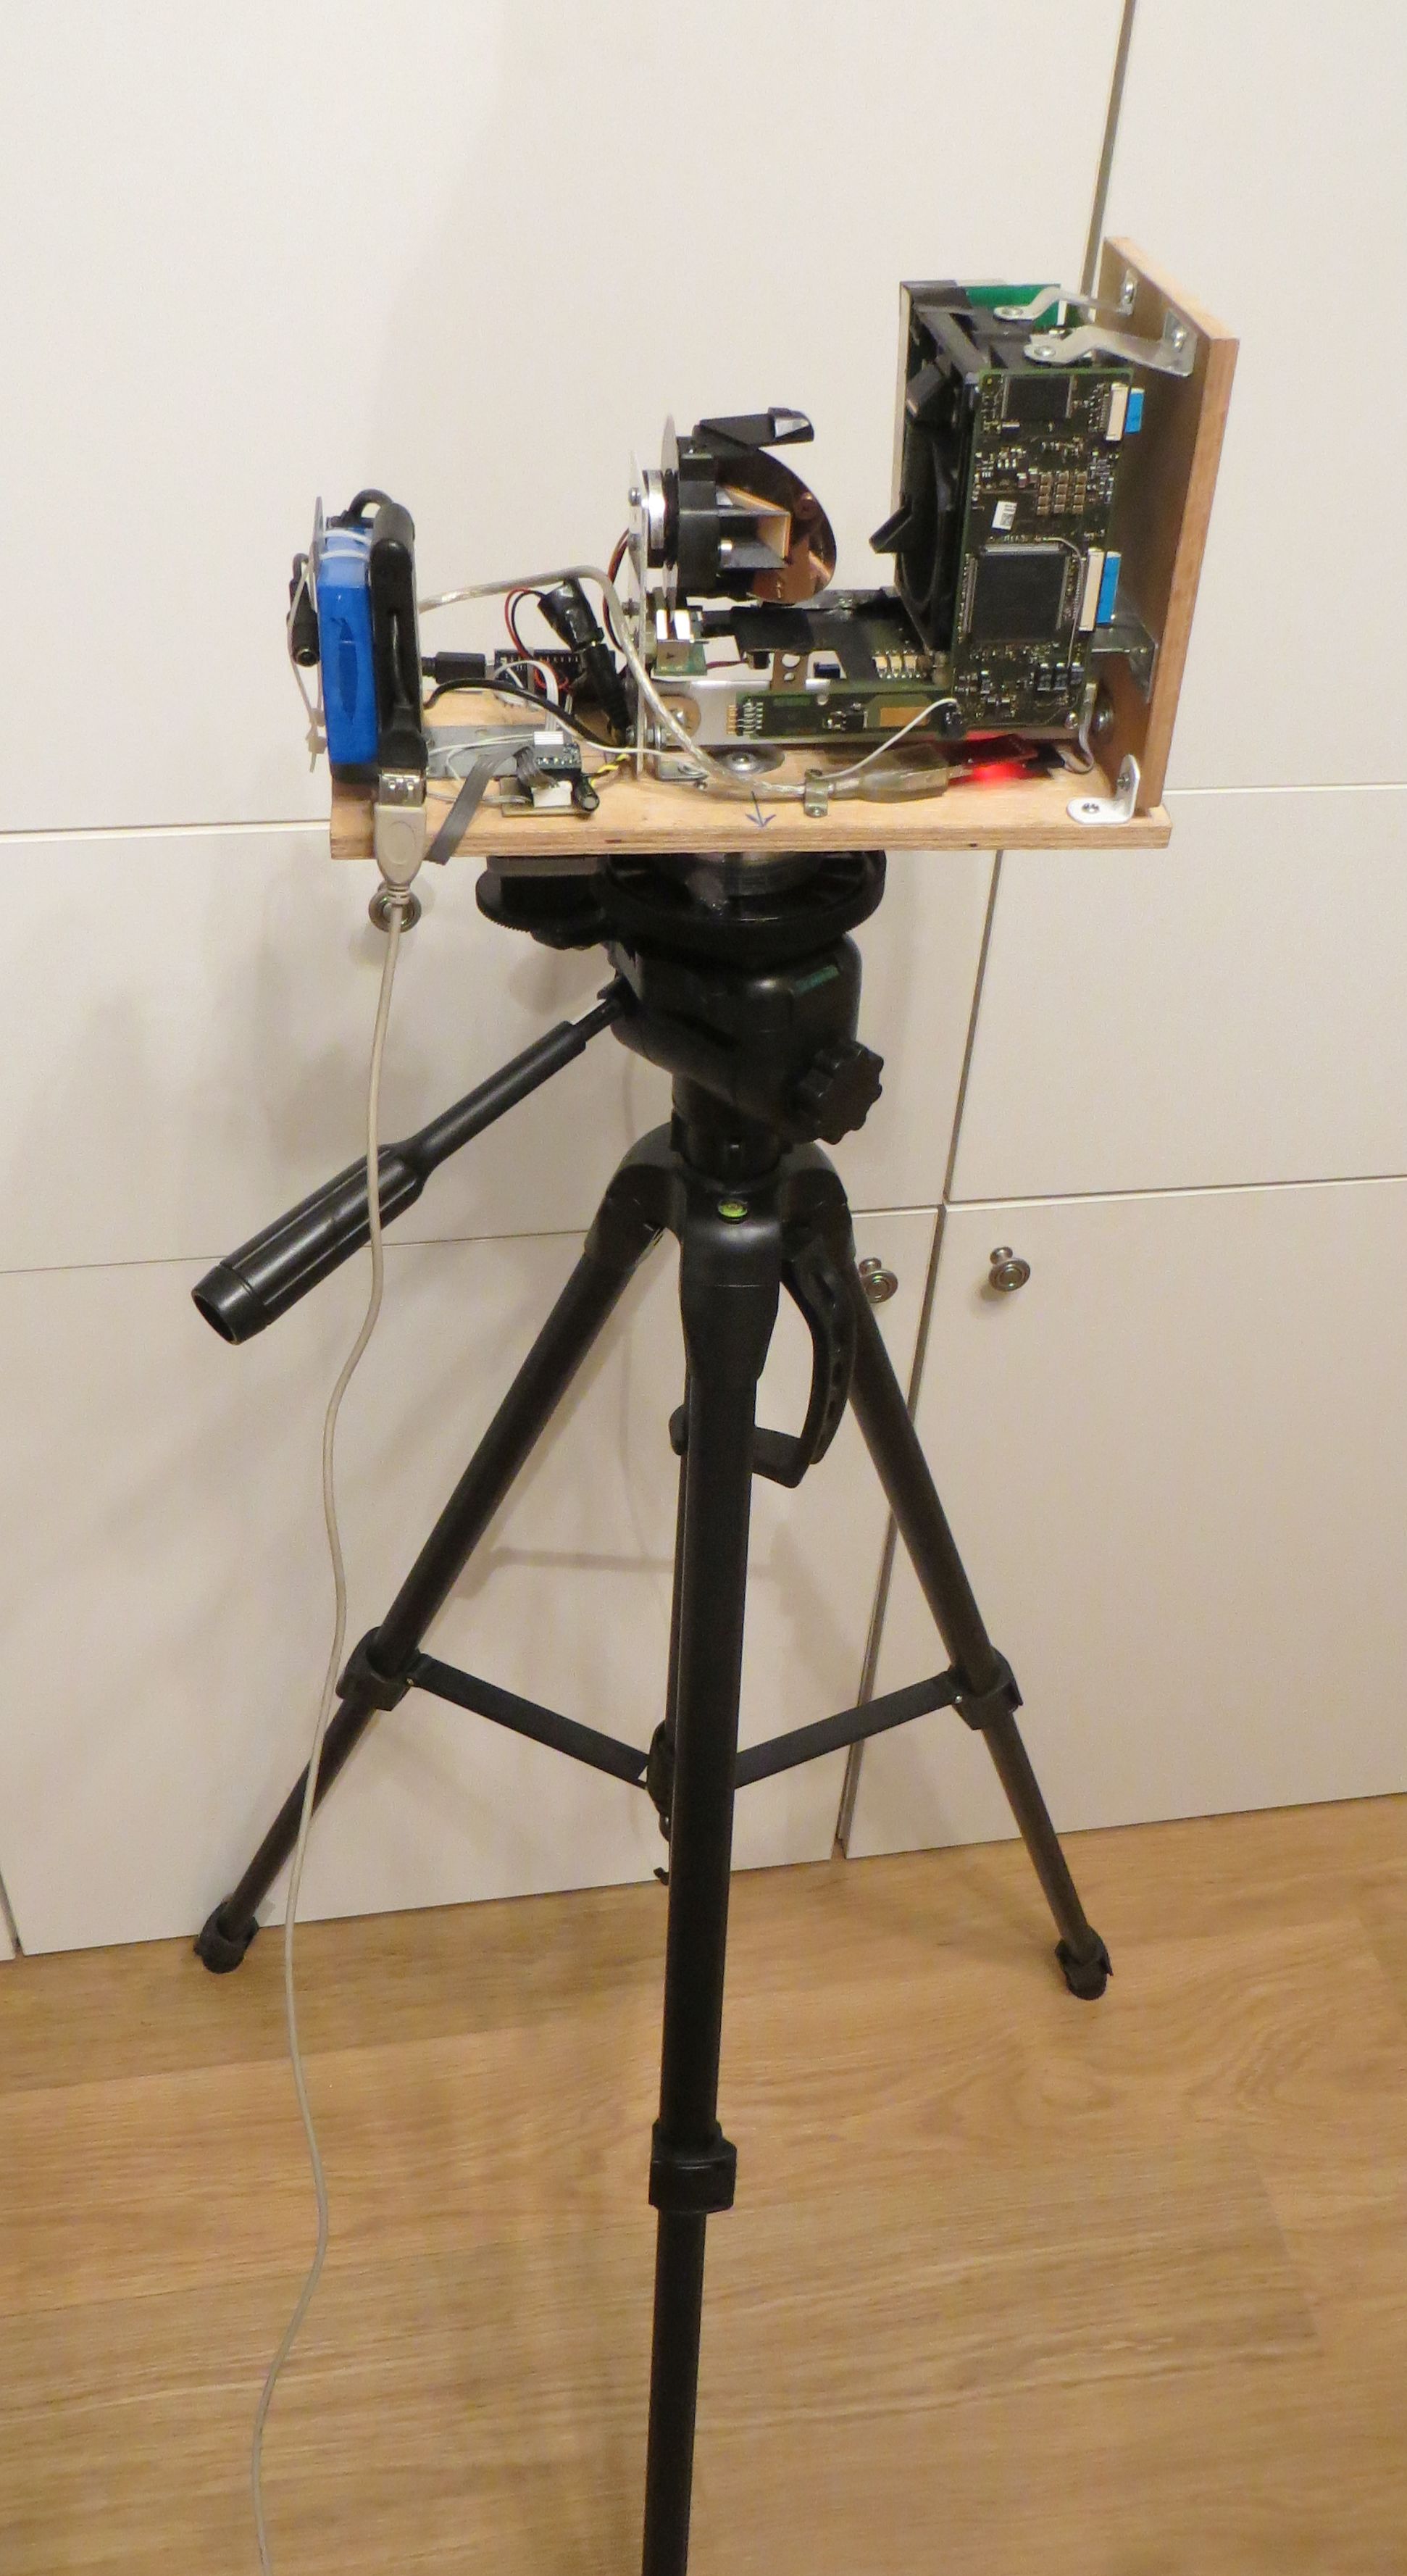
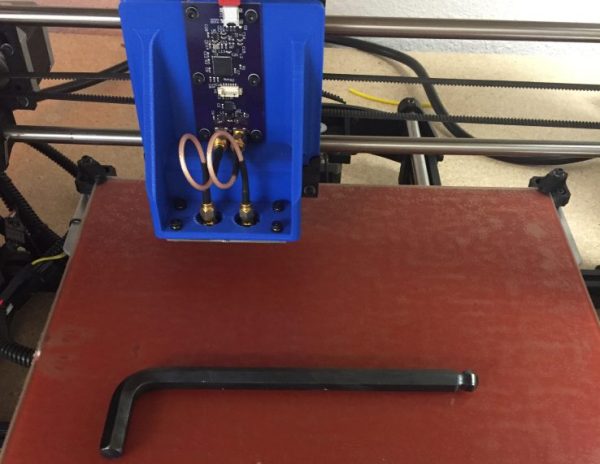
We have to admit that when [Kerry Wong] scored an ancient Hewlett-Packard X-Y chart recorder a while back, we wondered if it would lead to anything useful. One may quibble with the claim that the Lorenz attractor plotter he built with it is useful, and this single pixel scanner is equally suspect, but we like the idea. Using an Arduino to drive the X- and X-axis of the recorder through a raster pattern over the bed and replacing the pen with an RGB sensor board, [Kerry] was able to collect the color data for each pixel and reconstruct the image. It wouldn’t be too hard to replicate this if you don’t have an analog X-Y recorder, which just goes to show that not everything needs to be steppers and digital to get something useful done. Or at least semi-useful.

As for the RGB sensor used, they’ve made appearances here many times before, mostly in M&M sorters but with the occasional synesthesia simulator.

Continue reading “Old Chart Recorder Becomes Single-Pixel Scanner”

Dropping Zip Bombs On Vulnerability Scanners

If you’ve ever looked at the server logs of a computer that lives full-time on the Internet, you know it’s a rough world out there. You’ll see hundreds of attempts per day to break in to your one random little box. Are you going to take that sitting down? Christian Haschek didn’t.

Instead of simply banning IPs or closing off services, [Christian] decided to hit ’em where it hurts: in the RAM. Now, whenever a bot hits his server looking for a poorly configured WordPress install, he serves them 10 GB of zeroes, compressed down into 10 MB by gzip:

dd if=/dev/zero bs=1M count=10240 | gzip > 10G.gzip

The classic trick uses zip multiple times on itself, which lets you compress arbitrarily large files into just a few kB. [Christian] tried this with gzip, and discovered that it didn’t automatically recurse, so he’s taking a small bandwidth hit for the team. If you know how to get more data packed smaller using gzip, leave a note in the comments.

Nobody really knows if this works on the bad guys’ servers, but [Christian] said that they stopped hitting him after downloading a couple payloads. If you want to test out what it does to your system, click this link. If you don’t run a server, but phishing e-mails get you hot under the collar, check out [Robbie Gallagher]’s talk on phishing the phishers from last year’s Schmoocon for cathartic tales of revenge.

Visual Scanner Turns Obstacles Into Braille

This interesting project out of MIT aims to use technology to help visually impaired people navigate through the use of a haptic feedback belt, chest-mounted sensors, and a braille display.

The belt consists of a vibration motors controlled by what appears to be a Raspberry Pi (for the prototype anyway) with a distance sensor and camera connected as well. The core algorithm is designed to take input from the camera and distance sensors to compute the distance to obstacles, and to buzz the right motor to alert the user — fairly expected stuff. However, the project has a higher goal: to assist in identifying and using chairs.

Aiming to detect the seat and arms, the algorithm looks for three horizontal surfaces near each other, taking extra care to ensure the chair isn’t occupied. The study found that, used in conjunction with a cane, the system noticeably helped users navigate through realistic environments, as measured by minor and major collisions. Users recorded dramatically fewer collisions as compared to using the system alone or the cane alone. The project also calls for a belt-mounted braille display to relay more complicated information to the user.

We at HaD have followed along with several braille projects, including a refreshable braille display, a computer with a braille display and keyboard, and this braille printer.

Continue reading “Visual Scanner Turns Obstacles Into Braille”

Simple Scanner Finds The Best WiFi Signal

Want to know which way to point your WiFi antenna to get the best signal? It’s a guessing game for most of us, but a quick build of a scanning WiFi antenna using mostly off-the-shelf components could point you in the right direction.

With saturation WiFi coverage in most places these days, optimizing your signal might seem like a pointless exercise. And indeed it seems [shawnhymel] built this more for fun than for practical reasons. Still, we can see applications where a scanning Yagi-Uda antenna would come in handy. The build started with a “WiFi divining rod” [shawnhymel] created from a simple homebrew Yagi-Uda and an ESP8266 to display the received signal strength indication (RSSI) from a specific access point. Tired of manually moving the popsicle stick and paperclip antenna, he built a two-axis scanner to swing the antenna through a complete hemisphere.

The RSSI for each point is recorded, and when the scan is complete, the antenna swings back to the strongest point. Given the antenna’s less-than-perfect directionality — [shawnhymel] traded narrow beam width for gain — we imagine the “strongest point” is somewhat subjective, but with a better antenna this could be a handy tool for site surveys, automated radio direction finding, or just mapping the RF environment of your neighborhood.

Yagi-Uda antennas and WiFi are no strangers to each other, whether it be a WiFi sniper rifle or another recycling bin Yagi.  Of course this scanner isn’t limited to WiFi. Maybe scanning a lightweight Yagi for the 2-meter band would be a great way to lock onto the local Ham repeater.

Continue reading “Simple Scanner Finds The Best WiFi Signal”

Amazing 3D-Scanner Teardown And Rebuild

0_10ea1b_776cdc71_origPour yourself a nice hot cup of tea, because [iliasam]’s latest work on a laser rangefinder (in Russian, translated here) is a long and interesting read. The shorter version is that he got his hands on a broken laser security scanner, nearly completely reverse-engineered it, got it working again, put it on a Roomba that was able to map out his apartment, and then re-designed it to become a tripod-mounted, full-room 3D scanner. Wow.

The scanner in question has a spinning mirror and a laser time-of-flight ranger, and is designed to shut down machinery when people enter a “no-go” region. As built, it returns ranges along a horizontal plane — it’s a 2D scanner. The conversion to a 3D scanner meant adding another axis, and to do this with sufficient precision required flipping the rig on its side, salvaging the fantastic bearings from a VHS machine, and driving it all with the surprisingly common A4988 stepper driver and an Arduino. A program on a PC reads in the data, and the stepper moves another 0.36 degrees. The results speak for themselves.

This isn’t [iliasam]’s first laser-rangefinder project, naturally. We’ve previously featured his homemade parallax-based ranger for use on a mobile robot, which is equally impressive. What amazes us most about these builds is the near-professional quality of the results pulled off on a shoestring budget.

Continue reading “Amazing 3D-Scanner Teardown And Rebuild”

Custom Sensor Head Turns 3D Printer Into Capacitive Scanner

The best thing about owning a 3D printer or CNC router may not just be what you can additively or subtractively create with it. With a little imagination you can turn your machine into a 3D scanner, and using capacitive sensors to image items turns out to be an interesting project.

[Nelson]’s scanner idea came from fiddling with some capacitive sensors at work, and with a high-resolution capacitance-to-digital sensor chip in hand, he set about building a scan head for his printer. In differential mode, the FDC2212 sensor chip uses an external LC tank circuit with two plain sensor plates set close to each other. The sensor plates form an air-dielectric variable capacitor, and the presence of an object can be detected with high sensitivity. [Nelson]’s custom sensor board and controller ride on a 3D-printed bracket and scan over the target on the printer bed. Initial results were fuzzy, but after compensating for room temperature variations and doing a little filtering on the raw data, the scans were… still pretty fuzzy. But there’s an image there, and it’s something to work with.

Need a slightly more approachable project to get your feet wet with capacitive sensors? Maybe you should use your phone’s touchscreen as a 2D-capacitive scanner.

[via r/electronics]

Hackaday Prize Entry: An Open Source Retina Scanner

An ophthalmoscope is a device used to examine the back of the eye. This is useful for diagnosing everything from glaucoma, diabetic retinopathy, to detecting brain tumors. As you would expect from anything related to medicine, these devices cost a lot, making them inaccessible for most of the world’s population. This project for the Hackaday Prize is for an ophthalmoscope that can be built for under $400.

An ophthalmoscope is a relatively simple device, that really only requires a clinician to wear a head-mounted lamp and hold a condensing lens in front of the patient’s eye. Light is reflected off the retina and into the clinician’s view. Of course, the simplest ophthalmoscope requires a bit of training to get right, and there’s’ no chance of being able to take a picture of a patient’s retina to share with other clinicians.

The Open Indirect Ophthalmoscope gets around these problems by using a digital camera in the form of a Raspberry Pi camera module. This camera, with the help of a 3 W LED, is able to image the back of the eye, snap a picture, and send that image anywhere in the world. It’s a simple device that can be constructed from a few mirrors, a cheap lens, and a few 3D-printed parts, but is still very valuable for the detection of ophthalmological disorders.