A Merciless Environmental Monitoring System

We’ve seen plenty of environmental monitoring setups here on Hackaday — wireless sensors dotted around the house, all uploading their temperature and humidity data to a central server hidden away in some closet. The system put together by [Andy] from Workshopshed is much the same, except this time the server has been designed to be as bright and bold as possible.

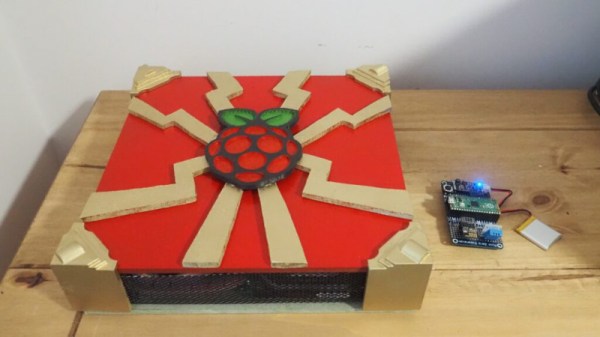
The use of Mosquitto, InfluxDB, Node Red, and Grafana (M.I.N.G) made [Andy] think of Ming the Merciless from Flash Gordon, which in turn inspired the enclosure that holds the Raspberry Pi, hard drive, and power supply. Some 3D printed details help sell the look, and painted metal mesh panels make sure there’s plenty of airflow.
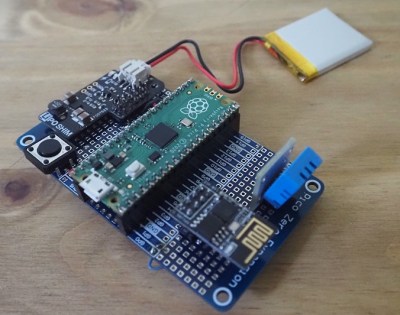
While the server is certainly eye-catching, the sensors themselves are also worth a close look. You might expect the sensors to be based on some member of the ESP family, but in this case, [Andy] has opted to go with the Raspberry Pi Pico. As this project pre-dates the release of the wireless variant of the board, he had to add on an ESP-01 for communications as well as the DTH11 temperature and humidity sensor.

For power each sensor includes a 1200 mAh pouch cell and a Pimoroni LiPo SHIM, though he does note working with the Pico’s energy saving modes posed something of a challenge. A perfboard holds all the components together, and the whole thing fits into an understated 3D printed enclosure.

Should you go the ESP8266/ESP32 route for your wireless sensors, we’ve seen some pretty tidy packages that are worth checking out. Or if you’d rather use something off-the-shelf, we’re big fans of the custom firmware developed for Xiaomi Bluetooth thermometers.

Continue reading “A Merciless Environmental Monitoring System”

What Goes Into A Hacker Camp

Long-time readers of Hackaday will know that we attend quite a few events, including summer hacker camps. Here in Europe this year there are two large events, the British Electromagnetic Field, and the Dutch MCH, or May Contain Hackers. These events are put together by volunteers from within the community, and as part of the MCH setup I noticed they needed drivers for their off-site logistics. I have a licence to drive medium-sized trucks in Europe so it seemed like a perfect fit. I traveled early on the first set-up day to the Dutch city of Utrecht, and found myself behind the wheel of a large Volkswagen box van. My brief career as a trucker had begun!

An Empty Field Of Dreams

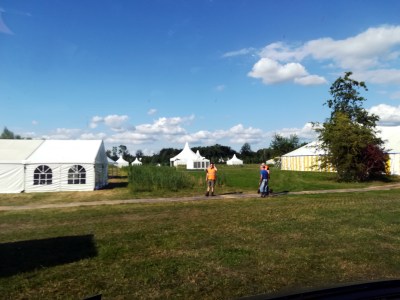
A field with a few tents and a blue sky
The tents stand in isolation at the end of day one.

The Netherlands is a relatively small country and the MCH site at Zeewolde is roughly in its centre, so while the traffic could be heavy the distances weren’t large by American or even British standards. There were however a wide variety of loads waiting for me and my fellow driver, and a few obstacles such as the hottest days of the year and angry Dutch farmers blockading the roads. If you’re interested in the logistics behind a large hacker camp then our journeys provided an insight that maybe wandering around the field doesn’t quite deliver.

Arriving on site on the first day gives a perspective on how much of the infrastructure comes from specialist contractors and thus isn’t delivered by the hackers. Articulated trucks from the marquee company were disgorging the main tents, with their crews expertly assembling them in record time. The toilets and showers were arriving as self-contained hook lift container units, and yet more contractors were delivering fencing or tables and chairs. I can add the power infrastructure to this list, but due I’m told to delays at another event this wasn’t on site on the first day. Continue reading “What Goes Into A Hacker Camp”

Here’s The World’s Smallest Wood Plane…Probably

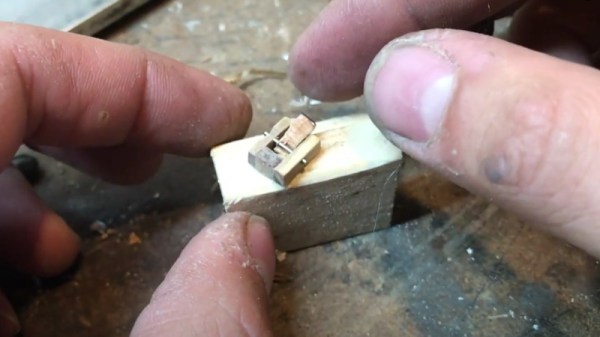
Admittedly, we aren’t really in a position to confirm whether or not the miniature wood plane put together by [Daniel d’Entremont] is actually the smallest in the world, but we’re willing to take his word for it. At the very least, we certainly haven’t seen a smaller one.

In the video below, [Daniel] crafts the diminutive tool from a small block of wood by first slicing off a square using a band saw and then switching over to a small hand saw to cut out the individual pieces. These are glued together to make the body of the plane, and the shank of a small drill bit is used to hold down the wedge and blade. All told it’s about 1/2 of an inch long, and is fully functional…or at least, as functional as a 1/2 inch wood plane can be.

Interested in more miniature tools? Believe it or not, we’ve got you covered.

Continue reading “Here’s The World’s Smallest Wood Plane…Probably”

Linux Fu: The Chrome OS Flex Virtualization

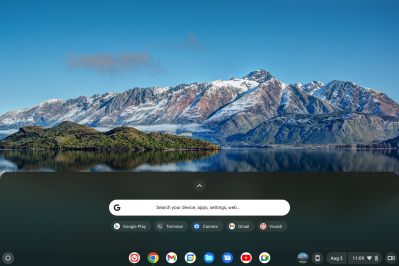
The Flex Desktop is user-friendly and responsive

You’ve probably heard about Google Chromebooks. Like Android, Chrome OS is based on some variant of Linux, but it is targeted at the “cloud first” strategy so Chromebooks typically don’t have a huge amount of storage or compute power. If you have a real Chromebook, you can also use it to run certain other kinds of programs via virtualization. However, Google has recently pushed out Chrome OS Flex which is meant to install on a spare laptop you might happen to have hanging around. Seems attractive to take that only Windows 7 laptop and repurpose it to run Chrome OS, especially if you can run Linux apps on it. Unfortunately, Chrome OS Flex has a very different use case and I would only recommend installing it if you meet the exact use case it addresses.

The other option, of course, is to just install Linux on that old hardware. There are several distributions that are made for that purpose and, honestly, even most of the major distributions will work fine on older hardware with a little tweaking to turn off some of the more resource-costly features. That assumes you know how to install, tweak, and maintain Linux.

Continue reading “Linux Fu: The Chrome OS Flex Virtualization”

Should’ve Used A 555 — Or 276 Of Them

When asked to whip up a simple egg timer, most of us could probably come up with a quick design based on the ubiquitous 555 timer. Add a couple of passives around the little eight-pin DIP, put an LED on it to show when time runs out, and maybe even add a pot for variable timing intervals if we’re feeling fancy. Heck, many of us could do it from memory.

So why exactly did [Jesse Farrell] manage to do essentially the same thing using a whopping 276 555s? Easy — because why not? Originally started as an entry in the latest iteration of our 555 Contest, [Jesse]’s goal was simple — build a functional timer with a digital display using nothing but 555s and the necessary passives. He ended up needing a few transistors and diodes to pull it off, but that’s a minor concession when you consider how many chips he replaced with 555s, including counters, decoders, multiplexers, and display drivers. All these chips were built up from basic logic gates, a latch, and a flip-flop, all made from one or more 555s, or variants like the 556 or 558.

As one can imagine, 276 chips take a lot of real estate, and it took eleven PCBs to complete the timer. A main board acts as the timer’s control panel as well as serving as a motherboard for ten other cards, each devoted to a different block of functions. It’s all neat and tidy, and very well-executed, which is in keeping with the excellent documentation [Jesse] produced. The whole thing is wonderfully, needlessly complex, and we couldn’t be more tickled to feature it.

Continue reading “Should’ve Used A 555 — Or 276 Of Them”

A Steam Box For Not A Lot

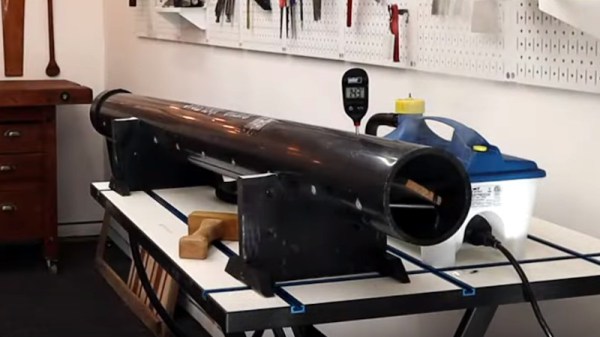
If you have ever marveled at the complex wooden curves used by shipbuilders or some furniture makers, then you have probably at some point hankered after a steam box. This is as its name suggests, a chamber in which a piece of wood is steamed until it becomes flexible, at which point it can be pressed into a new shape that it will retain once cooled. The ever-resourceful [Xyla Foxlin] shows us how to make a steam box using easy-to-find parts, as can be seen in the video below the break.

The steam supply comes from a commercial steam boiler of the type used by decorators for wallpaper stripping, and the steam box itself is made from a length of PVC pipe. Inside the pipe are a series of aluminium dowels that form a rack upon which the wood sits away from any condensation, and the whole things sits at a slant with the steam inlet and a condensation drain at the bottom end.

In use, a piece of wood is loaded into the tube and steamed, before being bent using a set of forms in a vice.  The process looks straightforward enough that even we could give it a go, so we’re sure Hackaday readers will find it interesting.

We think this may be the first steam box we’ve brought you, but it’s not the first time we’ve discussed bending wood.

Continue reading “A Steam Box For Not A Lot”

Art of 3D printer in the middle of printing a Hackaday Jolly Wrencher logo

Forget The UV Resist Mask: Expose Custom PCBs Directly On Your SLA Printer

For the enterprising hobbyist and prototyping hardware developer, creating custom PCBs remains somewhat of a struggle. Although there are a number of approaches to go about this, they usually involve printing or drawing a mask that is used to expose the photoresist layer on the to-be-etched PCB. Here [Andrew Dickinson]’s Photonic Etcher project provides an intriguing shortcut, by using the UV source of an MSLA 3D printer directly after converting the project’s Gerber files into a format the MSLA printer can work with.

The concept is as simple as can be: since MSLA printers essentially function by creating a dynamically updated UV mask (either via an LCD panel or DLP system), this means that an MSLA printer can be used to expose the PCB’s UV-sensitive photoresistive coating, effectively making the mask there insoluble during the etching step. This can be done with negative as well as positive photoresistive coatings, depending on the use case.

The obvious advantage of this approach is that you don’t need an additional UV source or any kind of separate mask, only an MSLA printer with a large enough work area to fit the PCB you wish to expose. One limitation of [Andrew]’s project at this point is that it can only convert Gerbers to PWMS (Photon Mono) files, but this can presumably be fairly easily extended to support more MSLA printers.