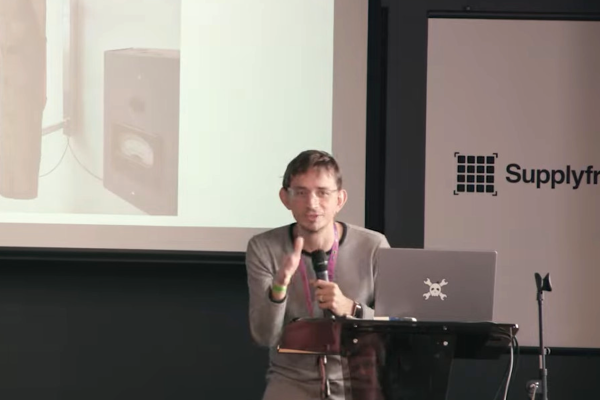
Minimal Tic Tac Toe Business Card

The PCB business card has long been a way for the aspiring electronics engineer to set themself apart from their peers. Handing out a card that is also a two player game is a great way to secure a couple minutes of a recruiter’s time, so [Ryan Chan] designed a business card that, in addition to his contact information, also has a complete Tic-Tac-Toe game built in.

[Ryan] decided that an OLED display was too expensive for something to hand out and an LED matrix too thick, so he decided to keep it simple and use an array of 18 LEDs—9 in each of two colors laid out in a familiar 3×3 grid. An ATmega328p running the Arduino bootloader serves as the brains of the operation. To achieve a truly minimal design [Ryan] uses a single SMD pushbutton for control: a short press moves your selection, a longer press finalizes your move, and a several-second press switches the game to a single-player mode, complete with AI.

If you’d like to design a Tic-Tac-Toe business card for yourself, [Ryan] was kind enough to upload the schematics and code for his card. If you’re still pondering what kind of PCB business card best represents you, it’s worth checking out cards with an updatable ePaper display or a tiny Tetris game.

Continue reading “Minimal Tic Tac Toe Business Card”

TRS-80 Gains Multiple Monitor Support, And High-Resolution Graphics

To call [Glen Kleinschmidt] a vintage computing enthusiast would be an understatement. Who else would add the ability to control and address multiple VGA monitors to a rack-mounted TRS-80 Model 1? Multiple 64-color 640×480 monitors might not be considered particularly amazing by today’s standards, but for 70s-era computing, it’s a different story.

Drawing this sin(x)/x ripple surface can be done in only 17 lines of BASIC.

How does a TRS-80 even manage to output anything useful to these monitors? [Glen] wrote his own low-level driver in machine code to handle that. The driver even has useful routines that are callable from within BASIC, meaning that programs written on the TRS-80 are granted powerful drawing abilities. Oh, and did we mention that the VGA graphics cards themselves were designed and made by [Glen]?

Interested in making your own? [Glen] provides all the resources you’ll need to re-create his work, including machine code drivers and demonstration BASIC programs as downloadable audio files, just as they would have been on original cassette tapes.

Watch things in action in the videos embedded below. The first draws a Land Rover, and the second plots a simple Moiré pattern star. Not bad for 70s-era hardware and 74xx logic!

Continue reading “TRS-80 Gains Multiple Monitor Support, And High-Resolution Graphics”

Honor Your Hacker Heroes

We recently ran an article on a sweet percussion device made by minimal-hardware-synth-madman [Gijs Gieskes]. Basically, it amplifies up an analog meter movement and plays it by slamming it into the end stops. Rhythmically, and in stereo. It’s got that lovely thud, plus the ringing of the springs. It takes what is normally a sign that something’s horribly wrong and makes a soundtrack out of it. I love it.

[Gijs] has been making electro-mechanical musical hacks for about as long as I’ve been reading Hackaday, if not longer. We’ve written up no fewer than 22 of his projects, and the first one on record is from 2005: an LSDJ-based hardware sequencer. All of his projects are simple, but each one has a tremendously clever idea at its core that comes from a deep appreciation of everything going on around us. Have you noticed that VU meters make a particular twang when they hit the walls? Sure you have. Have you built a percussion instrument out of it? [Gijs] has!

Maybe it’s a small realization, and it’s not going to change the world by itself, but I’ve rebuilt more than a couple projects from [Gijs]’ repertoire, and each one has made my life more fun. And if you’re a regular Hackaday reader, you’ve probably seen hundreds or thousands of similar little awesome ideas played out, and maybe even taken some of them on as your own as well. When they accumulate up, I believe they can change the world, at least in the sense of filling up a geek’s life. I hope that feeling comes across when we write up a project. Those of you out there hacking, we salute you!

This Scratch-Built X-Ray Tube Really Shines

On no planet is making your own X-ray tube a good idea. But that doesn’t mean we’re not going to talk about it, because it’s pretty darn cool.

And when we say making an X-ray tube, we mean it — [atominik] worked from raw materials, like glass test tubes, tungsten welding electrodes, and bits of scrap metal, to make this dangerously delightful tube. His tool setup was minimalistic as well– where we might expect to see a glassblower’s lathe like the ones used by [Dalibor Farny] to make his custom Nixie tubes, [atominik] only had a small oxy-propane hand torch to work with. The only other specialized tools, besides the obvious vacuum pump, was a homebrew spot welder, which was used to bond metal components to the tungsten wires used for the glass-to-metal seals.

Although [atominik] made several versions, the best tube is a hot cathode design, with a thoriated tungsten cathode inside a copper focusing cup. Across from that is the anode, a copper slug target with an angled face to direct the X-rays perpendicular to the long axis of the tube. He also included a titanium electrode to create a getter to scavenge oxygen and nitrogen and improve the vacuum inside the tube. All in all, it looks pretty similar to a commercial dental X-ray tube.

The demonstration in the video below is both convincing and terrifying. He doesn’t mention the voltage he’s using across the anode, but from the cracking sound we’d guess somewhere around 25- to 30 kilovolts. The tube really gets his Geiger counter clicking.

Here’s hoping [atominik] is taking the proper precautions during these experiments, and that you do too if you decide to replicate this. You’ll also probably want to check out our look at the engineering inside commercial medical X-ray tubes.

Continue reading “This Scratch-Built X-Ray Tube Really Shines”

Chandelier Mimics The Solar Analemma

The solar analemma is the shape the sun traces out when photographed each day at the same time and same location for a whole year – but you probably knew that already. [makendo] decided to use this skewed figure-eight shape as the inspiration for a chandelier, and the results are stunning.

A laser cutter was used to cut out segments of the analemma shape in plywood, such that they could slot together into the full form. These were then glued together on to a plywood sheet as a template to cut out the full-size form in a single piece. Some laminate edging was then added and the entire thing was given a coat of black gloss paint. String lights were cut up to provide the many globe fittings required, and installed on the back of the chandelier.

[makendo] notes that with a full 51 bulbs in the chandelier, it’s way too bright for most dining room settings. A dimmer is thus used to tone down the output to reduce eyestrain at mealtimes. It’s a fun build, and we’ve always loved light fixtures that are inspired by astronomy. If you like the moon more than the sun, though, there’s a build for you too!

A Spreadsheet For The Python Hacker

You can write a Python program or use a Jupyter Notebook to do almost anything. But you can also get a lot of things done quickly using a spreadsheet. Grist is a “hacker’s” spreadsheet that merges these worlds. It looks like a spreadsheet, but underneath are SQLite tables and the formula language is Python.

The code is open source and if you want it hosted, there are free and paid plans. You can even try it out without even logging in and either start with a blank screen or use a template. You can see an introductory video below.

Continue reading “A Spreadsheet For The Python Hacker”

Simple Stopwatch with two buttons, an eight digit 7-segment display and ICSP programming cable going into the board

Add An OSHW Certified Stopwatch To Your Toolkit

[MakingDevices] has created a simple stopwatch that makes for a nice introduction to surface mount electronic design and assembly. The project is open source hardware (OSHW) certified, with Gerbers, KiCAD files, and software all available.

Conceptually the stopwatch is straight forward, with a row of two four digit seven-segment displays being driven by a PIC18LF14k50 microcontroller through multiple NPN transistors. The PIC doesn’t quite have enough data lines to drive the two displays at once so an inverter is used to toggle between the two seven-segment blocks.

The circuit is continuously powered from a CR2032 coin cell battery. For normal usage with display, [MakingDevices] estimates 30+ hours of operation and 140+ hours without display, but still counting time. When idle, the “Extreme Low-Power (XLP)” capabilities of the PIC put the operating window estimates well beyond the self discharge of the coin cell battery. There’s an in circuit serial programming (ICSP) footprint that accepts a pogo pin TC2030-MCP-NL adapter for flashing the PIC.

Don’t let the simplicity fool you, this is a well documented project with detailed posts about the design, simulation and battery consumption. Various videos and glamour shots give a whole picture of the process, from design, assembly, testing to final validation.

It’d be wonderful to see the project extended or hacked on further, perhaps with a cute enclosure or case.

Continue reading “Add An OSHW Certified Stopwatch To Your Toolkit”