Frustrated by his Aldi multimeter’s backlight turning off after just 15 seconds, [Steg Steg] took matters into his own hands. His solution? He added a manual toggle switch to control the backlight, allowing it to stay on as long as needed. He began by disassembling the multimeter—removing the outer bumper and a few screws—to access the backlight, labeled “BL.” He identified the voltage regulator outputting 2.8V, desoldered the red wire, and extended it to install the switch.
On his first try, he successfully drilled a spot for the SPST switch. To fit the switch into the multimeter’s rubber bumper, he used a circular punch, although his second hole wasn’t as clean as the first. Despite this minor setback, the modification worked perfectly, giving him complete control over his multimeter’s backlight without the original 15-second timeout.
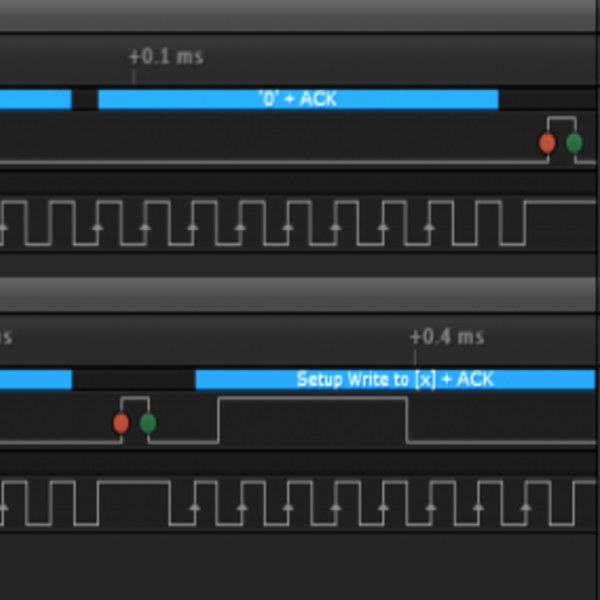
Using a disk drive today is trivial. But back “in the day,” it was fairly complex both because the drives were simple and the CPUs were not powerful by today’s standards. [Thomas] has been working on a 68000 Mac emulator and found that low-level floppy information was scattered in different places. So he’s gathered it all for us in one place.
Low-level disk access has a lot of subtle details. For example, the Mac calibrates its speed control on boot. If your emulated drive just sets the correct speed and doesn’t respond to changes during calibration, the system will detect that as an error. Other details about spinning disks include the fact that inner tracks are shorter than outer track and may require denser recordings. Laying out sectors can also be tricky since you will lose performance if you, for example, read sector one and then miss sector two and have to wait for it to come back around. Disk sectors are often staggered for this reason.
Adding to the complexity is the controller — the IWM or Integrated Woz Machine — which has an odd scheme for memory mapping I/O. You should only access the odd bytes of the memory-mapped I/O. The details are all in the post.
In a way, we don’t miss these days, but in other ways, we do. It wasn’t that long ago that floppies were king. Now it is a race to preserve the data on them while you still can.
There’s a joke in the world of radio that all you need for a HF antenna is a piece of wet string, but the truth is that rudimentary antennas rarely perform well. Random pieces of wire may pull in some signal, but along with it comes a ton of unwanted interference and noise. It’s thus worth putting in the effort to make a better antenna, and if you’re not fortunate enough to have a lot of space, your best choice may be a magnetic loop. [Robert Hart] takes us through the design of a receive-only coaxial loop. It’s referred to as a Moebius loop because the conductor takes a “twist” path between the inner and outer halfway around.
The idea of a loop antenna is simple enough. It’s an inductor intended to respond to the magnetic portion of the wave rather than the electric part. They’re normally made of a single turn of wire in a loop of diameter well below half a wavelength, and, in their transmitting versions, they are often tuned to resonance by an air-spaced variable capacitor. Coaxial loops like this one provide enhanced resistance to electrical noise. He’s using some rather expensive Andrews coax for its rigidity, but the less well-heeled can use cheaper stuff without penalty. The result, when put on a frame of PVC pipe and a speaker stand, is an excellent portable receiving antenna, and if we’re being honest, something we might also consider in our own shack.
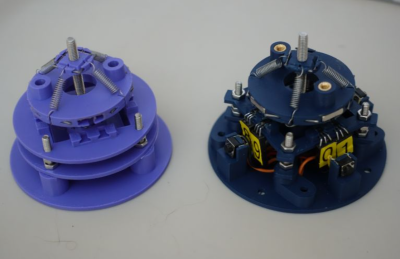
[Marius Taciuc’s] latest endeavor, the B4 Thinker, offers a captivating glimpse into microcontroller architecture through a modular approach. This proof-of-concept project is meticulously documented, with a detailed, step-by-step guide to each component and its function.
Launched in 2014, the B4 Thinker project began with the ambitious goal of building a microcontroller from scratch. The resulting design features a modular CPU architecture, including a base motherboard that can be expanded with various functional modules, such as an 8-LED port card. This setup enables practical experimentation, such as writing simple assembly programs to control dynamic light patterns. Each instruction within this system requires four clock pulses to execute, and the modular design allows for ongoing development and troubleshooting.
The Sun has been remarkably active lately, so much so that it might have set a new sunspot record. According to the sun watchers at the Space Weather Prediction Center, on August 8, the Solar Dynamics Observatory snapped a picture that was positively bedazzled with sunspots. Counting methods vary, but one count put the sunspot number at a whopping 337 that day. That would be the largest number since 2001, during the peak of Solar Cycle 23. The sunspot number is highly correlated with solar storms and coronal mass ejections; more spots mean more magnetic activity and more chance for something to go very, very wrong. We’ve been pretty lucky so far with Solar Cycle 25; despite being much more active than the relatively lazy Cycle 24 and much stronger than predicted, most of this cycle’s outbursts have been directed away from Earth or only dealt us a glancing blow. Seeing all those spots, though, makes us think it’s only a matter of time before we get hit with something that does more than make pretty lights.
The printed breadboard cover as seen from the bottom. (Credit: CHEP, YouTube)
Does it make sense to make your own breadboards rather than purchasing off the shelf ones? As [Chuck Hellebuyck] notes in a recent video on DIY, 3D-printed breadboards, there’s a certain charm to making a breadboard exactly the size you need, which is hard to argue with. The inspiration came after seeing the metal breadboard spring clips on sale by [Kevin Santo Cappuccio], who also has a 3D printable breadboard shell project that they fit into. This means that you can take the CAD model (STEP file) and modify it to fit your specifications before printing it, which is what [Chuck] attempts in the video.
The models were exported from TinkerCAD to Bambu Lab Studio for printing on a Bambu Lab A1 Mini FDM printer. After a failed first print (which the A1 Mini, to its credit, did detect), a model was printed on a Creality K1 Max instead. Ultimately [Chuck] traced this back to the Bambu Lab Studio slicer failing to add the inner grid to the first layer, which the Creality slicer did add, caused by the ‘wall generator’ setting in the Bambu Lab slicer being set to ‘Classic’ rather than ‘Arachne,’ which can vary line width.
After this, the models printed fine and easily fit onto the spring clips that [Chuck] had soldered down on some prototyping board. A nice feature of these spring clips is that they have a bit of space underneath them where an SMD LED can fit, enabling functional (or just fancy) lighting effects when using a custom PCB underneath the contraption. As for whether it’s worth it depends on your needs. As [Chuck] demonstrates, it can be pretty convenient for a small breadboard on an add-on card (with or without custom lighting) like this, but it’s unlikely to replace generic breadboards for quick prototyping. We can, however, imagine a custom breadboard with mounting points for things like binding posts, switches, or potentiometers.
The 3DConnexion Space mouse is an interesting device but heavily patent-protected, of course. This seems to just egg people on to reproduce it using other technologies than the optical pickup system the original device uses. [John Crombie] had a crack at building one using linear Hall effect sensors and magnets as the detection mechanism to good — well — effect.
Using the SS49E linear Hall effect sensor in pairs on four sides of a square, the setup proves quite straightforward. Above the fixed sensor plate is a moveable magnet plate centred by a set of springs. The magnets are aligned equidistant between each sensor pair such that each sensor will report an equal mid-range signal with zero mechanical displacement. With some simple maths, inputs due to displacements in-plane (i.e., left-right or up-down) can be resolved by looking at how pairs compare to each other. Rotations around the vertical axis are also determined in this manner.
Tilting inputs or vertical movements are resolved by looking at the absolute values of groups or all sensors. You can read more about this by looking at the project’s GitHub page, which also shows how the to assemble the device, with all the CAD sources for those who want to modify it. There’s also a detour to using 3D-printed flexures instead of springs, although that has yet to prove functional.
On the electronics and interfacing side of things, [John] utilises the Arduino pro micro for its copious analog inputs and USB functionality. A nice feature of this board is that it’s based on the ATMega32U4, which can quickly implement USB client devices, such as game controllers, keyboards, and mice. The USB controller has been tweaked by adjusting the USB PID and VID values to identify it as a SpaceMouse Pro Wireless operating in cabled mode. This tricks the 3DConnexion drivers, allowing all the integrations into CAD tools to work out of the box.


 compare to each other. Rotations around the vertical axis are also determined in this manner.