
Solid state batteries, we are told, are the new hot battery technology that will replace lithium-ion batteries. Soon. Not that we haven’t heard that before. One reason it isn’t dominating the market today is that it’s prone to short circuits during charging. [Dr. Yuwei Zhang and others have published a paper detailing why the shorts happen, which could lead to strategies to improve the technology.
Solid state batteries employ a solid electrolyte and a lithium anode. It is known that, sometimes, lithium metal from the anode forms dendrites that penetrate the ceramic electrolyte and cause it to crack. This is somewhat of a mystery as the lithium is a soft metal: to quote [Zhang], “like a gummy bear”.
There were two leading hypotheses for the observations. [Zhang’s] team showed that hydrostatic stress made the lithium dendrites act like a water jet, enabling them to penetrate the hard ceramic.
There is still work to figure out what to do about it, but understanding the root cause is certainly a step in the right direction. We’ve looked at these batteries before. We’ve also seen how changing the anode construction might help with the problem.


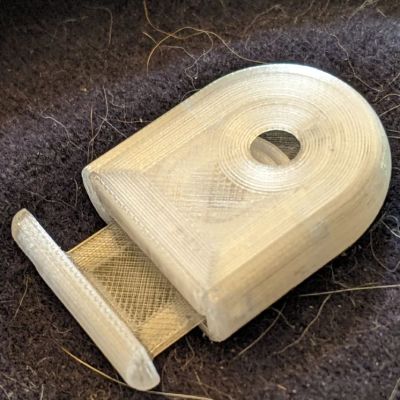 Springs are great, but making them out of plastic tends to come with some downsides, for fairly obvious reasons. Creating a compliant mechanism that can be 3D printed and yet which doesn’t permanently deform or wear out after a few uses is therefore a bit of a struggle. The compliant toggle mechanism that [neotoy] designed


