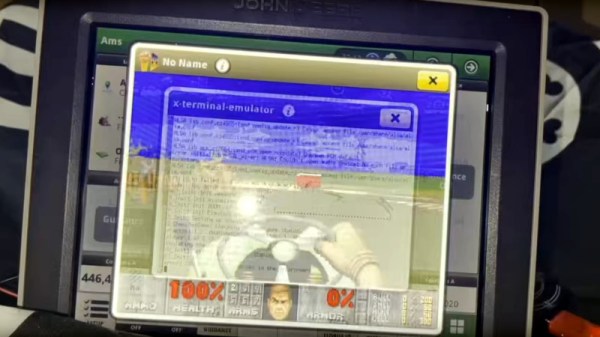
A few weeks ago, some tantalizing social media posts emerged from a Def Con talk, in which [Sick Codes] broke into the screen control unit for a John Deere tractor live on stage, and proceeded to play a special Deere-themed DOOM level upon it. At the time there was nothing more to go on, but we’re pleased to find out that the whole talk has been put online.
The talk starts with an introduction to the topic, to the basics of the control units within the machine and to the various different ages of Deere screen unit. We find that the earlier machines, which are still at work on farms worldwide, rely on outdated Windows CE versions, though the very latest screens run a Linux variant.
It’s one of these last screens to which he turns his attention, and we’re treated to an in-depth look at some of its secrets. After a lot of dead ends and learning exercises the final result is distilled into a pogo pin adapter for the hardware part, and a simple enough cron job to bypass one of Deere’s defenses by keeping the filesystem writable so a file can be updated. There’s a bit more detail about the special DOOM level too, as a special bonus.
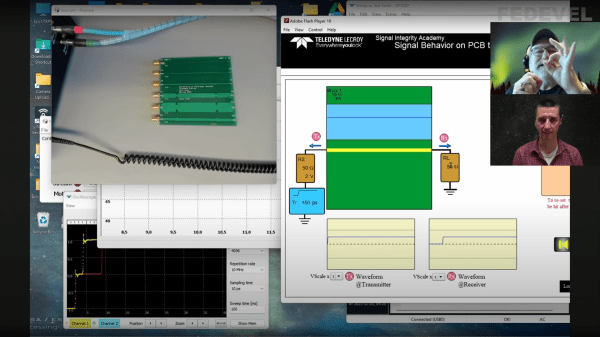
PCB design starts off being a relatively easy affair — you create a rectangular outline, assign some component footprints, run some traces, and dump out some Gerber files to send to the fab. Then as you get more experienced and begin trying harder circuits, dipping into switching power supplies, high speed digital and low noise analog, things get progressively more difficult; and we haven’t even talked about RF or microwave design yet, where things can get just plain weird from the uninitiated viewpoint. [Robert Feranec] is no stranger to such matters, and he’s teamed up with one of leading experts (and one of this scribe’s personal electronics heroes) in signal integrity matters, [Prof. Eric Bogatin] for a deep dive into the how and why of controlled impedance design.
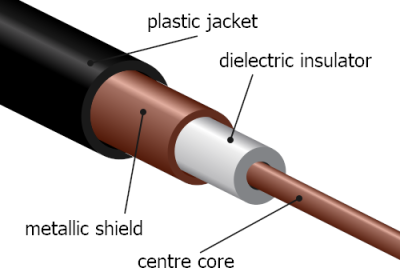
RG58 cable construction. These usually are found in 50 Ω and less commonly these days 75Ω variants
One interesting part of the discussion is why is 50 Ω so prevalent? The answer is firstly historical. Back in the 1930s, coaxial cables needed for radio applications, were designed to minimize transmission loss, using reasonable dimensions and polyethylene insulation, the impedance came out at 50 Ω. Secondarily, when designing PCB traces for a reasonable cost fab, there is a trade-off between power consumption and noise immunity.
As a rule of thumb, lowering the impedance increases noise immunity at the cost of more power consumption, and higher impedance goes the other way. You need to balance this with the resulting trace widths, separation and overall routing density you can tolerate.
Another fun story was when Intel were designing a high speed bus for graphical interfaces, and created a simulation of a typical bus structure and parameterized the physical constants, such as the trace line widths, dielectric thickness, via sizes and so on, that were viable with low-cost PCB fab houses. Then, using a Monte Carlo simulation to run 400,000 simulations, they located the sweet spot. Since the via design compatible with the cheap fab design rules resulted often in a via characteristic impedance that came out quite low, it was recommended to reduce the trace impedance from 100 Ω to 85 Ω differential, rather than try tweak the via geometry to bring it up to match the trace. Fun stuff!
We admit, the video is from the start of the year and very long, but for such important basic concepts in high speed digital design, we think it’s well worth your time. We certainly picked up a couple of useful titbits!
Now we’ve got the PCB construction nailed, why circle back and go check those cables?
While it isn’t for everyone, some of the best creators we know are experts at working with textiles. While the art is ancient, it isn’t easy and requires clever tools. [Lauren] collected a few 3D prints that can help you with knitting, crochet, and even a knitting loom.
Some of the designs are pretty basic like the yarn bowl, or pretty easy to figure out like the simple machine for re-spooling wool. We were frankly surprised that you can 3D print a crochet hook, although the post does mention that breaking them is a real problem.
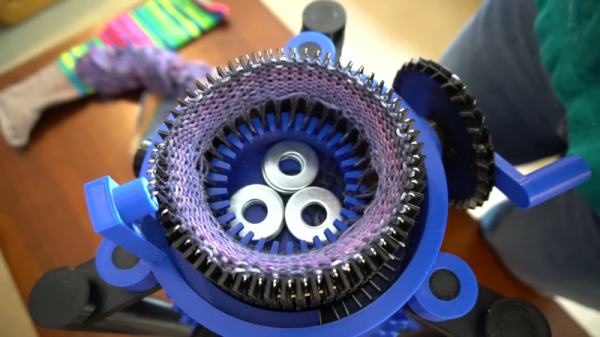
We were really impressed though, with the sock knitting machine. There are actually a few of these out there, and you can see a similar one in the video below. Of course, like a RepRap printer, it needs “vitamins” in the form of metal rods, fasteners, and the like. There’s also a portable knitting loom which looked interesting.
We aren’t adept enough with fabric arts to know if these tools are serious contenders compared to commercial products, but we have to admit the sock knitting machine looks like it could be. We recently saw a sophisticated loom, although that might be a bit more than most people need. We have looked at open-source knitting machines, too. Of course, if you’d rather not create with textiles, you can always 3D print on them, instead.
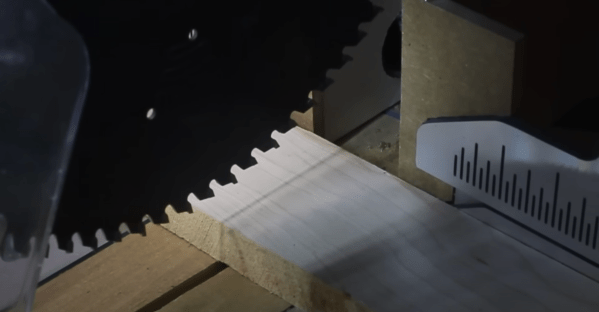
If you’ve bought a miter saw in the past few years, you might have noticed the LED “laser” that came with it. The goal was to show where on the piece the saw was going to cut. But over a year or two, you might have found the laser to have drifted or skewed into a crooked line. [Fisher] decided that his after-market laser wasn’t entirely accurate enough and added a shadow line instead. (Video, embedded below the break.)
The blade has a thickness (known as kerf), and with a laser to one side, you can only accurately cut on one side of the line. A shadow line works differently. By shining a line at the top of the blade, you get a mark where the blade will cut precisely. You can also see your marks as the laser doesn’t shine over them. Previously, [Fisher] had tried to use LED strips, but after a comment suggested it, he found a sewing light on a gooseneck. It worked great as a small compact light fitting the blade housing. After some quick modifications, hot glue, and duct tape, the light was installed, and the wires were routed while still allowing the saw its full range of motion.
Good news out of Mars from the little lunchbox that could — in the seven times that MOXIE has run since it arrived in February 2021, it has reached its target production of six grams of oxygen per hour, which is in line with the output of a modest tree here on Earth. The research team which includes MOXIE engineers report that although the solid oxide electrolysis machine has shown it can produce oxygen at almost any time or day of the Martian scale, they have not shown what MOXIE can do at dawn or dusk, when the temperature changes are substantial, but they say they have ‘an ace up (their) sleeve’ that will let them do that. We can’t wait to see what they mean.
In other, somewhat funnier space news — early last Sunday morning, the ESA’s Solar Orbiter was cruising by Venus as part of a gravity-assist maneuver to get the Orbiter closer to the Sun. Two days before the Orbiter was to reach its closest point to the spacious star, it spat a coronal mass ejection in the general direction of both Venus and the Orbiter (dibs on that band name), as if to say ‘boo’. Fortunately, the spacecraft is designed to withstand such slights, but the same cannot be said for Venus — these events have their way with Venus’ atmosphere, depleting it of gasses.
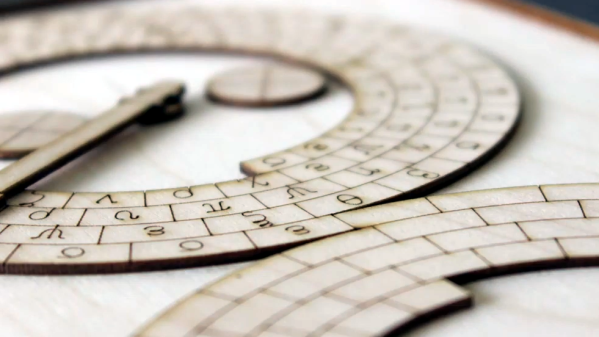
Here’s a neat resource from [MSRaynsford] that is worth bookmarking for anyone who gets creative with laser engravers, CNC routers, or drawing robots: SVGFonts are single-line symbol fonts that [MSRaynsford] created for his laser-cut and engraved cryptex puzzle boxes. They provide an easy way to engrave text as symbols.
Single-line fonts for engraving that include a runic-looking alphabet, a Greek-inspired set, and two symbol sets based on Flag Semaphore.
CNC engraving of letters and symbols is one of those things that seems simple, but is actually more complex than it may appear. It is often desirable to use a tool to engrave symbols with a single line, in much the same way a person would write them if using a pen. But fonts and art for letters and numbers aren’t normally a single line. Thankfully there is a solution in the form of Hershey text, an extension for which is included in Inkscape. It turns out that Hershey Fonts have their origin back in the 1960s, when the changing landscape of electronics and industry opened new opportunities and demanded new solutions.
That’s why, when [MSRaynsford] needed fonts in different styles and symbols for creating his puzzle boxes, he had to design them himself and they had to be single-line vector art, just like Hershey Text. The small collection includes English letters designed to resemble a runic alphabet, a Greek-inspired series, and two coded alphabets based on flag semaphore.
If you live anywhere on the Northern Hemisphere, you’re likely to have experienced one of the many heatwaves that occurred this summer. Extreme heat is dangerous for humans and animals, but plants, including important crops, also suffer. High temperatures lead to increased transpiration and evaporation, and if the water lost in this way is not replenished quickly enough, plants will stop growing and eventually wither and die.
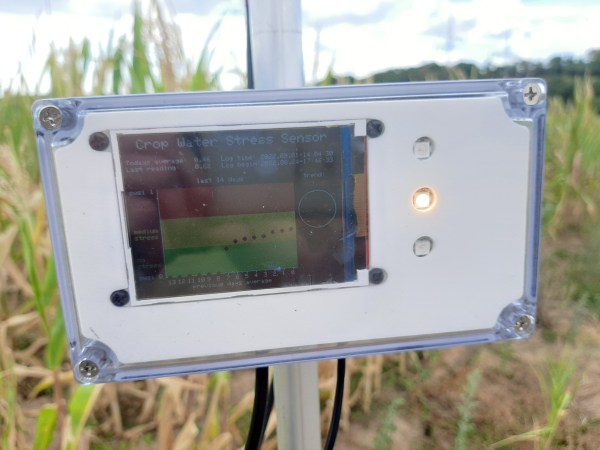
In order to keep track of the amount of water available to crops, [Florian Ellsäßer] built the Crop Water Stress Sensor: a device that checks whether plants have enough moisture available to stay healthy. It does this by measuring the temperature of the leaves to calculate evaporation levels. If the leaves are cooler than their surroundings, this means that water is evaporating from them and the plant apparently has enough water available. If the leaves’ temperature is closer to the ambient temperature, then the plant may be running low on water.
[Florian]’s system performs this measurement using an infrared array, which is basically a low-resolution thermal camera that remotely measures the temperature of everything in its field of view. This IR array is pointed at a field, where it will see both leaves and the ground between them. The difference in temperature between these two can then be used to calculate the Crop Water Stress Index (CWSI), a standardized measure of how well-hydrated plants are. The result is shown on a display and also indicated using a convenient red-yellow-green status LED that shows if the crops in question need watering.
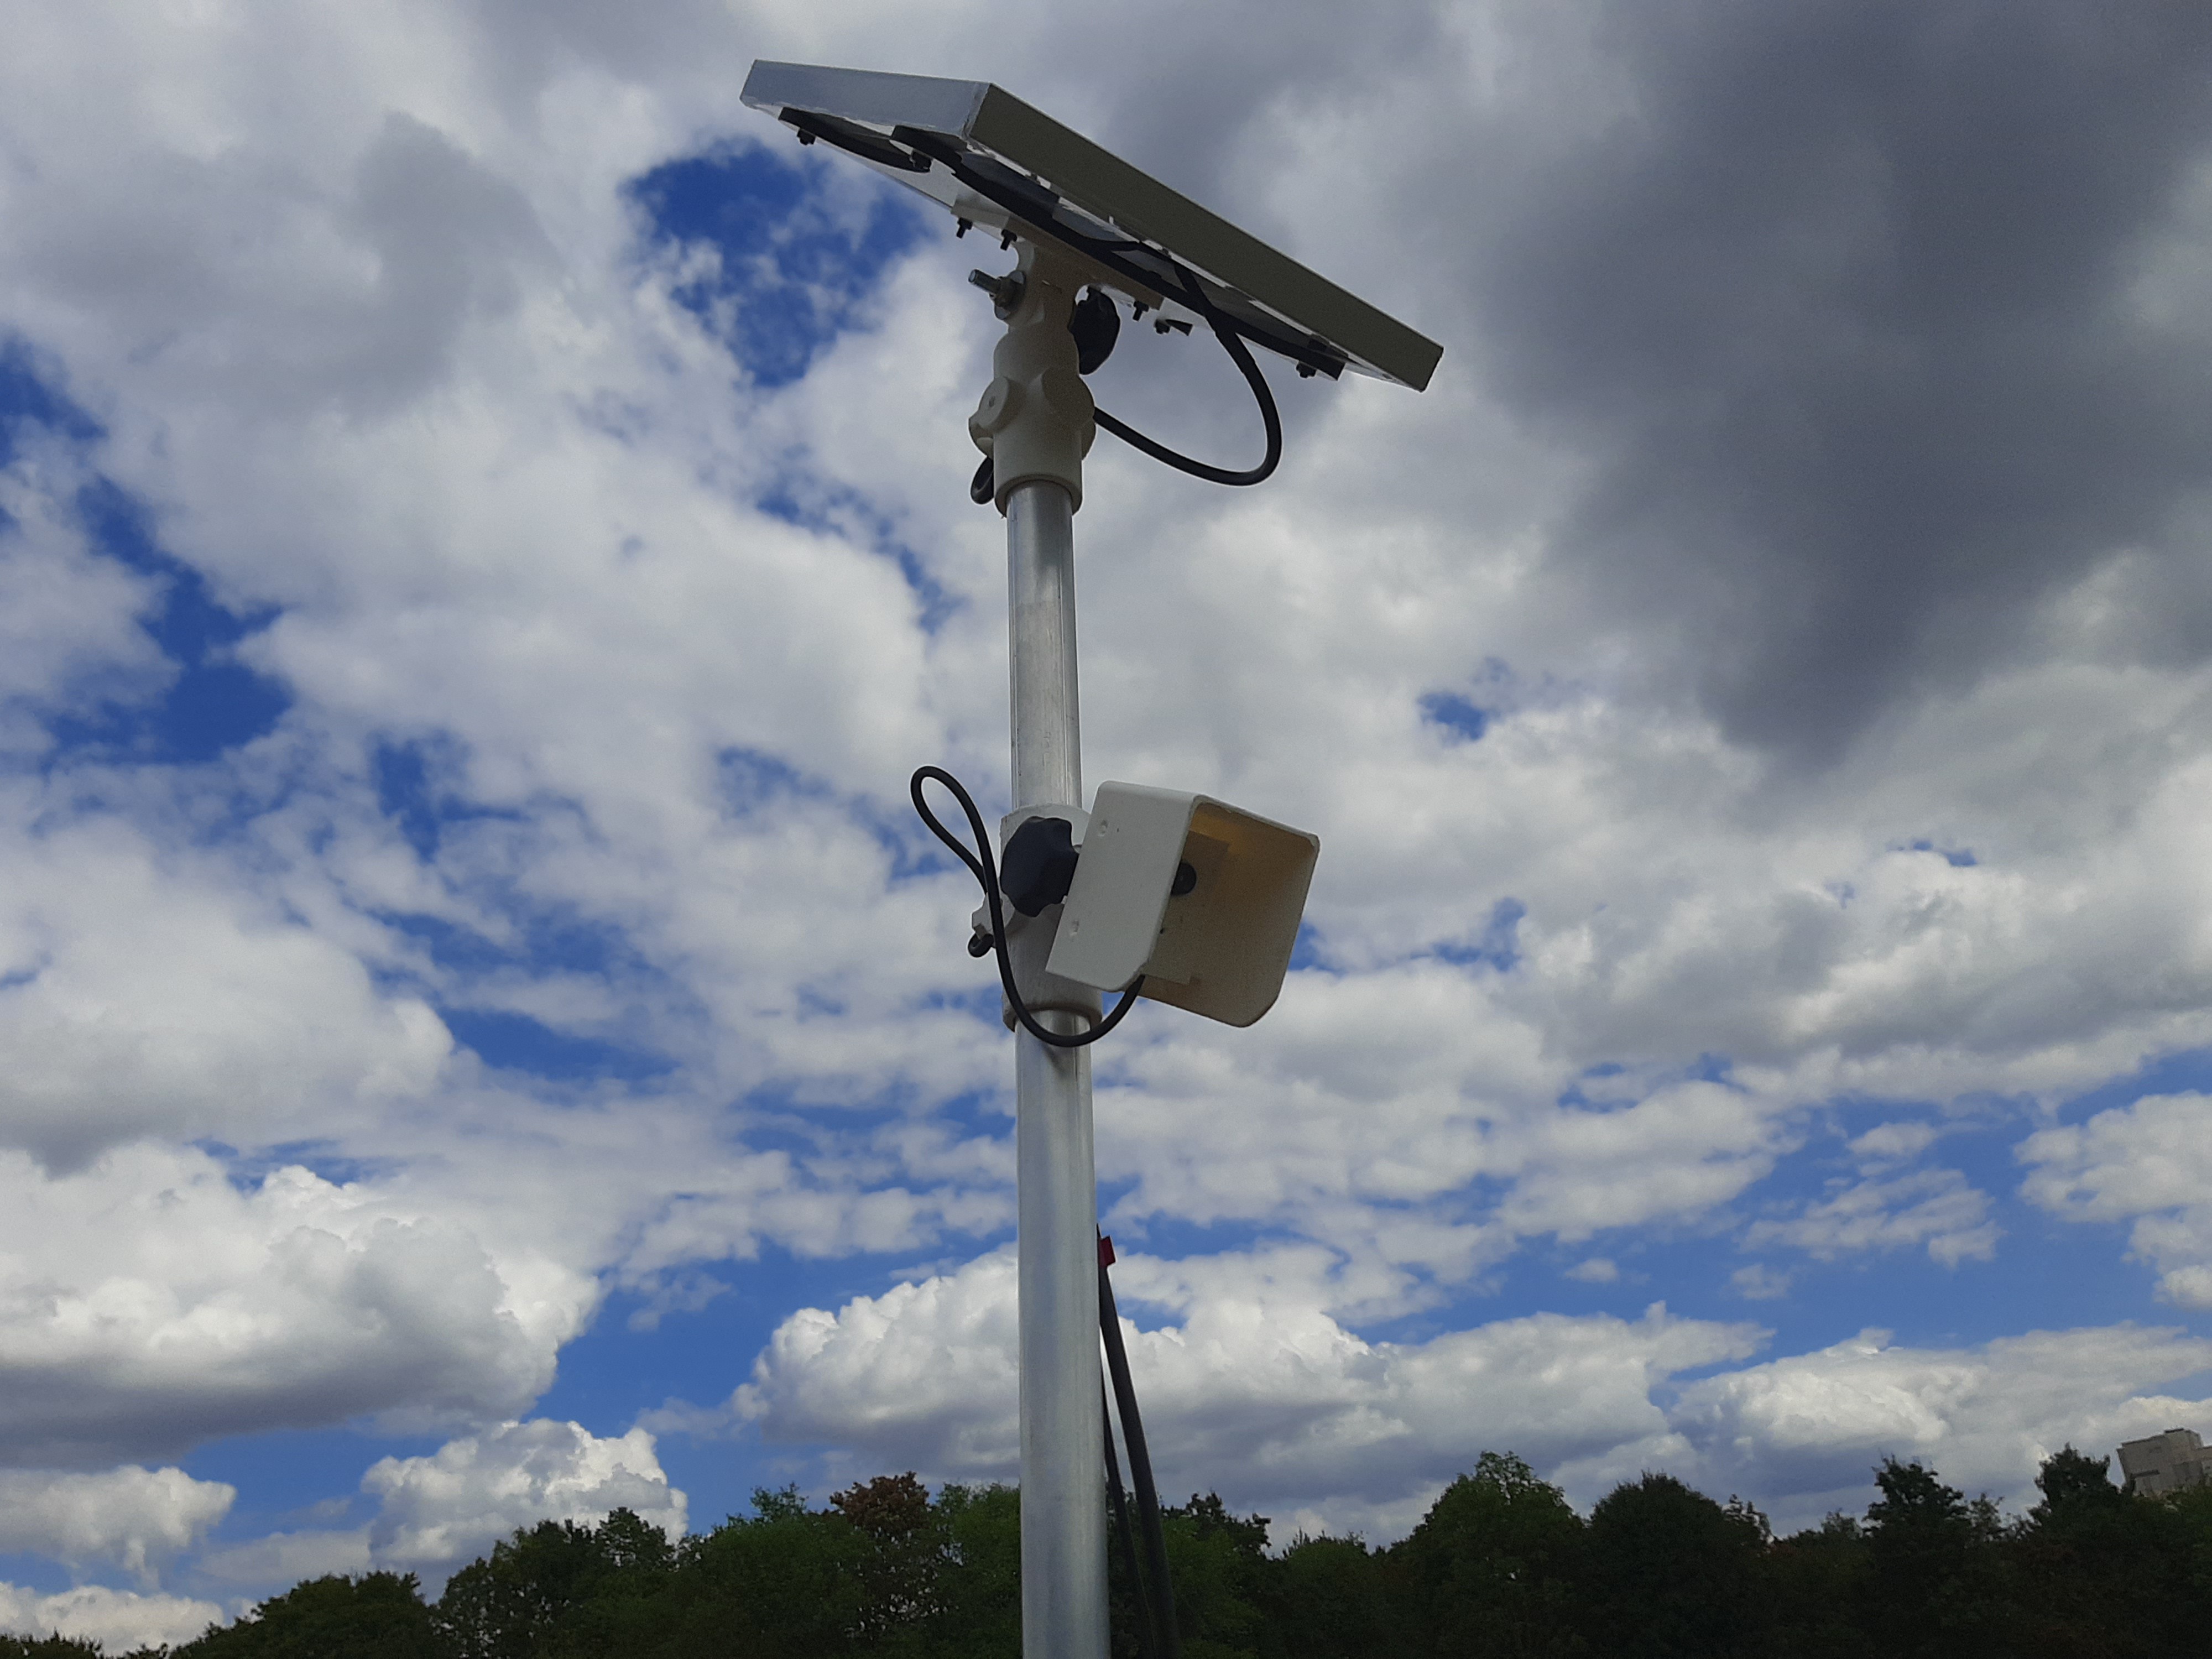
The system can be solar powered for completely remote operation, while its data can be read out through a WiFi interface. [Florian] is planning to update the design with a LoRa interface for greater range: the eventual goal is to build a large network of these sensors throughout agricultural areas and use the combined data to raise awareness of water shortages in certain areas. In order to make the sensors easy to build by anyone interested, all design files are available on the project page.