A CH341 programmer dongle with a stack of adapters on top (one for 1.8V and one for clip connection), and a test clip to the right of it

BIOS Flashing Journey Writeup Puts Tutorials To Shame

A couple of weeks ago, [Doug Brown] bought a Ryzen motherboard, advertised as “non-working” and discounted accordingly. He noticed that the seller didn’t test it with any CPUs old enough to be supported by the board’s stock BIOS revision, and decided to take a gamble with upgrading it.

Not having a supported CPU in hand either, he decided to go the “external programmer” route, which succeeded and gave this board a new life. This is not why we’re writing this up, however. The reason this article caught our eye is because [Doug]’s research leaves no stone unturned, and it’s all there to learn from. Whether through careful observation or thorough research, this article covers all the important points and more, serving as an example to follow for anyone looking to program their BIOS.

For instance, [Doug] correctly points out a design issue with these common programmers resulting in 5 V getting onto the 3.3 V data lines, and fixes it by rewiring the board. Going through all the letters in the ICs part number, something that many of us would dismiss, [Doug] notices that the flash chip is 1.8 V-only and procures a 1.8 V adapter to avoid the possibility of frying his motherboard. After finding out that the 1.8 V adapters don’t work for some people, he reverse-engineers the adapter’s schematics and confirms that it, indeed, ought to work with the specific parts on adapter he received.

Noting another letter in the part number implying the flash chip might be configured for quad-SPI operation, he adds series resistors to make sure there’s no chance of the programmer damaging the BIOS chip with its hardwired pinout. This is just an example of the insights in [Doug]’s article, there’s way more that we can’t mention for brevity, and we encourage you to check it out for yourself.

With this level of care put into the process, it’s no surprise that the modification was successful. The kind of inquisitiveness shared here is worth aspiring to, and writeups like this often surpass general-purpose tutorials in their insights and usefulness. What’s your “successfully making use of something sold as non-working” story?

If you’re looking for other insightful BIOS stories, we’ve covered someone reverse-engineering their BIOS to remove miniPCIe card whitelisting. We’ve typically covered BIOS modification stories in laptops, since there’s more incentives to modify these, but a lot of laptop BIOS articles will apply to desktop motherboards too, such as this supervisor password removal story or this LibreBoot installation journey by our own [Tom Nardi].

Thank you [Sidney] for sharing this with us!

Realtime Shadows On N64 Hardware

Although the Nintendo 64 console has in the minds of many been relegated to the era of ‘firmly obsolete graphics’, since its graphic processor’s (GPU’s) lineage traces directly to the best which SGI had to offer in the 1990s, it too supports a range of modern features, including dynamic shadows. In a simple demo, [lambertjamesd] demonstrates how this feature is used.

As can be seen in the demonstration video (linked after the break), this demo features a single dynamic light, which casts a shadow below the central object in the scene, with a monkey object floating around that casts its own shadow (rendered into an auxiliary frame buffer). This auxiliary buffer is then blended into the main buffer, as explained by [ItzWarty] over at /r/programming on Reddit.

This effectively means that the main scene uses a shadow volume, which was used extensively with Doom 3. The primary reasons for why the N64 didn’t use shadow volumes all over the place was due to the limitations this places on the shadow caster (objects) in the scene, such as the need to be convex, and overlap is likely to lead to artifacts and glitches.

Doom 3 would fix this with the use of a stencil buffer that would further refine the basic dynamic lighting support on the N64, which ultimately would lead to the fancy video game graphics we have today. And which no doubt will look properly obsolete in another decade again, as usual.

Continue reading “Realtime Shadows On N64 Hardware”

Seoul Introduces Self-Driving Taxis

Last year the Seoul city government passed an ordinance enabling the commercial operation of autonomous passenger-carrying vehicles. A six square kilometer region in the Seoul neighborhood of Sangam, near the 2002 World Cup Stadium, was designated as a pilot program test bed. This area encompasses 24 streets totaling 31.3 km. Two companies were selected, and the pilot program launched a few weeks ago. Currently there are three vehicles and passengers can ride for free during this introductory phase. Three more taxis and a bus will be added within this year, with plans for 50 in this region by 2026. For the time being, these cars require a standby driver who takes control in an emergency and in school zones. Check out the short news report (in English) below the break.

There was a smaller autonomous driving test program in the city of Sejong which we wrote about back in January, and [Alfred Jones] gave a keynote presentation at the 2020 Hackaday Remoticon on the challenges of designing self-driving vehicles if you want to learn more on this topic.

Continue reading “Seoul Introduces Self-Driving Taxis”

DIY High Flow 3D Printing

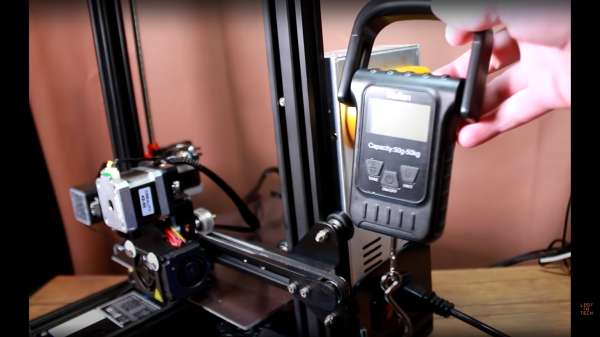
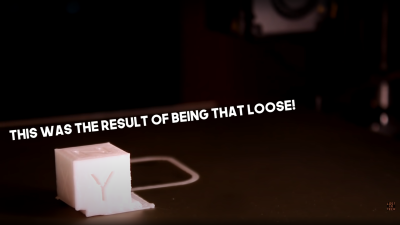
Sometimes we’re impressed by the sheer audacity of a project. [Stefan] rarely disappoints in that area, and his latest video shows him making an adapter to convert a normal 3D printed nozzle into a high-flow nozzle, similar to one you’d find on a Volcano. We say similar because [Stefan] took the trouble to drill three holes in the adapter to increase the melting surface area. The audacious part is that he doesn’t really have the machine shop to drill three tiny precision holes in close proximity — and he shows us the pictures to prove that he didn’t get it right the first (or fifth) time. But he did stick with it and got good results.

Why do such a thing? He wanted to mount the high-efficiency nozzles he’s been experimenting with on the Volcano extruder. The commercial one, in particular, doesn’t come in the extended size. To simplify things, he started with a long brass insert. The conical hex cut offers a natural center point if you are satisfied with a single hole through the center of the adapter. The hex cutout allows you to use a key to install or remove the spacer easily.

The idea behind the longer nozzles is that the filament has more time at temperature and can therefore move faster and still melt. The additional surface area should help, too. Of course, [Stefan] does plenty of testing and you can see the results in the video. A Volcano nozzle started misbehaving around 25 mm/s but at 30 mm/s, things started going bad. The CHT nozzle on the homemade standard spacer stayed working up to 30 mm/s and even at 60 mm/s was doing better than the standard nozzle at 45 mm/s. Sadly, the multiple holes in the special adapter caused worse extrusion performance, presumably by increasing pressure in the extrusion system. However, it did work well in real-life printing. Since the single bore adapter and the CHT nozzle worked great we don’t think it would be worth making the more complex one, as impressive a feat as that was.

[Stefan] thinks a lot about nozzles. He worries about wear, of course. He also built his own version of the high-flow nozzle.

Continue reading “DIY High Flow 3D Printing”

several chocolate figurines of various sizes

Cast Your Own Holiday Chocolate Bunny, Or Rather Mouse

The art of forming and using a mold is, well, an art. The already tricky process would be made even harder by using a fickle material, like chocolate. This is exactly where [Alexandre Chappel] found himself as he tried to cast his own chocolate figurines.

The starting point was a 3D low-poly model of everyone’s favorite fictional electric mouse. He tweaked the model to add offsets so that after the model was vacuum formed, there would be something to clamp onto. [Alexandre] was left with four different pieces, and he vacuum-formed them with 1 mm PETG plastic. Electing for white chocolate to add coloring, he started heating the chocolate. Adding too much colorant resulted in a seized mess, so the process was a bit of trial and error. Finally, he poured in chocolate and spun it around to form an even layer of chocolate as a shell. The flashing lines were easy to trim with a utility knife.

The last thing to add was a little splash of color via airbrush and food-grade paint. The results are stunning, and even though the techniques are simple, the results came together nicely. The files are available on his website if you’re curious about making your own. If you’re curious about more clever casting techniques with chocolate, take a look at the creative use of diffraction grating to get iridescent chocolate.

Continue reading “Cast Your Own Holiday Chocolate Bunny, Or Rather Mouse”

A pair of RP2040-based USB microphones

Mico Is A USB Microphone Based On A Pi Pico

When [Mahesh Venkitachalam] was experimenting with machine learning for audio applications on a Raspberry Pi, he found himself looking for a simple USB microphone. A cheap one was easy to find, but the sound quality and directionality left much to be desired. A large, studio-quality mic would be overkill, so [Mahesh] decided to simply build exactly what was needed: a compact, yet high-quality USB microphone that he called Mico.

The sensing device is a MEMS microphone that outputs a pulse density modulated (PDM) signal. There are chips available to directly interface such a microphone to a USB port, but [Mahesh] found them difficult to work with and therefore settled on something he knew already: the Raspberry Pi Pico platform. Luckily, someone had already figured out how to read out a microphone and present a USB device to a PC, so all that was needed was to put all the bits together into a convenient form factor.

The great thing about the Pico platform is that its main controller chip, the RP2040, is available as a separate component. [Mahesh] designed a sleek little PCB that holds the RP2040 along with the MEMS microphone and a USB connector. The end result looks tidy enough that it might have come out of a mass-produced gizmo. Those don’t usually come with full schematics and source code, but the Mico does: everything is available on its GitHub page for anyone to re-use and improve.

You can judge the sound quality for yourself in the video embedded below. If you like DIY USB microphones, you’re in luck: we’ve featured one based on an STM32 as well as a beautiful recreation of a studio-quality mic.

Continue reading “Mico Is A USB Microphone Based On A Pi Pico”

3D Printing Gets Tiny

Using a process akin to electroplating, researchers at the University of Oldenburg have 3D printed structures at the 25 nanometer scale. A human hair, of course, is thousands of time thicker than that. The working medium was a copper salt and a very tiny nozzle. How tiny? As small as 1.6 nanometers. That’s big enough for two copper ions at once.

Tiny nozzles are prone to every 3D printer’s bane: clogged nozzles. To mitigate this, the team built a closed-loop control that measured electrical current between the work area and inside the nozzle. You can read the full paper online.

Continue reading “3D Printing Gets Tiny”