Hands On: AD409-Max Microscope

It used to be that only the most well-equipped home electronics lab had a microscope. However, with SMD parts getting smaller and smaller, some kind of microscope is almost a necessity.

Luckily, you can get USB microscopes for a song now. If you’re willing to spend a little more, you can get even get microscopes that have little LCD screens. However, there are some problems with the cheaper end of these microscopes.

Many of them have small and wobbly stands that aren’t very practical. Some don’t leave you much room to get a soldering iron in between the lens and the part. Worse still, many cheap microscopes have trouble staying still when you have to push buttons or otherwise make adjustments to the device.

It seems like every time a new generation of microscopes aimed at the electronics market arrives on the scene, many of the earlier flaws get taken care of. That’s certainly the case with the Andonstar AD409-Max.

Continue reading “Hands On: AD409-Max Microscope”

How We Got The Scanning Electron Microscope

According to [Asianometry], no one believed in the scanning electron microscope. No one, that is, except [Charles Oatley].The video below tells the whole story.

The Cambridge graduate built radios during World War II and then joined Cambridge as a lecturer once the conflict was over. [Hans Busch] demonstrated using magnets to move electron beams, which suggested the possibility of creating a lens, and it was an obvious thought to make a microscope that uses electrons.

After all, electrons can have smaller wavelength than light, so a microscope using electrons could — in theory — image at a higher resolution. [Max Knoll] and [Ernst Ruska], in fact, developed the transmission electron microscope or TEM.

Continue reading “How We Got The Scanning Electron Microscope”

Cheap DIY Microscope Lamp Makes Tiny Macro Shots Look Great

For optical microscopes, light is everything. If you don’t have a good amount of light passing through or bouncing off your sample, you’ve got nothing for your eyeballs or a camera to pick up. To aid in this regard, [Halogenek] whipped up a nifty microscope lamp with some LEDs.

The build uses a neat arch-shaped PCB with a hole in the middle for the microscope’s optics to pass through. Surrounding this are the LEDs, which provide a circle of light focused on the sample, akin to the ring lights so favored by today’s online influencers. The LEDs are powered via USB C, so the lamp can be run off of any garden-variety phone charger you might have lying around.

[Halogenek] reports that the lamp has proven useful for extreme macro shots of PCBs. It’s an easy build to replicate or redesign your own way if you’re doing similar work.

Microscopes are super useful, and there are all kinds of hacks you can do to make them perform better in your quest for science. Meanwhile, if you’ve been jazzing up your own lab hardware, let us know—we’d love to hear about it!

Cheap Microscope Can Take Amazing Images With Some Simple Upgrades

[Birdbrain] is trying to make their own microfluidic devices. To aid in this quest, they need a quality microscope to see what they’re doing. Instead of buying one outright, they purchased a cheap microscope and upgraded it to do the job instead.

Usability and performance is greatly improved over the stock unit, which was really only fit for learning purposes.

The cheap education-grade microscope cost around $50 USD, had few features, and wasn’t much chop out of the box. The worst part was the sample stage — which was poorly adjustable in the up-and-down axis and could only track about two centimeters up and down. There was no X or Y axis panning either, and it lacked a proper condensor iris, too. Oh, and the included camera module had a resolution of just 240p.

To fix these problems, the microscope was first outfitted with a fully redesigned X-Y-Z stage built out of old components from a salvaged DVD drive and an additional NEMA stepper motor. Camera-wise, it was hooked up with a 2K Raspberry Pi Camera Module 3 running at 10 to 15 frames per second, which broadcasts video over a local network for easy viewing on an external monitor. It also gained an epi-illumination setup for doing reflected light microscopy.

If you’re eager to build a quality microscope with all the controls you personally dream of, this could be a relevant project for you to study. We’ve featured some other builds along these lines before, too. Video after the break.

Continue reading “Cheap Microscope Can Take Amazing Images With Some Simple Upgrades”

CNC Plus Microscope Plus Game Controller Equals Awesome

What do you get if you strap a microscope onto a CNC and throw in a gaming controller? The answer, according to Reddit user [AskewedBox] is something kind of awesome: you get a microscope that can be controlled with the game controller for easier tracking of tiny creepy-crawlies.

[ASkewedBox] set up this interesting combination of devices, attaching their Adonostar AD246S microscope to the stage of a no-brand 1610 CNC bought off Amazon, then connected the CNC to a computer running Universal G-Code Sender. This great open source program takes the input from an Xbox game controller and uses it to jog the CNC.

With a bit of tweaking, the game controller can now move the microscope, so it can be used to track microbes and other small creatures as they wander around on the slide mounted below the microscope eating each other. The movement of this is surprisingly smooth: the small CNC and a well-mounted microscope means that there seems to be very little wobble or backlash as the microscope moves.

[Askewedbox] hasn’t finished yet, though: in the latest update, he adds a polarizing lens to the setup and mentions that he wants to add focus control to the system, which is controlled by a remote that comes with the microscope.

There are plenty of other things that could be added beyond that, though, such as auto pan and stitch for larger photos, auto focus stacking and perhaps even auto tracking using OpenCV to track the hideous tiny creatures that live in the microscopic realm. What would you do to make this even cooler?

Dr. Niels Olson uses the Augmented Reality Microscope. (Credit: US Department of Defense)

Google’s Augmented Reality Microscope Might Help Diagnose Cancer

Despite recent advances in diagnosing cancer, many cases are still diagnosed using biopsies and analyzing thin slices of tissue underneath a microscope. Properly analyzing these tissue sample slides requires highly experienced and skilled pathologists, and remains subject to some level of bias. In 2018 Google announced a convolutional neural network (CNN) based system which they call the Augmented Reality Microscope (ARM), which would use deep learning and augmented reality (AR) to assist a pathologist with the diagnosis of a tissue sample. A 2022 study in the Journal of Pathology Informatics by David Jin and colleagues (CNBC article) details how well this system performs in ongoing tests.

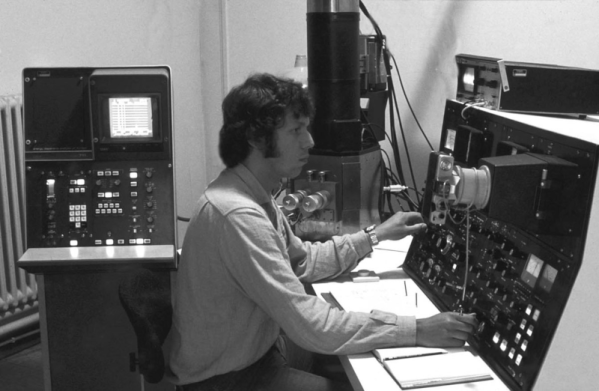
For this particular study, the LYmph Node Assistant (LYNA) model was investigated, which as the name suggests targets detecting cancer metastases within lymph node biopsies. The basic ARM setup is described on the Google Health GitHub page, which contains all of the required software, except for the models which are available on request. The ARM system is fitted around an existing medical-grade microscope, with a camera feeding the CNN model with the input data, and any relevant outputs from the model are overlaid on the image that the pathologist is observing (the AR part).

Although the study authors noted that they saw potential in the technology, as with most CNN-based systems a lot depends on how well the training data set was annotated. When a grouping of tissue including cancerous growth was marked too broadly, this could cause the model to draw an improper conclusion. This makes a lot of sense when one considers that this system essentially plays ‘cat or bread’, except with cancer.

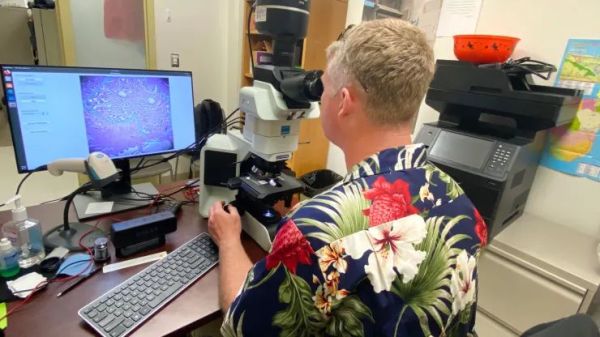
These gotchas with recognizing legitimate cancer cases are why the study authors see it mostly as a useful tool for a pathologist. One of the authors, Dr. Niels Olsen, notes that back when he was stationed at the naval base in Guam, he would have liked to have a system like ARM to provide him as one of the two pathologists on the island with an easy source of a second opinion.

(Heading image: Dr. Niels Olson uses the Augmented Reality Microscope. (Credit: US Department of Defense) )
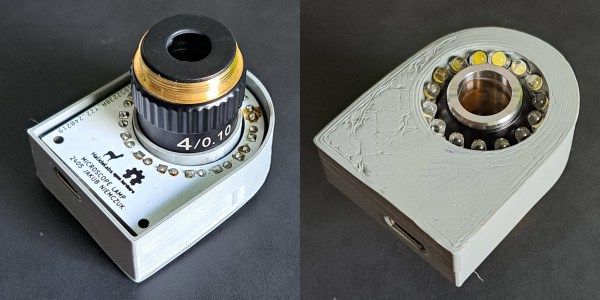
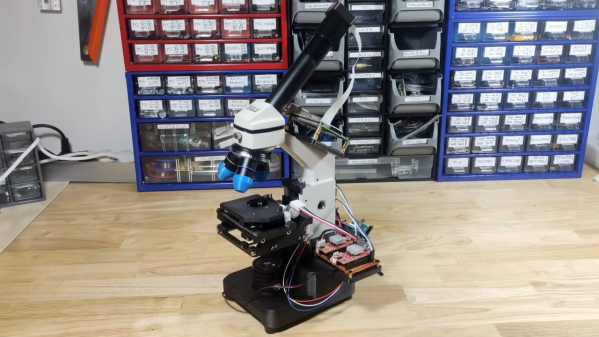
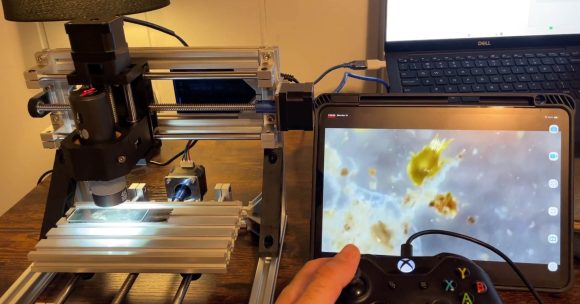
DIY Repair Brings An X-Ray Microscope Back Into Focus

Aside from idle curiosity, very few of us need to see inside chips and components to diagnose a circuit. But reverse engineering is another story; being able to see what lies beneath the inscrutable epoxy blobs that protect the silicon within is a vital capability, one that might justify the expense involved in procuring an X-ray imager.  But what’s to be done when such an exotic and expensive — not to mention potentially deadly — machine breaks down? Obviously, you fix it yourself!

To be fair, [Shahriar]’s Faxitron MX-20 digital X-ray microscope was only a little wonky. It still generally worked, but just took a while to snap into the kind of sharp focus that he needs to really delve into the guts of a chip. This one problem was more than enough to justify tearing into the machine, but not without first reviewing the essentials of X-ray production — a subject that we’ve given a detailed look, too — to better understand the potential hazards of a DIY repair.

With that out of the way and with the machine completely powered down, [Shahriar] got down to the repair. The engineering of the instrument is pretty impressive, as it should be for something dealing with high voltage, heavy thermal loads, and ionizing radiation. The power supply board was an obvious place to start, since electrostatically focusing an X-ray beam depends on controlling the high voltage on the cathode cup. After confirming the high-voltage module was still working, [Shahriar] homed in on a potential culprit — a DIP reed relay.

Replacing that did the trick, enough so that he was able to image the bad component with the X-ray imager. The images are amazing; you can clearly see the dual magnetic reed switches, and the focus is so sharp you can make out the wire of the coil. There are a couple of other X-ray treats, so make sure you check them out in the video below.

Continue reading “DIY Repair Brings An X-Ray Microscope Back Into Focus”