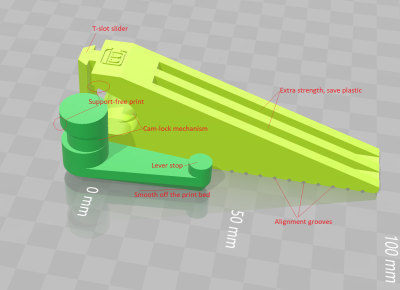
The typical hacker can never say no to more tools. And when it comes to clamps, one just can’t have enough of them. From holding small PCB’s to clamping together large sheets of plywood, you need a variety of sizes and quantities. So it would be pretty neat if we could just 3D print them whenever needed. [Mgx3d] has done that by designing 3D printable bar clamp jaws with a quick release mechanism that can be used with standard T-slot aluminum extrusion. This allows you to create ad-hoc bar clamps of any size and length quickly.
The design consists of two pieces – the jaw and its quick release lever, and does not require any additional parts or fasteners for assembly. Both pieces can be easily 3D printed without supports. The quick release lever is a simple eccentric cam design which locks the jaw in place by pushing down on the extrusion. The design is parametric and can be easily customized for different sizes, either in OpenSCAD or via the online customizer. The online customizer supports Misumi 15 mm and 20 mm extrusion, 1″ 1010-S and 20 mm 20-2020 from 80/20 Inc., 15 mm from OpenBeam and 10 mm from MicroRax. But it ought to be easy to create fresh designs in OpenSCAD. Check out the video after the break to see the bar-clamps in action.
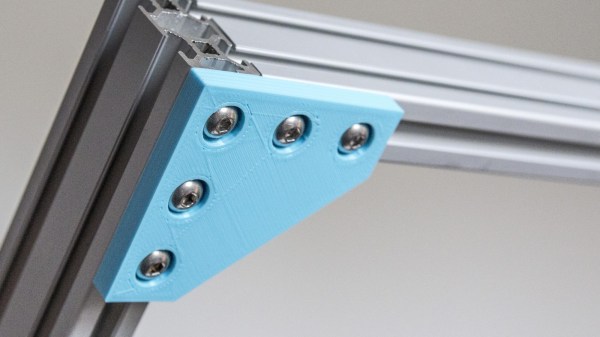
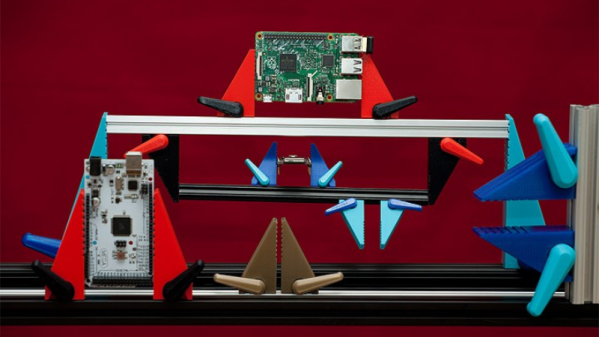
Aluminum extrusions are a boon for mechanical assemblies, but they require a stock of brackets and other hardware to be kept on hand. [mightynozzle] has decided to make things a little easier for prototyping and low-stress assemblies by creating a collection of 3D printable brackets for aluminum extrusions. 3D printing your own bracket hardware means faster prototyping, and if the assemblies don’t need the extra strength and rigidity of metal brackets you can just stick with the 3D printed versions.
This project showcases two things well. The first is that while brackets are not particularly expensive or hard to obtain, it can still be worth 3D printing them to reduce the overall amount of hardware one needs to keep on hand to make prototyping faster. The other is that 3D printing can shine when it comes to the creation of things like brackets: a few dimes’ worth of plastic can be turned into precise yet geometrically simple objects that would be a pain to make by other means. It certainly beats sitting on one’s hands waiting for parts to be delivered.
For the penny-pinching basement hacker, McMaster-Carr seems like a weird go-to resource for hardware. For one, they’re primarily a B2B company; and, for two, their prices aren’t cheap. Yet their name is ubiquitous among the hacker community. Why? Despite the price, something makes them too useful to ignore by everyday DIY enthusiasts. Those of us who’ve already been enlightened by the McMaster-Carr can design wonders with a vocabulary of parts just one day away at the click of a button.
Today, this article is for those of us who have yet to receive that enlightenment. When used wisely, this source of mechanical everything brings us a world of fast parts at our fingertips. When used poorly, we find nothing but overpriced stock components in oversized shipping boxes.
Since we, the McMaster-Carr sages, are forever doomed to stuff our desk drawers with those characteristic yellow baggies till the end of time, we thought we’d give an intro to the noobs that are just beginning to flex their muscles with this almighty resource. Grab another cup of coffee as we take you on a tour of the good and good-grievances of McMaster-Carr.
For hardware aficionados and Makers, trips to Shenzhen’s Huaqiangbei have become something of a pilgrimage. While Huaqiangbei is a tremendous and still active resource, increasingly both Chinese and foreign hardware developers do their sourcing for components on TaoBao. The selection is vastly greater and with delivery times rarely over 48 hours and frequently under 24 hours for local purchases it fits in nicely with the high-speed pace of Shenzhen’s hardware ecosystem.
For overseas buyers, while the cost of Taobao is comparable to, or slightly less than AliExpress and Chinese online stores, the selection is again, many, many times the size. Learning how to effectively source parts from Taobao will be both entertaining and empowering.
Most inexpensive 3D printers use a type of lead screw to move some part of the printer in the vertical direction. A motor turns a threaded rod and that causes a nut to go up or down. The printer part rides on the nut. This works well, but it is slower than other drive mechanisms (which is why you don’t often see them on the horizontal parts of a printer). Some cheap printers use common threaded rod, which is convenient, but prone to bad behavior since the rods are not always straight, the threads are subject to backlash, and the tolerances are not always the best.
More sophisticated printers use ACME threaded rod or trapezoidal threaded rods. These are made for this type of service and have thread designs that minimize things like backlash. They typically are made to more exacting standards, too. Making the nut softer than the rod (for example, brass or Delrin) is another common optimization.
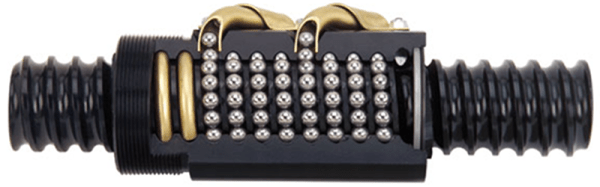
However, when lead screws aren’t good enough, mechanical designers turn to ball screws. In principle, these are very similar to lead screws but instead of a nut, there is a race containing ball bearings that moves up and down the screw. The ball bearings lead to less friction.
Misumi recently posted a few blog articles about ball screws. Some of the information is basic, but it also covers preloading and friction. Plus they are promising future articles to expand on the topic. If you prefer to watch a video, you might enjoy the one below.
Experimenting with optics can be great fun and educational. Trouble is, a lot of optical components are expensive. And other support paraphernalia such as optical benches, breadboards, and rails add to the cost. [Peter Walsh] and his team are working on designing a range of low-cost, easy to build, laser cut optics bench components. These are designed to be built using commonly available materials and tools and can be used as low-cost teaching tools for high-schools, home experimenters and hacker spaces.
They have designed several types of holders for mounting parts such as lasers, lenses, slits, glass slides, cuvettes and mirrors. The holder parts are cut from ¼ inch acrylic and designed to snap fit together, making assembly easy. The holders consist of two parts. One is a circular disk with three embedded neodymium magnets, which holds the optical part. The other is the base which has three adjustment screws which let you align the optical part. The magnets allow the circular disk to snap on to the screws on the base.
A scope for improvement here would be to use ball plunger screws instead of the regular ones. The point contact between the spherical ball at the end of the screw and the magnet can offer improved alignment. A heavy, solid table with a ferrous surface such as a thick sheet of steel can be used as a bench / breadboard. Laser cut alignment rods, with embedded magnets let you set up the various parts for your experiment. There’s a Wiki where they will be documenting the various experiments that can be performed with this set. And the source files for building the parts are available from the GitHub repository.
Check out the two videos below to see how the system works.
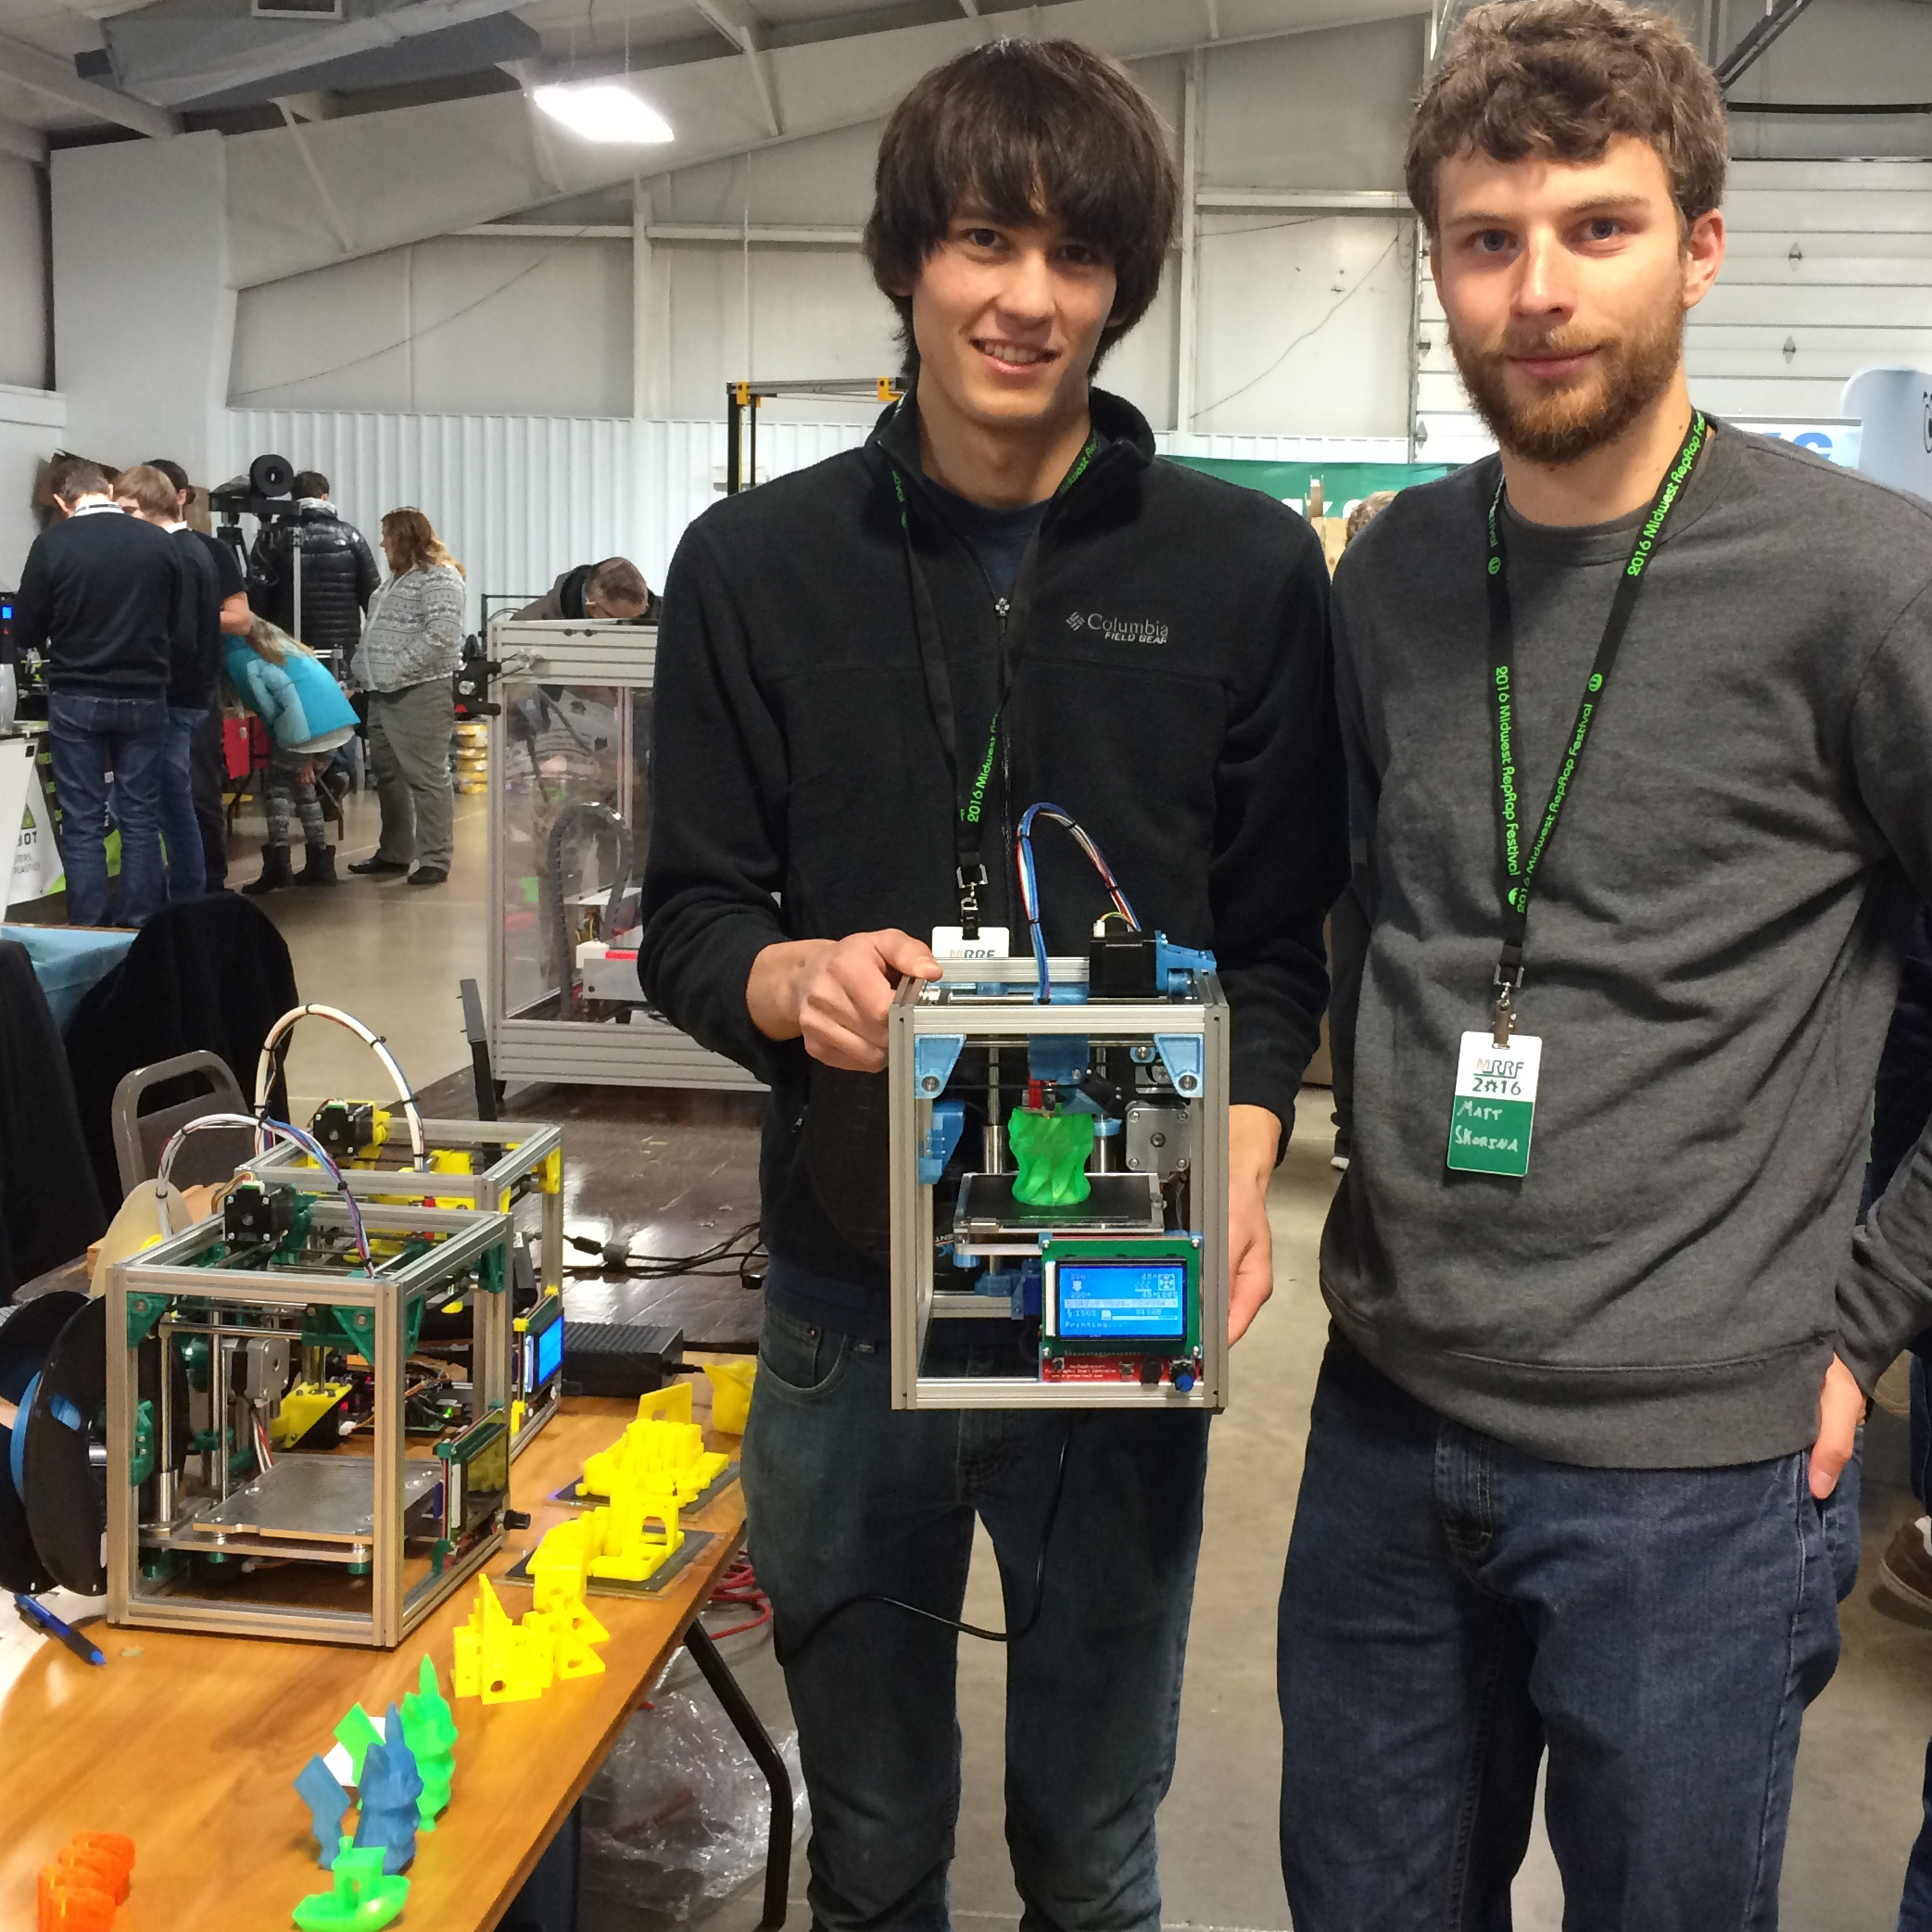
Patrick and Matt hold a running Kitten Printer. The frame is stiff enough that the printer can be held or turned upside down and it can keep printing without visible defects in the print.
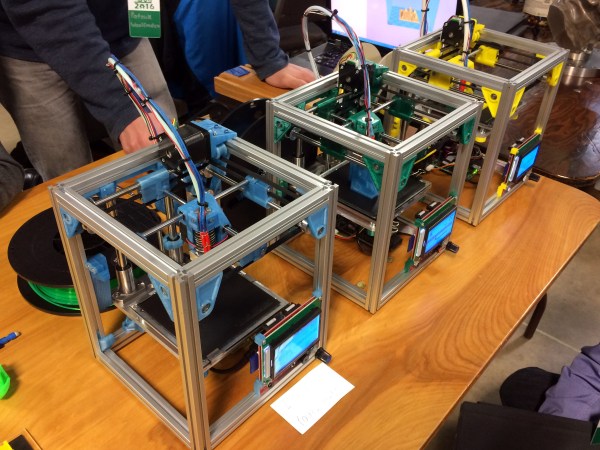
[Patrick] and [Matt] have been coming to the Midwest RepRap Festival from Minneapolis for the past few years and bringing their trusty Tantillus printers with them. However, sometime between this year and the last [Patrick] decided that it would be really fun to make his own 3D printer, and liking the size and accuracy of the Tantillus, started there.
The adorably sized printer is adorably named too: Kitten 3D printer. The printer is certainly an enthusiast’s choice. It’s expensive at 1200 and small, but very well made. Its one big advantage? It prints really accurate parts.
The Tantillus also printed well, but the extruder left a lot to be desired, and the low stretch fishing line movement was very difficult to get tensioned just right. The secret behind the Tantillus and Kitten’s great print quality, aside from good design, is the small xy movement and low weight of the extruder set-ups. By having a movement over a very small range, cumulative errors in construction never get to add up. Also vibrations are less likely to show and smaller moments on the joints mean less flex at the extremes of the movements.
Really stunning print quality almost entirely free of ringing and z-wobble. 100mm x 100mm tray. These are very small parts.
[Patrick] is a mechanical engineer for his day job, and since this was a just for fun printer, he cut no corners. The frame is made with Misumi extrusions and linear movements. The build plate sits on a machined aluminum plate. It’s not flexing or going anywhere.
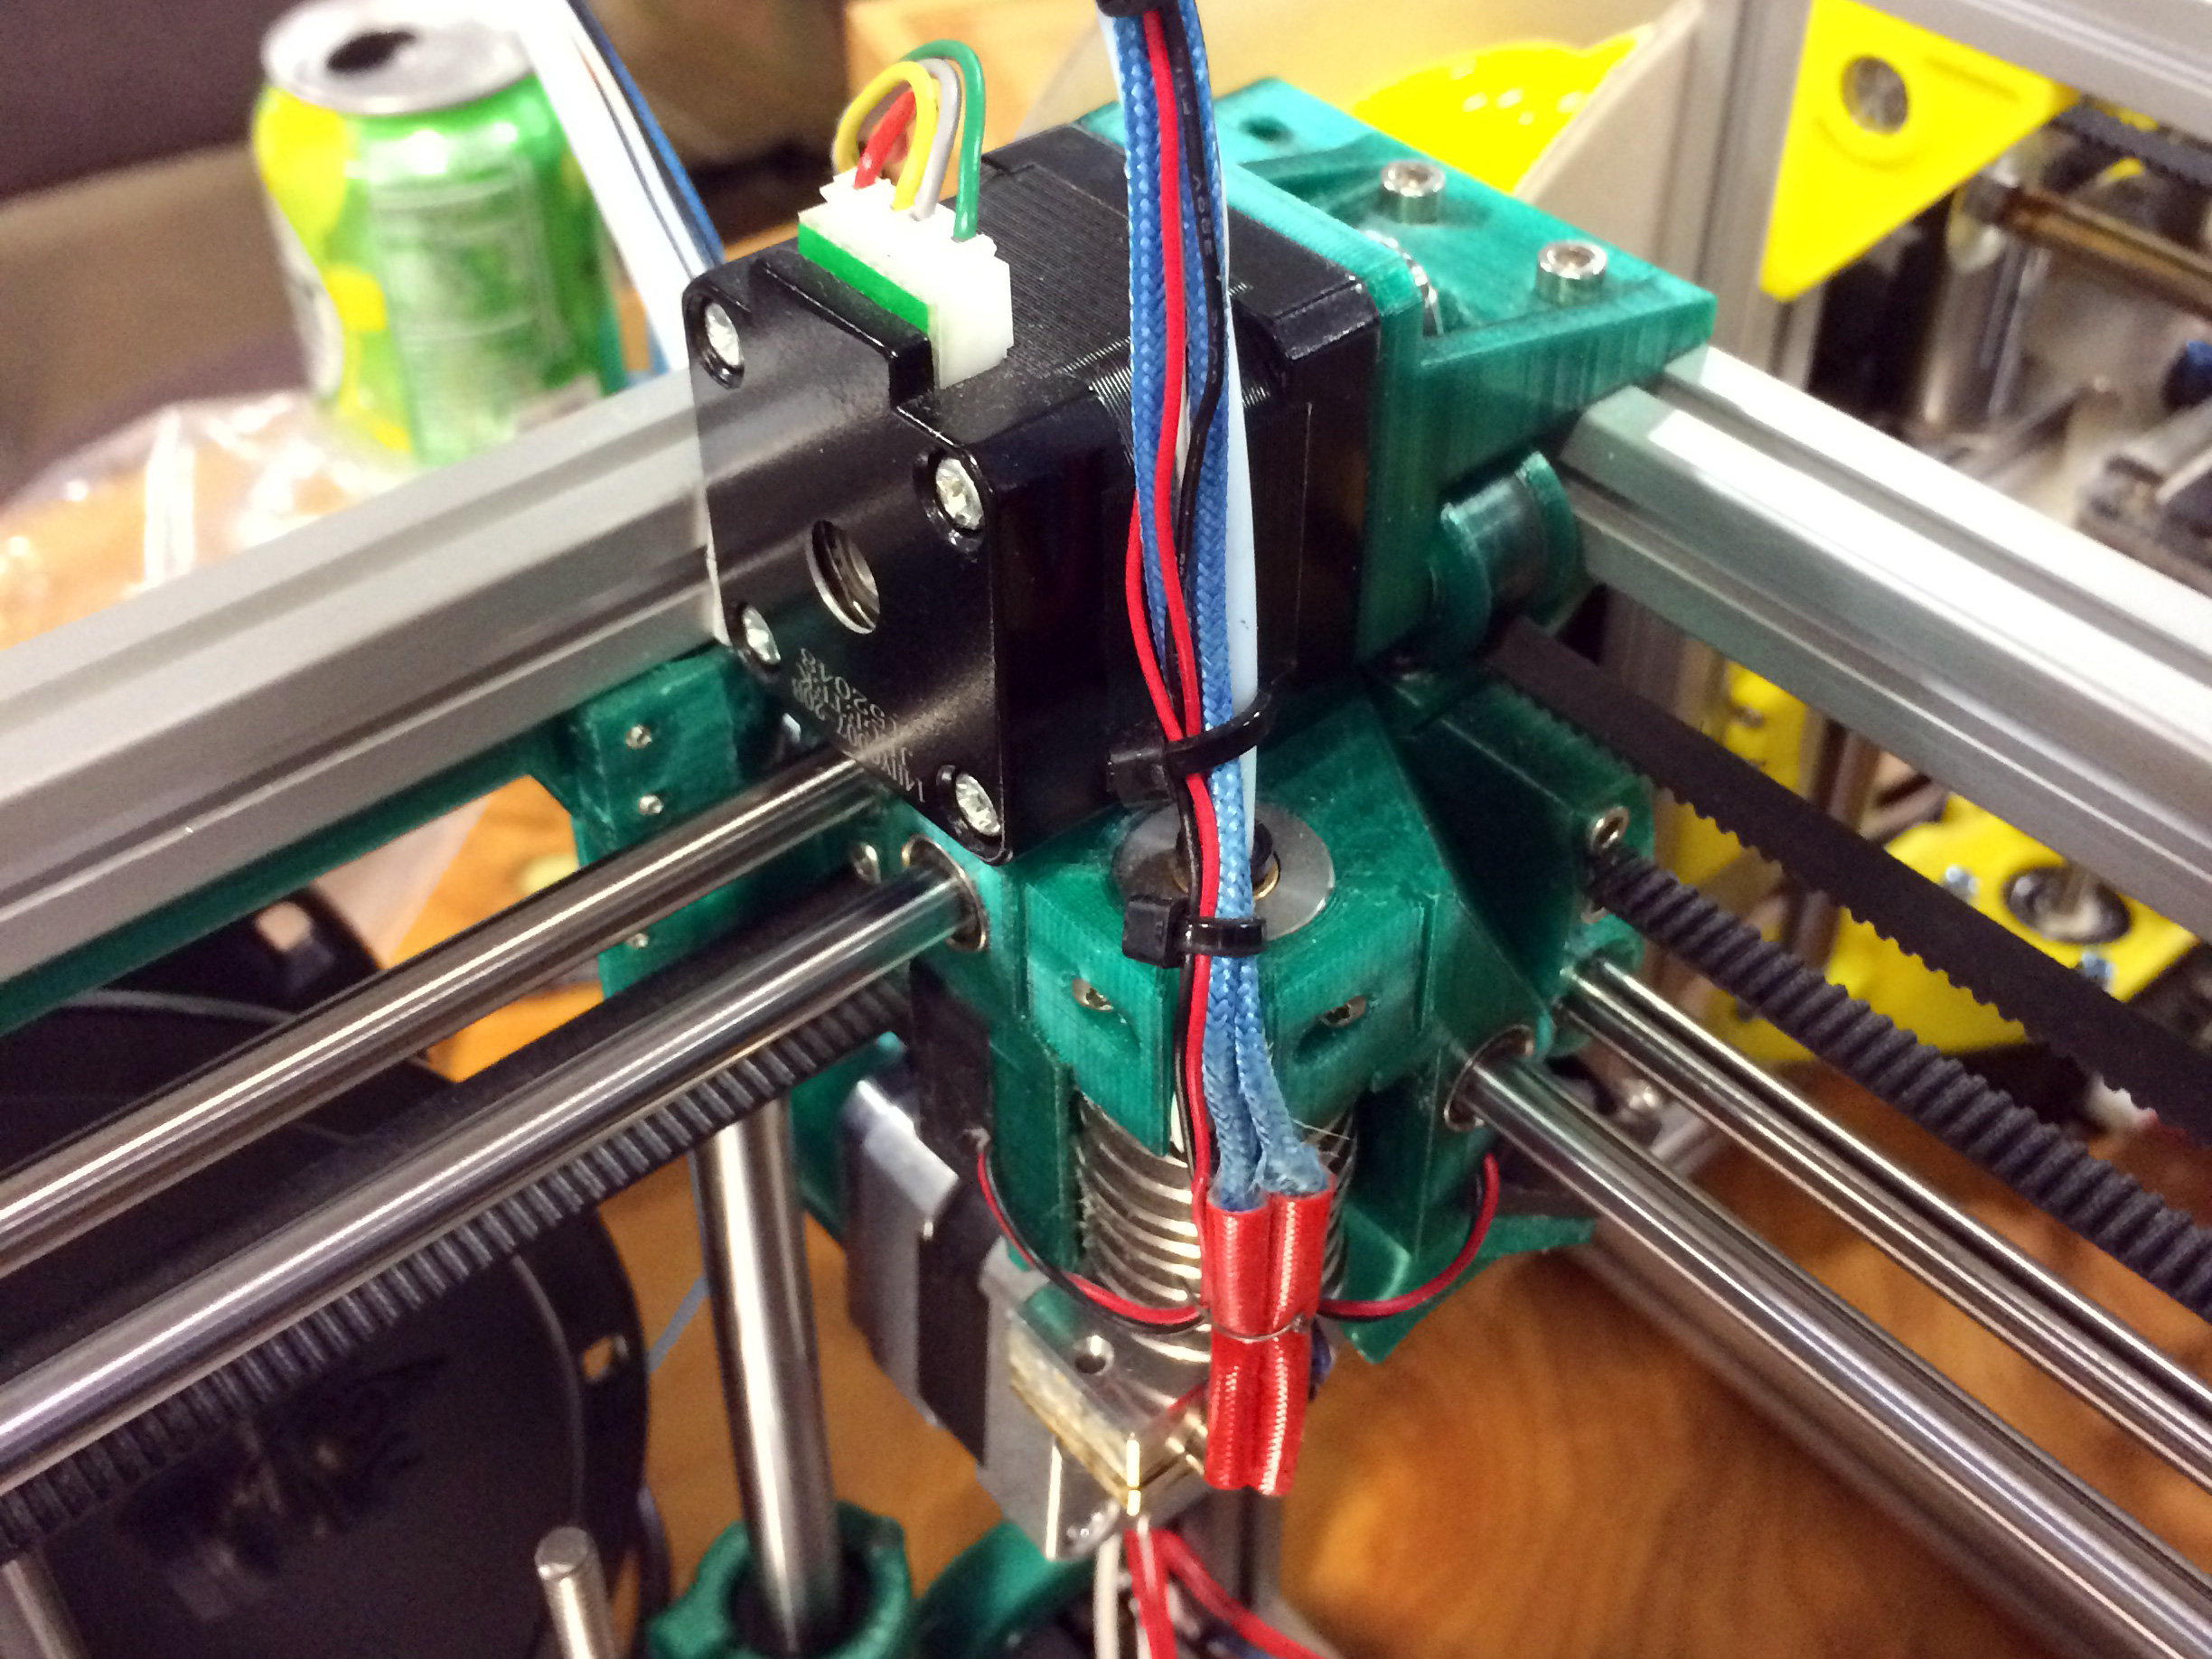
Part of what really stood out to me about the printer are a lot of neat little features which show careful thought. For example, the extruder movement sits neatly under one of the motors. All the parts except for one can be printed inside its build envelope without support. It uses around 200g of plastic. Every axis is constrained just enough, rather than the common tendency to over constrain that plagues 3D printer design. The spec sheet reads like my printer part wishlist: Bondtech extruder, Rambo board, E3d nozzle, heated bed, flat borosilicate build plate, name brand linear movements, and a well designed Z.
The entire extruder assembly tucks under one of the XY motors at the corner of its movement. Compare its size to the size of a NEMA14 stepper motor.
Another interesting aspect of the design is the extremely light extruder assembly. The lighter an extruder can get, the less ringing will show in your parts at speed. This is one of the most compact designs I’ve witnessed. It consists of two fans, an E3d v6 lite nozzle, and two small linear bearings. The cold end is handled by a bowden set-up and a Bondtech extruder at the back of the printer. The only way to get it lighter would be a different nozzle, such as the upcoming insanely light 13g Pico from B3 unveiled at the festival. I was also interested to see that the bearings on the supporting rails were printed bushings to keep the weight even lower. [nop head] has tested these extensively, they should be fine as long as the rods have a good finish.
I’ve mentioned the size before, but it’s hard to grasp just how adorable this printer is without seeing it. The build envelope is 100mm x 100mm x 100mm, the printer itself is 200mm x 200mm x 240mm. That’s only 50mm wider than the build footprint. It’s a really fun design just to look at and see how they fit it all in there. There are lots of neat little tricks with belt routing and part design to get it all right.
For the enthusiast this would make a good small parts printer and travel printer. However, for me, it was neat to see people still setting out to try designing their own printer. In some ways the 3d printer movement has become crowded with Chinese knock-offs, and I was excited to see something new at the festival. It wasn’t the only new printer design there, but it stood out to me the most. I like the uncompromising nature of it, many people try to design for the lowest BOM and not the nicer print. There are still lots of low-hanging fruit in the 3d printer world and many of them are just getting the mechanics right.
PLA Bushing
Seriously serious Z.
[Patrick] and [Matt] came to the festival with their printer to see if people would like it. They didn’t have grand dreams of selling tons of printers and making millions. They were quite aware that their price point and the small size made it not for everyone. However, their table always had a small crowd. They just really like 3D printers, and that honesty resonated. They didn’t even have a website up at the start of the convention, but by the end they had gotten so many requests they had to oblige. They expect to have 3 kit options available by the end of April. If you’re interested there’s a mailing list sign up on their website. Let’s hope we see them at MRRF again next year with another cool design to look over.
 The typical hacker can never say no to more tools. And when it comes to clamps, one just can’t have enough of them. From holding small PCB’s to clamping together large sheets of plywood, you need a variety of sizes and quantities. So it would be pretty neat if we could just 3D print them whenever needed. [Mgx3d] has done that by designing 3D printable bar clamp jaws with a quick release mechanism that can be used with standard T-slot aluminum extrusion. This allows you to create ad-hoc bar clamps of any size and length quickly.