Building A Modern Retro Console

There are a few dozen classic re-imaginings of classic game consoles, using hardware ranging from the ATMegas of the Uzebox to everyone’s favorite, stuffing some ROMs on a Raspi and calling it a day. You don’t necessarily learn anything doing that, which puts [Mike]’s custom game console head and shoulders above the rest.

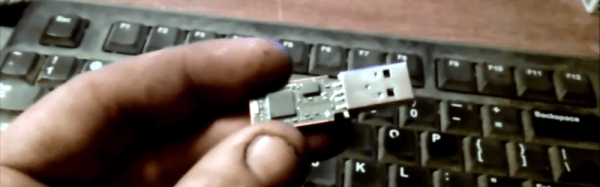
The build started off as a plan for a Z80 computer with a dual ATMega GPU. He progressed far enough in the design where it would have been a masterpiece, but the inability to mill double-sided boards at home killed the design. Plans then moved on to an FPGA, then to an ATMega with the Analog Device AD725 PAL/NTSC encoder chip. That idea had a similar architecture to the Uzebox, but [Mike] wanted more power. He eventually settled on a PIC32 with the AD725.

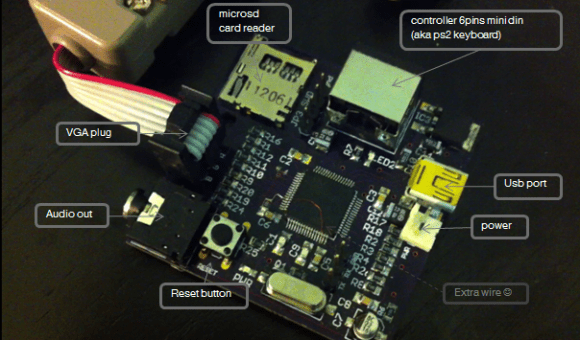
This setup was capable of pumping out some impressive graphics, but for moving bits to a screen, you need DMA. [Mike] ran into a problem where the DMA timer runs at a maximum rate of 3.7 MHz. It’s a problem documented in a few projects, leading [Mike] to change his plan once again, this time to the STM32F4.

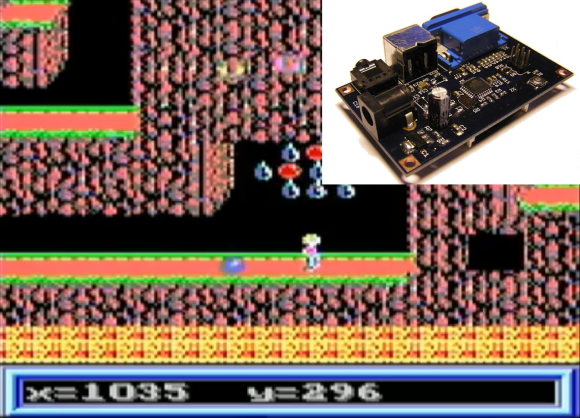
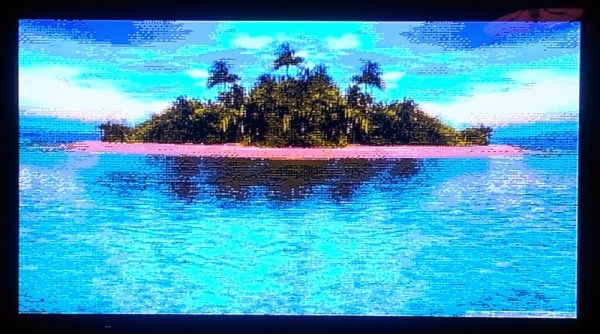
The bugs are worked out, and now [Mike] can stream a whole lot of pixels to a screen while still having some processing power left over to play a game. It’s a project that’s more than a year and a half old at this point, and so far he’s learned a lot.

Sega Controller Hack Updated For Windows Auto-Launch

Who knew that modern versions of Windows have nixed the option to auto-launch when a USB drive is inserted? Not a big deal unless, like [sonicdude10], you want to base a hack on the behavior. He did find a workaround and recently built a Sega Controller emulator to autoplay on Windows computers.

The bulk of the hack was inspired by a Sega Emulator built in a controller which he saw on Hackaday a couple of years back. It’s simply a Sega-like USB gamepad which has a hub and thumb drive internalized. The hardware changes on [sonicdude10’s] version gets rid of the old thumb drive and replaces it with one that supports U3. This is a hardware emulation trick supported by some USB drives which allows them to enumerate as CD drives instead of USB mass storage. Autoplay for CD drives is still functional in Windows.

We’ve heard a bit about U3 over the years. There was a now-dead hack covered all the way back in 2006. And we even found a comment suggesting its use for USB-based game emulators. [sonicdude10] points to two useful tools that let him customize how U3 performs. u3_tool is a multitool for tweaking how the hardware behaves, u3-autorun makes customization of the auto-launching app a snap.

Continue reading “Sega Controller Hack Updated For Windows Auto-Launch”

Demystifying NTSC Color And Progressive Scan

NTSC

Black and white NTSC is simple – it can, and was, done with vacuum tubes for a long, long time. Color is just weird, though. It runs at 29.976 frames per second, uses different phases of the carrier for different colors, and generally takes a while to wrap your head around. [Sagar] is doing a series on the intricacies of NTSC, and the latest post deals with color and progressive scanning versus interlacing, or as it is better known, how classic game consoles and home computers generate video.

The test bed for [Sagar]’s video experimentations is a circuit containing an ATMega16, a 4-bit shift register, and a 14.31818 MHz clock. This clock is much faster than the 3.579545 MHz clock in an NTSC carrier frequency – exactly four times as fast – allowing the shift register to output four different phases of the carrier frequency a 0°, 90°. 180°, and 270°. Playing with some of the pins on the ATMega in the circuit results in a palette being generated on any old TV.

NTSC requires interlaced scanning, or sending an entire screen of even lines, then an entire screen of odd lines, at around 60 fields per second. The Nintendos and Segas of yesteryear didn’t bother with this, instead opting to send half the vertical resolution at double the frame rate. This is known as a progressive scan. [Sagar] found that this resulted in some image artifacts when displayed on a modern LCD, and moving back to an interlaced mode fixed the problem. All the code and files are up on the gits. If you’re feeling adventurous, this is exactly how projects like the Uzebox have created homebrew game consoles using little more than the ATMega found in [Sagar]’s build.

Update From Wayback: AVGA Reborn As RetroWiz

retrowiz-vga-avr-gaming-system

This one has been a long time coming. We’re finally seeing an update to [Jaromir’s] retro gaming platform based around and ATmega chip. The thing that was novel about it back in 2009, and continues to be to this day, is the use of VGA output (PAL) from an AVR chip rather than composite video like most offerings.

Good projects never die and recently he picked the hardware up again, spinning a mostly surface mount board and putting together a new website to feature his work. Above you can see a demo of Commander Keen 4 running on the hardware (video below). He’s also has a rather trippy Super Mario port and adapted [Albert Seward’s] PacMan source for the hardware.

The chip is being clocked at 32MHz with VGA clock running at 19.6608 MHz. This gives him sixteen colors with a resolution of 192×144. He concedes that you get better resolution out of composite video, but who needs resolution for retro gaming?

Continue reading “Update From Wayback: AVGA Reborn As RetroWiz”

Hackaday Links: September 29, 2013

hackaday-links-chain

We would be remiss if we didn’t mention that all of SparkFun’s open source hardware is now on Upverter.

Not wanting to tie up an iPad as a mini-gaming cabinet [Hartmut] hacked an Arcadi cabinet to use EUzebox instead.

Time travel happens in the bedroom as well. But only if you have your very own Tardis entrance.  [AlmostUseful] pulled this off with just a bit of word trim and a very nice paint job. [via Reddit]

[Pierre] tricks an iPhone fingerprint scanner by making a replica out of hot glue.

Some of the guys from our parent company were over in Shanghai on business. [Aleksandar Bradic] made time to visit the Shanghai hackerspace while in town and wrote about the experience over on their engineering blog.

[Gregory Charvat] is a busy guy. In fact we’ve got a juicy hack of his saved up that we still need to wrap our minds around before featuring. In the mean time check out the Intern-built coffee can radar that he took over and tested on a  multi-million dollar Spherical Near Field Range.

And finally, everyone loves coffee hacks, right? Here’s what [Manos] calls a Greek style instant coffee machine.

The Bitbox Console: An Open Source Gaming Rig

Bitbox Console

A simple resistive DAC is all you need to drive a VGA display. Combining that with an on-chip DAC for audio, the STM32F405RGT6 looks like a good choice for a DIY game console. [Makapuf’s] Bitbox console is a single chip gaming machine based on the STM32 ARM processor.

We’ve seen some DIY consoles in the past. The Uzebox is a popular 8 bit open source game system, and [makapuf] was inspired by its design. His console’s use of a more powerful 32 bit processor will allow for more complex games. It will also provide more colors and higher quality audio.

One of the keys of the Uzebox’s success is the development tools around it. There’s a full emulator which allows for debugging with GDB. [Makapuf] has already built an SDL based emulator, and can debug the target remotely using GDB. This will certainly speed up game development.

After the break, check out a demo of the first game for the Bitbox: JUMP. Also be sure to read through [makapuf]’s blog for detailed information on the build.

Continue reading “The Bitbox Console: An Open Source Gaming Rig”

Controlling Raspberry Pi Expansion Pins With A Web Interface

For the lucky few who have a Raspberry Pi board in their hands, you can now use the GPIO pins as a web interface (German, google translation). [Chris] is turning this magical board is turning a small device that can play 1080p video into something that can blink LEDs via the web.

The build started with an example of driving GPIO pins under Linux. [Chris] cobbled together a bit of PHP and Javascript on the Raspberry pi. Whenever he goes to the website hosted on the Pi, he’s greeted with the status and direction of a couple of expansion IO pins.

On a semi-related note, [Tony] is building a GPIO MIDI interface for his Pi. Yes, he could just get a USB to MIDI adapter and call it a day, but this is a far more professional looking solution to all the MIDI goodness the RasPi will deliver. If you’ve got any info on other RasPi breakout boards you’ve seen, send them in on the tip line.