Espresso Machine Now Powers Plants

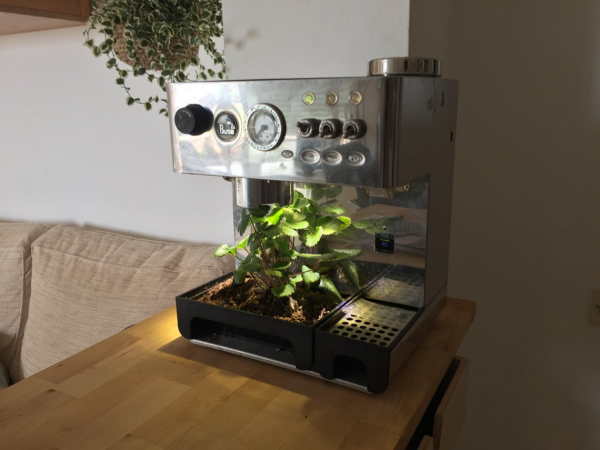
This thing has what plants crave! No, not electrolytes exactly — just water, light, and moisture polling every 30 minutes. We think it’s fitting to take something that once manufactured liquid liveliness for humans and turn it into a smart garden that does the same thing for plants.

So let’s just get this out of the way: the espresso machine was abandoned because it was leaking water from a gasket. [The Plant Bot] cleaned it up, replaced the gasket, and got it brewing, and then it started leaking hot water again from the same gasket. We might have gone Office Space on this beautiful machine at that point, but not [The Plant Bot].

Down in the dirt, there’s a soil moisture sensor that’s polling every 30 minutes. If the moisture level falls below the threshold set appropriately at a life-sustaining 42%, the Arduino is triggered to water the plant through a relay board using the espresso machine’s original pump. If the plant is dry, the machine will pump water for two seconds every minute until the threshold is met. [The Plant Bot] tied it all together with a nice web interface that shows plant data and allows for changes over Bluetooth.

[The Plant Bot] started by disconnecting the heating element, because plants don’t tend to like hot steam. But if the cup warming tray along the top has a separate heating element, it might be neat to reuse it for something like growing mushrooms, or maintaining a sourdough starter if the temperature is right.

Via r/duino

Introducing The XFM2: A New FM Synthesizer Board

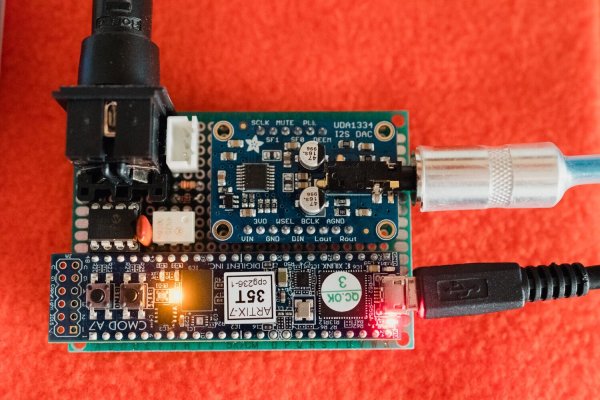
[René Ceballos] contacted us about the new XFM2 FM synthesizer board, successor to the XFM that we covered on Hackaday last year. In addition to changing FPGAs from a Spartan 6 to an Artix-7 35, the DAC was also upgraded from 16 to 24 bits. Since the project is based around two easily available boards for the FPGA and DAC functionality, it is something that should be easy for anyone to recreate.https://images.squarespace-cdn.com/content/v1/5d2c7309e3281e0001ef5655/1580208742008-DDG6FHLVST9DTOU5YDV7/ke17ZwdGBToddI8pDm48kIzPiMR3_Rs2gge4hyoameUUqsxRUqqbr1mOJYKfIPR7LoDQ9mXPOjoJoqy81S2I8N_N4V1vUb5AoIIIbLZhVYxCRW4BPu10St3TBAUQYVKc8LXFP3nIOov1DiYlxUpn2kjauiJB9jSbs9pkYnnzvQkOGqqUmgmVAUPjW85v7F78/xfm2.PNG?format=1500w

The project consists of a lower board that features the opto-isolated MIDI-input port, a 24LC1025 EEPROM, and a few passives, on top of which are mounted the Adafruit UDA1334A-based I2S decoder board and a Digilent Cmod A7-35T, containing the Xilinx XC7A35T-1CPG236C Artix-7 FPGA. [René] has made a schematic and BOM available on the XFM2 page. Total part cost should be about $99.

A user manual, installation guide, and the binaries that have to be loaded into the FPGA – using the provided instructions – are all made available. Unfortunately no HDL source is provided, but that shouldn’t take away from the fun of assembling an FM synthesizer board like this.

[René ] said that based on the feedback to the XFM project, he is now working on a visual user interface for the board. Once this is all working and depending on the feedback from XFM2 users, he may decide to start a crowdfunding campaign.

Restoring The Coolest Laptop Ever

Well-seasoned readers will no doubt remember GRiD laptops, the once and always tacti-cool computers that dominated the military market for decades. GRiDs were the first laptops to go to space, and they were coveted for their sleek (for the time) good looks and reputation as indestructible machines.

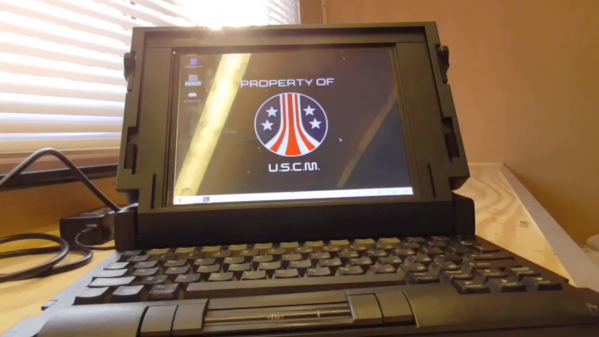
The GRiDs went through many iterations, and even though their military roots make them nearly unobtanium, [Simon] scored a GRiD laptop and set about restoring it. His theme was the 1986 movie Aliens, which featured a few GRiD Compass computers as props. [Simon]’s 1550SX came a little later than the Compass 2, but documents with the machine reveal it was a Royal Air Force machine that had been deemed unserviceable for reasons unknown.

[Simon] carefully tore it down – pay close attention to the video below and you’ll hear the telltale plink of the magnesium case parts rather than the dull thud of plastic; they don’t make them like that anymore – and cleaned it up. He replaced the original display with a PiMoroni 10″ retro game display to keep the original 4:3 aspect ratio. A Raspberry Pi 4 went inside, along with a Teensy to take care of adapting the GRiD keyboard to USB and lighting up some front-panel LEDs. A second Teeny allows the original IsoPoint mouse to be used, which is a real gem. With the addition of appropriate graphics, the machine looks like it would be at home on a Colonial Marines dropship.

We love the retro feel of [Simon]’s build, and the movie nostalgia. We’re just glad he didn’t include a LiPo battery, which might not get along with the magnesium case. Game over, man!

Continue reading “Restoring The Coolest Laptop Ever”

How To Slice Lightweight Aircraft Parts For 3D Printing

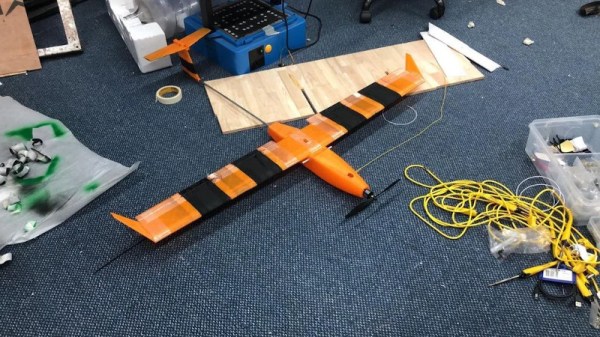
Historically, remote control aircraft were produced much like their early full-sized counterparts. Wooden structures were covered with adhesives and taut fabric membranes. Other techniques later came to the fore, with builders looking to foam and other materials. Of course, these days 3D printers are all the rage, so perhaps one can simply print out a whole plane? As [sahevaantaneja] discovered, it’s not that easy!

One of the foremost problems is the process of slicing. This is where 3D geometry is transformed into the G-code which defines the path taken by the 3D printer during production of a component. Slicer software is generally optimised for working with mostly-solid objects, and some tweaks can be required when working with thin-walled designs.

These challenges come to bear with an aircraft design, which, by necessity must be lightweight. [sahevaantaneja] does a great job of explaining the journey of discovery in which their design was optimised to work with conventional slicers. This allowed the various components to be printed without errors, while retaining their strength to survive in flight.

The design was successful in test flights –  a great reward after much experimentation. We’ve seen other 3D printed designs take flight, too. Video after the break.

Continue reading “How To Slice Lightweight Aircraft Parts For 3D Printing”

Arkanoid Clock Is Exactly What It Sounds Like

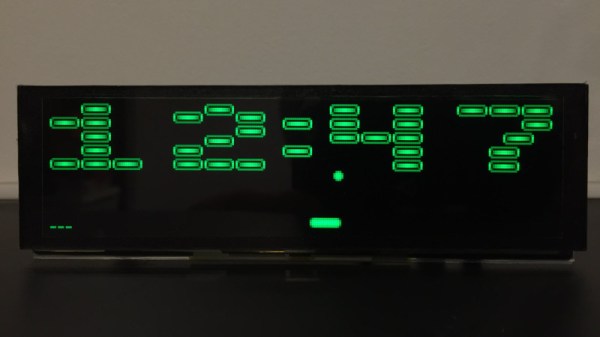
A clock can be a simple device that keeps you aware of the current time, but it can also be so much more. It can express an aesthetic ideal from yesteryear, or be a throwback to a popular cultural touchstone. It can even be both, in the case of the brilliant Arkaclock from [Victor Serrano].

The build started when [Victor] wished to create an old-school arcade-style game. Aiming to work with limited hardware, just like the pioneers, he settled on using the PIC18F86K22, with less than 4KB of RAM and just 64KB of program space to play with. Hooked up to a 256 x 64 OLED screen with a pleasant green glow, he set about recreating Arkanoid in assembly language.

With this done, [Victor] noted that the retro-looking display was rather pleasant. At this point, the device was repurposed into a clock, with the program generating an Arkanoid level in the shape of the current time. The AI would then play the game, destroying the bricks each minute before the level changed.

It’s an excellent timepiece, and one that would be perfect for the wall of any indie game studio. Other retro games make for great clocks, too. Video after the break.

Continue reading “Arkanoid Clock Is Exactly What It Sounds Like”

Steel Pegboard Makes For A Tidy Charging Station

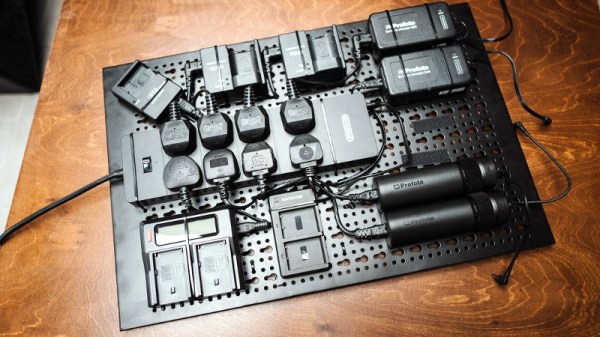
Do you have a bunch of electronic devices that all have different styles of chargers and batteries? Of course you do, so does everyone else. While there’s been some headway made towards standardizing on USB (and more recently, USB-C) for charging, there are still plenty of gadgets out there that march to the beat of their own DC adapter. For all those devices, [Tom Barnes] has a tip for making a cheap and easy centralized charging station.

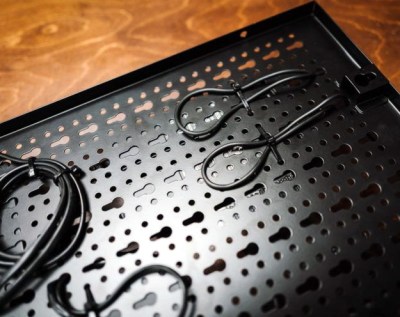
The idea is to get a power strip, ideally one that has a switch on it, and use zip ties to attach it to a piece of pegboard. [Tom] used a nice black steel board which is obviously very strong and shouldn’t be bothered by any potentially high temperatures, but you could get away with the hardware store MDF variety if you had to.

All your chargers, mounted around the periphery of the board with Velcro hook and loop fasteners, have their individual power cords run through to the back of the board where they are nearly routed and zip tied. This is where using the steel pegboard really helped, as it has a lip around the edge that makes a void for all the wires to be run through when hung on the wall. If your particular flavor of pegboard doesn’t have that space behind it, you’d either have to settle for running the wires across the front or build out your own space in the back using a wooden frame.

Even in our high-tech world, no shop is truly complete without pegboard. Whether you’re using it to vertically mount your development boards, or pushing it around on wheels to keep your tools close at hand, there’s no shortage of ways to use this versatile material.

Software Defined Everything With Mike Ossmann And Kate Temkin

Software defined radio has become a staple of the RF tinkerer, but it’s likely that very few of us have ever taken their software defined toolchain outside the bounds of radio. It’s an area explored by Mike Ossmann and Kate Temkin in their newly published Supercon talk as they use GNU Radio to do some things that you might find unexpected.

For most people, a software defined radio is a device. An RTL-SDR dongle perhaps, or the HackRF that a popular multi-tool for working in the radio frequency realm. But as they explain, the SDR hardware can be considered merely as the analogue front end, being just the minimal analogue circuitry coupled with a digitiser. The real software-defined part comes — as you might expect — in the software

Kate and Mike introduce GNU Radio Companion — the graphical UI for GNU Radio — as their tool of choice and praise it’s use as a general purpose digital signal processing system whether or not that includes radio. Taking their own Great Scott Gadgets GreatFET One USB hackers toolkit peripheral as an input device they demonstrate this by analysing the output from a light sensor. Instantly they can analyse the mains frequency in a frequency-domain plot, and the pulse frequency of the LEDs. But their bag of tricks goes much deeper, exploring multiple “atypical use cases” that unlock a whole new world through creative digital signal processing (DSP).

Continue reading “Software Defined Everything With Mike Ossmann And Kate Temkin”