Many a gamer has found that after a few years of racing around the track or sending demons back from whence they came, the analog sticks on their trusty controller can start to drift around. Many times it’s a fairly minor problem, something you might only notice if you were really keeping an eye out for it, but it can definitely be annoying. Those handy with a soldering iron might just swap out the sticks for replacements once it gets to that point, but [Taylor Burley] wondered how difficult it would be to recalibrate the ailing sticks instead.
 To be clear, [Taylor] acknowledges this approach is overkill. It would be cheaper and easier to just replace the drifting stick with a new one. Even if you take into account that new sticks might not be as high quality as the originals and could give up the ghost faster, this probably isn’t worth the effort. But that doesn’t mean it’s not an interesting hack.
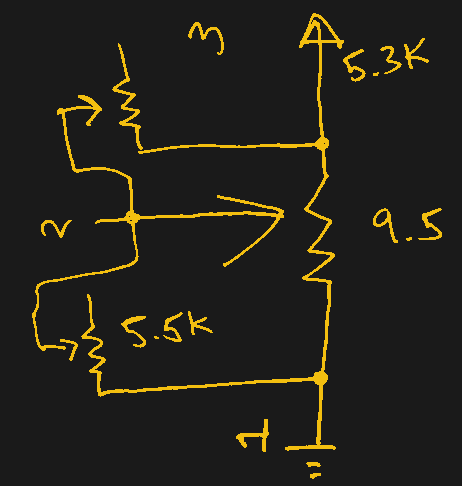
In the video after the break, [Taylor] starts by explaining how stick drift occurs in the first place. Each axis of the stick is physically connected to the wiper of a potentiometer, so for 10K pots, the stick’s center point should correspond to a resistance of 5K. He then goes on to measure the resistance in a bad joystick, and sure enough, the center resistance is off by several hundred Ohms.
To fix this, he comes up with a simple circuit that places additional potentiometers between the wipers. With two joysticks and two adjustment pots per axis, that makes eight little adjustment wheels that need to be fiddled with to get the center points calibrated properly. In this case [Taylor] uses a controller diagnostic tool for the Xbox to quantify the impact his adjustments are making so he can dial it in perfectly, but the idea is the same no matter who’s logo is on the box.
We’d say this is the most overkill attempt at addressing the issue of stick drift on gaming controllers we’ve ever seen, but that title has to go to [Matteo Pisani], who replaced the analog stick on his Switch Joy-Con with a custom circular touchpad.
Continue reading “Xbox Controller Mod Gets Serious About Stick Drift”