While concerns over COVID-19 probably kept many a guest room empty this Thanksgiving, things were a little different aboard the International Space Station. The four-seat SpaceX Crew Dragon is able to carry one more occupant to the orbiting outpost than the Russian Soyuz, which has lead to a somewhat awkward sleeping arrangement: there are currently seven people aboard a Station that only has six crew cabins. To remedy the situation, Commander Michael Hopkins has decided to sleep inside the Crew Dragon itself, technically giving himself the most spacious personal accommodations on the Station. This might seem a little hokey, but it’s actually not without precedent; when the Shuttle used to dock with the ISS, the Commander would customarily sleep in the cockpit so they would be ready to handle any potential emergency.
Speaking of off-world visitation, the Hayabusa2 spacecraft is nearly home after six years in space. It won’t be staying long though, the deep-space probe is only in the neighborhood to drop off a sample of material collected from the asteroid Ryugu. If all goes according to plan, the small capsule carrying the samples will renter the atmosphere and land in the South Australian desert on December 6th, while Hayabusa2 heads back into the black for an extended mission that would have it chasing down new asteroids into the 2030s.
Moving on to a story that almost certainly didn’t come from space, a crew from the Utah Division of Wildlife Resources recently discovered a strange metal monolith hidden in the desert. While authorities were careful not to disclose the exact coordinates of the object, it didn’t take Internet sleuths long to determine its location, in part thanks to radar data that allowed them to plot the flight path of a government helicopters. Up close inspections that popped up on social media revealed that the object seemed to be hollow, was held together with rivets, and was likely made of aluminum. It’s almost certainly a guerrilla art piece, though there are also theories that it could have been a movie or TV prop (several productions are known to have filmed nearby) or even some kind of military IR/radar target. We may never know for sure though, as the object disappeared soon after.
Even if you’re not a fan of Apple, it’s hard not to be interested in the company’s new M1 chip. Hackers have been clamoring for more ARM laptops and desktops for years, and with such a major player getting in the game, it’s only a matter of time before we start seeing less luxurious brands taking the idea seriously. After the recent discovery that the ARM version of Ubuntu can run on the new M1 Macs with a simple virtualization layer, it looks like we won’t have to wait too long before folks start chipping away at the Walled Garden.
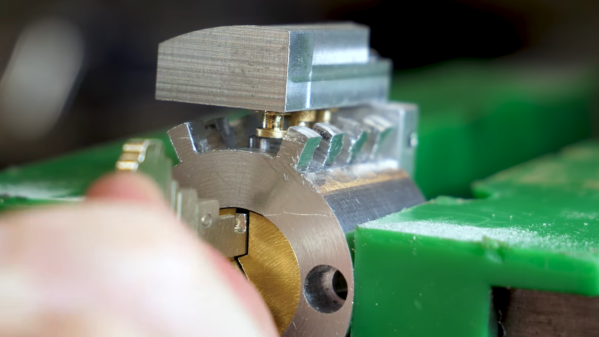
In the market for a three phase servo controller? A reader who’s working on a robotics project worth as much as a nice house recently wrote in to tell us about an imported driver that goes for just $35. Technically it’s designed for driving stepper motors, but it can also (somewhat inefficiently) run servos. Our informant tells us that you’d pay at least $2,000 for a similar servo driver from Allen-Bradley, so the price difference certainly seems to make up for the hit in performance.
Finally, some bittersweet news as we’ve recently learned that Universal Radio is closing. After nearly 40 years, proprietors Fred and Barbara Osterman have decided it’s time to start winding things down. The physical store in Worthington, Ohio will be shuttered on Monday, but the online site will remain up for awhile longer to sell off the remaining stock. The Ostermans have generously supported many radio clubs and organizations over the years, and they’ll certainly be missed. Still, it’s a well-deserved retirement and the community wishes them the best.