If you’re reading this article on a desktop or laptop computer, you’re probably staring at millions of pixels on a TFT LCD display. TFT became a dominant technology due to its picture quality and fast response times, but it’s not the only way to build an LCD. There are cheaper technologies, such as STN and its color variant, CSTN. They’re rarely used nowadays, but [Wenting Zhang] had one lying around and wanted to take a crack at driving it.
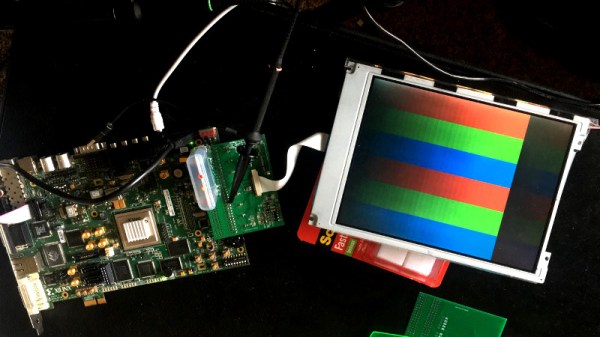
The screen in question came courtesy of a 20th century laptop. It’s a Hitachi SX21V001-Z4, with a resolution of 640×480 pixels. Driver boards for CSTN screens were once readily available, however now such things are difficult to come by.
[Wenting] instead grabbed an FPGA and got to work. Driving displays can be taxing for small microcontrollers, so an FPGA is always a great choice when working on such projects. They’re easily capable of generating whatever weird and wacky signals are required, and can generate many such signals in parallel without breaking a sweat.
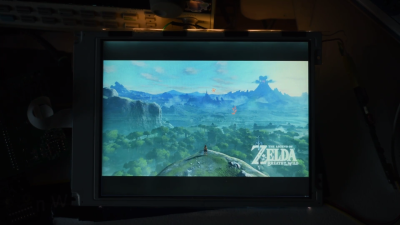
[Wenting] successfully got the screen up and running, and hooked up to a VGA input. Image quality is surprisingly passable for still images, though things absolutely go to pieces when motion is introduced. [Wenting]’s demo shows off the screen playing Breath of the Wild, and it’s a great showcase of how far technology has come since the mid-90s.
Driving strange LCDs is a hacker rite of passage, and we see plenty of efforts around these parts. Video after the break.