Responsive LCD Backlights With A Little Lateral Thinking

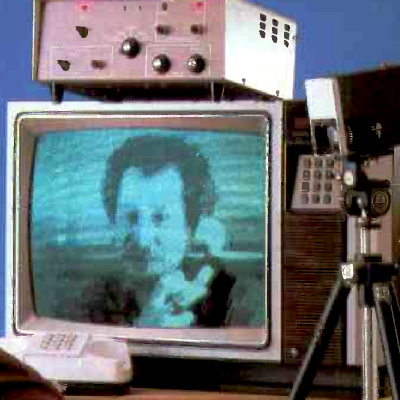
LCD televisions are a technological miracle, but if they have an annoying side it’s that some of them are a bit lacklustre when it comes to displaying black. [Mousa] has a solution, involving a small LCD and a bit of lateral thinking.

These screens work by the LCD panel being placed in front of a bright backlight, and only letting light through at bright parts of the picture. Since LCD isn’t a perfect attenuator, some of the light can make its way through, resulting in those less than perfect blacks. More recent screens replace the bright white backlight with an array of LEDs that light up with the image, but the electronics to make that happen are not exactly trivial.

The solution? Find a small LCD panel and feed it from the same HDMI source as a big panel. Then place an array of LDRs on the front of the small LCD, driving an array of white LEDs through transistor drivers to make a new responsive backlight. We’re not sure we’d go to all this trouble, but it certainly looks quite cool as you can see below the break.

This may be the first responsive backlight we’ve brought you, but more than one Ambilight clone has graced these pages.

Continue reading “Responsive LCD Backlights With A Little Lateral Thinking”

FLOSS Weekly Episode 790: Better Bash Scripting With Amber

This week Jonathan Bennett and Dan Lynch chat with Paweł Karaś about Amber, a modern scripting language that compiles into a Bash script. Want to write scripts with built-in error handling, or prefer strongly typed languages? Amber may be for you!

Continue reading “FLOSS Weekly Episode 790: Better Bash Scripting With Amber”

USB And The Myth Of 500 Milliamps

If you’re designing a universal port, you will be expected to provide power. This was a lesson learned in the times of LPT and COM ports, where factory-made peripherals and DIY boards alike had to pull peculiar tricks to get a few milliamps, often tapping data lines. Do it wrong, and a port will burn up – in the best case, it’ll be your port, in worst case, ports of a number of your customers.

Want a single-cable device on a COM port? You might end up doing something like this.

Having a dedicated power rail on your connector simply solves this problem. We might’ve never gotten DB-11 and DB-27, but we did eventually get USB, with one of its four pins dedicated to a 5 V power rail. I vividly remember seeing my first USB port, on the side of a Thinkpad 390E that my dad bought in 2000s – I was eight years old at the time. It was merely USB 1.0, and yet, while I never got to properly make use of that port, it definitely marked the beginning of my USB adventures.

About six years later, I was sitting at my desk, trying to build a USB docking station for my EEE PC, as I was hoping, with tons of peripherals inside. Shorting out the USB port due to faulty connections or too many devices connected at once was a regular occurrence; thankfully, the laptop persevered as much as I did. Trying to do some research, one thing I kept stumbling upon was the 500 mA limit. That didn’t really help, since none of the devices I used even attempted to indicate their power consumption on the package – you would get a USB hub saying “100 mA” or a mouse saying “500 mA” with nary an elaboration.

Fifteen more years have passed, and I am here, having gone through hundreds of laptop schematics, investigated and learned from design decisions, harvested laptops for both parts and even ICs on their motherboards, designed and built laptop mods, nowadays I’m even designing my own laptop motherboards! If you ever read about the 500 mA limit and thought of it as a constraint for your project, worry not – it’s not as cut and dried as the specification might have you believe.
Continue reading “USB And The Myth Of 500 Milliamps”

Retrotechtacular: The Tools And Dies That Made Mass Production Possible

Here at Hackaday we’re suckers for vintage promotional movies, and we’ve brought you quite a few over the years. Their boundless optimism and confidence in whatever product they are advancing is infectious, even though from time to time with hindsight we know that to have been misplaced.

For once though the subject of today’s film isn’t something problematic, instead it’s a thing we still rely on today. Precision manufacturing of almost anything still relies on precision tooling, and the National Tool and Die Manufacturers Association is on hand in the video from 1953 below the break to remind us of the importance of their work.

The products on show all belie the era in which the film was made: a metal desk fan, CRT parts for TVs, car body parts, a flight of what we tentatively identify as Lockheed P-80 Shooting Stars, and a Patton tank. Perhaps for the Hackaday reader the interest increases though when we see the training of an apprentice toolmaker, a young man who is being trained to the highest standards in the use of machine tools. It’s a complaint we’ve heard from some of our industry contacts that it’s rare now to find skills at this level, but we’d be interested to hear views in the comments on the veracity of that claim, or whether in a world of CAD and CNC such a level of skill is still necessary. Either way we’re sure that the insistence on metrology would be just as familiar in a modern machine shop.

A quick web search finds that the National Tool and Die Manufacturers Association no longer exists, instead the search engine recommends the National Tooling And Machining Association. We’re not sure whether this is a successor organisation or a different one, but it definitely represents the same constituency. When the film was made, America was at the peak of its post-war boom, and the apprentice would no doubt have gone on to a successful and pretty lucrative career. We hope his present-day equivalent is as valued.

If you’re of a mind for more industrial process, can we direct you at die casting?

Continue reading “Retrotechtacular: The Tools And Dies That Made Mass Production Possible”

Peering Into The Black Box Of Large Language Models

Large Language Models (LLMs) can produce extremely human-like communication, but their inner workings are something of a mystery. Not a mystery in the sense that we don’t know how an LLM works, but a mystery in the sense that the exact process of turning a particular input into a particular output is something of a black box.

This “black box” trait is common to neural networks in general, and LLMs are very deep neural networks. It is not really possible to explain precisely why a specific input produces a particular output, and not something else.

Why? Because neural networks are neither databases, nor lookup tables. In a neural network, discrete activation of neurons cannot be meaningfully mapped to specific concepts or words. The connections are complex, numerous, and multidimensional to the point that trying to tease out their relationships in any straightforward way simply does not make sense.

Continue reading “Peering Into The Black Box Of Large Language Models”

The ring shown on someone's index finger

The ErgO Ring Makes Computer Interactions Comfortable

[Sophia Dai] brings us a project you will definitely like if you’re tired of traditional peripherals like a typical keyboard and mouse combo. This is ErgO, a smart ring you can build out of a few commonly available breakouts, and it keeps a large number of features within a finger’s reach. The project has got an IMU, a Pimoroni trackball, and a good few buttons to perform actions or switch modes, and it’s powered by a tiny Bluetooth-enabled devboard so it can seamlessly perform HID device duty.

While the hardware itself appears to be in a relatively early state, there’s no shortage of features, and the whole experience looks quite polished. Want to lay back in your chair yet keep scrolling the web, clicking through links as you go? This ring lets you do that, no need to hold your mouse anymore, and you can even use it while exercising. Want to do some quick text editing on the fly? That’s also available; the ErgO is designed to be used for day to day tasks, and the UX is thought out well. Want to use it with more than just your computer? There is a device switching feature. The build instructions are quite respectable, too – you can absolutely build one like this yourself, just get a few breakouts, a small battery, some 3D printed parts, and find an evening to solder them all together. All code is on GitHub, just like you would expect from a hack well done.

Looking for a different sort of ring? We’ve recently featured a hackable cheap smart ring usable for fitness tracking – this one is a product that’s still being reverse-engineered, but it’s alright if you’re okay with only having an accelerometer and a few optical sensors.

Continue reading “The ErgO Ring Makes Computer Interactions Comfortable”

Lasers Al Fresco: Fun With Open-Cavity Lasers

Helium-neon lasers may be little more than glorified neon signs, but there’s just something about that glowing glass tube that makes the whole process of stimulated emission easier to understand. But to make things even clearer, you might want to take a step inside the laser with something like [Les Wright]’s open-cavity He-Ne laser.

In most gas lasers, the stimulated emission action takes place within a closed optical cavity, typically formed by a glass tube whose ends are sealed with mirrors, one of which is partially silvered. The gas in the tube is stimulated, by an electrical discharge in the case of a helium-neon laser, and the stimulated photons bounce back and forth between the mirrors until some finally blast out through the partial mirror to form a coherent, monochromatic laser beam. By contrast, an open-cavity laser has a gas-discharge tube sealed with the fully silvered mirror on one end and a Brewster window on the other, which is a very flat piece of glass set at a steep angle to the long axis of the tube and transparent to p-polarized light. A second mirror is positioned opposite the Brewster window and aligned to create a resonant optical cavity external to the tube.

To switch mirrors easily, [Les] crafted a rotating turret mount for six different mirrors. The turret fits in a standard optical bench mirror mount, which lets him precisely align the mirror in two dimensions. He also built a quick alignment jig, as well as a safety enclosure to protect the delicate laser tube. The tube is connected to a high-voltage supply and after a little tweaking the open cavity starts to lase. [Les] could extend the cavity to almost half a meter, although even a waft of smoke was enough obstruction to kill the lasing at that length.

If this open-cavity laser arrangement seems familiar, it might be because [Les] previously looked at an old-school particle counter with such a laser at its heart. Continue reading “Lasers Al Fresco: Fun With Open-Cavity Lasers”