This is it. After twelve years we finally have a new Star Trek. Star Trek: Discovery (we’re using ST:DSC as the abbreviation) is airing right about when this post goes up. Next week, you’ll have to pay CBS $6USD a month to get your Star Trek fix, and today might be the last time a new episode of Star Trek is aired on broadcast TV ever. Enjoy it now, and hope the theme song doesn’t have lyrics. Also, hope The Orville is a tenth as good as a Galaxy Quest series could be.
What’s the best way to describe Delta Sigma PLLs? The Cat In The Hat (PDF, page 31). [Dr. Tune] found a Seuss reference in a TI app note. Personally, I’m a fan of hand-drawn cartoons, but we’ll take what we can get.
This weekend the Prusa I3 MK3 was announced. A good printer just got better. Now here’s the video.
The Raspberry Pi is a great media storage device, but it’s absolutely insufficient for audiophile tomfoolery. Here’s a neat Pi DAC/amp/DSP thingy. The VoltaStream turns the Raspberry Pi into a WiFi-connected pair of speakers with low-latency audio in and a TOSLINK connector.
SpaceX! There is serious consideration being given to starting an ‘Elon Musk column’ here on Hackaday. There will be SpaceX updates coming this week from the International Astronautical Congress in Adelaide. What will we find out? I don’t know bruh, but I just got back from Burning Man and I realized it was a whole lot like Mars and I was wondering Elon, like, have you ever been to Burning Man because it’s really dusty and a whole lot like Mars and there’s not much water… Please, organizers of the IAC, I implore you: give more idiots microphones. That was hilarious.
How was the World Maker Faire in New York this weekend? In one word, empty. Abnormally so. Maker Faire was not as crowded as last year, and you could actually move around. My agoraphobia didn’t kick in until the afterparties, and lines for the $5 bottles of water were short. Bay Area Faire attendance was down 16% from 2016-2017, and I would bet attendance for the NY Faire would be down a similar amount. Even a 10% decline in attendance would be noteworthy; the weather last year was cold and rainy and this year was beautiful. There are rumors, speculation, and people wondering how long Maker Faire will continue, but except for Intel pulling out of the maker market, no actual information. Millennials are killing the Maker Faire industry?
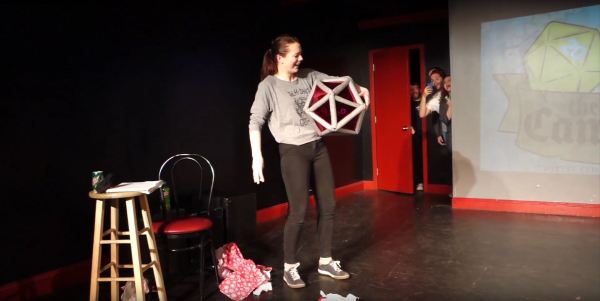
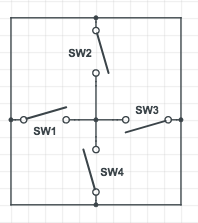 [Vejdemo-Johansson] figured a circle of 4 tilt sensors mounted on the one and twenty face would be enough to detect critical rolls. If any of the switches were tilted beyond 30 degrees, the switch would close. He mounted eight ball-tilt switches and glued in the LEDs. A hackerspace friend also helped him put together an astable multivibrator to generate the pulses for non-critical rolls.