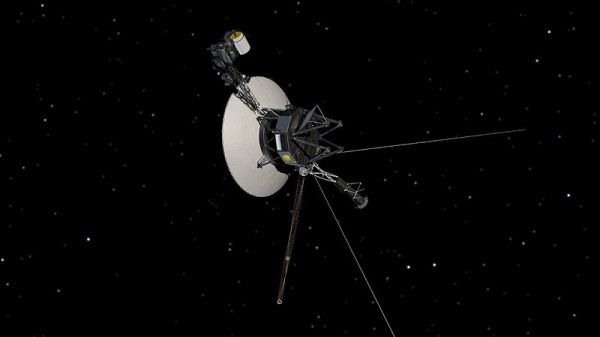
Ply Your Craft With Tubular Origami

Researchers at the University of Pennsylvania have just published a paper on creating modular tubular origami machines which they call “Kinegami”, a portmanteau of “kinematic” and “origami”.

Diagrams of "kinegami" folds for various modules and joint mechanism

The idea behind their work is to create individual modules and joint mechanisms that can then be chained together to create a larger “serial” robot. Some example joints they propose are “prismatic” joints, allowing for linear motion, and “revolute” joints, which allow for rotational motion. One of the more exciting aspects of this process is that the joint mechanisms are origami-like structures which can be constructed from a single piece of flat material which is folded and glued together to make the module. Of particular interest is that the crease pattern for the origami-like folds can be laser cut into a material, cardboard or thin acrylic for example, which can be used as a guide to create the resulting structure. The crease patterns for the supporting structures, such as tubes or joints, can be taken from pre-formatted patterns or customized, so this method is very accessible to the hobbyist and could allow for a rich new method of rapid project prototyping.

The researchers go on to discuss how to create the composition of modules from a specification of joints and links (from a “Denavit-Hartenberg” specification) to attaching the junctures together while respecting curvature constraints (via the “Dubins path”). Their paper offers the gritty details along with the available accompanying source files. Origami hacking is a favorite subject of ours and we’ve featured articles on the use of origami in medical technology to creating inflatable actuators.

Video after the break!

Continue reading “Ply Your Craft With Tubular Origami”

Using I²C Sensors With Any Linux Via USB And IIO

Hooking up I2C sensors is something which is generally associated with microcontrollers and SBCs, yet it’s very easy to use such I2C sensors from basically any system that runs Linux. After all, I2C (that is, SMBus) is one of the interfaces that is highly likely to be used on your PC’s mainboard as well as peripherals. This means that running our own devices like the well-known BME280 temperature, pressure and humidity sensor, or Si1145 light sensor should be a piece of cake.

In a blog post from a few years ago, [Peter Molnar] explains in detail how to wire up a physical adapter to add a USB-connected I2C interface to a system. At its core is the ATtiny85 AVR-based MCU, which provides a built-in USB interface, running the I2C-Tiny-USB firmware.

The essential part here is that the MCU shows up to the Linux kernel as an i2c device, requiring the i2c-dev driver to be loaded. After this the I2C device that is connected to the adapter MCU’s I2C bus can be used via the Linux module’s API calls, either directly or via existing drivers. [Peter] found that the BMP280 driver came with Debian Sid, for example.

Ask Hackaday: When It Comes To Processors, How Far Back Can You Go?

When it was recently announced that the Linux kernel might drop support for the Intel 486 line of chips, we took a look at the state of the 486 world. You can’t buy them from Intel anymore, but you can buy clones, which are apparently still used in embedded devices. But that made us think: if you can’t buy a genuine 486, what other old CPUs are still in production, and which is the oldest?

Defining A Few Rules

An Intel 4004 microprocessor in ceramic packaging
The daddy of them all, 1972’s Intel 4004 went out of production in 1981. Thomas Nguyen, CC BY-SA 4.0

There are a few obvious contenders that immediately come to mind, for example both the 6502 from 1975 and the Z80 from 1976 are still readily available. Some other old silicon survives in the form of cores incorporated into other chips, for example the venerable Intel 8051 microcontroller may have shuffled off this mortal coil as a 40-pin DIP years ago, but is happily housekeeping the activities of many far more modern devices today. Still further there’s the fascinating world of specialist obsolete parts manufacturing in which a production run of unobtainable silicon can be created specially for an extremely well-heeled customer. Should Uncle Sam ever need a crate of the Intel 8080 from 1974 for example, Rochester Electronics can oblige.

Continue reading “Ask Hackaday: When It Comes To Processors, How Far Back Can You Go?”

An esp32 weather station with 3d printed anemometer, rain gauge and wind vane mounted on an aluminum frame sitting in an overgrown lawn

A Weather Station For Whether It Rains Or Shines

[Giovanni Aggiustatutto] creates a DIY weather station to measure rain fall, wind direction, humidity and temperature. [Giovanni] has been working on various parts of the weather station, including the rain gauge and anemometer, with the weather station build incorporating all these past projects and adding a few extra features for measurement and access.

An esp32 module connected to three level shifters inside of a grey utility junction box with a USB power connector coming in powering the ESP32 device and an external wifi antenna mounted on the outside of the junction box, all siting on a wooden table

For temperature and humidity, a DHT22 sensor is located in a 3D printed Stevensen screen, giving the sensor steady airflow while protecting the module from direct sunlight and rain. A mostly 3D printed wind vane is printed with the base attached to a ball bearing and magnet so that the four hall sensors positioned in a “plus” configuration at the base can detect direction. The 3D printed anemometer uses a hall sensor to detect the revolution speed of the device. The rain gauge uses a “tipping bucket” mechanism, with a magnet attached to it that triggers the hall sensor affixed to the frame. The rain gauge (or pluviometer if you’re fancy) needs extra calibration to adjust for how much water the buckets take on before tipping.

An ESP32, with additional level shifters and BMP180 atmospheric pressure sensor module, are placed in a junction box. The ESP32 is used to communicate with each of the sensors and allows for an external internet connection to a Home Assistant server to push collected data out.

[Giovanni] has done an excellent job of documenting each piece, including making the 3D STL files available. Weather stations are a favorite of ours with a lot of variety in what gets collected and how, from ultrasonic anemometers to solar powered weather stations, and it’s great to see [Giovanni]’s take.

Video after the break!

Continue reading “A Weather Station For Whether It Rains Or Shines”

tiny surface mount seven segment display

Nano-Sized 7-Segment LED Display On A Surface Mount Module

Inspired by a prank tweet, [Sam Ettinger] endeavored to create an SMD seven-segment display.  The NanoRaptor NanoSegment implements a panel of seven-segment display modules sized at “0806” each or just a bit wider than a standard 0805 SMD footprint.  Each of the seven segments is a single 0201 LED.  Six I/O lines and three resistors are required to operate each module.

To demonstrate the operation of his tiny display modules, Sam also created the “6Pin 7Seg” development board featuring an ATtiny84 microcontroller coupled to PCB footprints sized to receive the NanoRaptor NanoSegment display modules.  A demonstration of the board counts through digits displayed on one of the tiny seven-segment modules.

Hoping to reduce the module’s interface to two pins, Sam is now experimenting with a seven-segment display on a flex PCB that folds up into a 1208 footprint.  He is attempting to fold the resistors and a ATtiny20 microcontroller into an “origami PCB” configuration.

If these hacks are getting a little too small for your tastes, we’ve got you covered with this giant seven-segment display.


Cardboard Game Tokens Become Shiny Click-Clacks With DIY Treatment

Tabletop games and cardboard tokens go hand-in-hand for a good reason: they are economical and effective. However, their tactile attributes leave a little to be desired. There’s something really great about high-quality pieces possessing a shiny, pleasing smoothness and click-clack handling that cardboard simply can’t deliver, but that all changes with [Dzhav]’s simple method for converting cardboard tokens into deluxe versions of themselves with a little work and a resin coating.

The result is a token with a crystal-clear, smooth, and slightly-convex coating of hardened resin on it. They feel (and sound) like plastic, rather than cardboard. The resin used is a two-part clear jewelry resin, used for casting things like pendants. It benefits from a long working time and unlike UV-cured resin (like the SLA 3D printer resin) it won’t be affected by light.

Careful application of resin relies on surface tension to prevent messes.

Like with most things, good results come from careful preparation and technique. [Dzhav] suggests preparing the tokens by sanding the edges completely smooth with fine sandpaper, then using a black marker to color them. Then, tokens are coated one side at a time with a paintbrush and correctly-mixed resin: while holding a token down with a toothpick, resin is brushed right to (but not over) the edges. Then, additional resin can be dropped in the center of the token, and gravity and surface tension will work together to ensure an even coating that doesn’t drip.

After the resin has had plenty of time to cure, the tokens are flipped over and the process repeated. The end result are tokens with both sides coated in a nice, smooth, ever-so-slightly-convex shield of resin.

They look fantastic, and sound even better. Turn up your volume and play the two-second video embedded below to listen for yourself. And when you’re ready for another gamer that didn’t settle for what was in the box, check out this redesigned Catan version.

Continue reading “Cardboard Game Tokens Become Shiny Click-Clacks With DIY Treatment”

Building Your Own Consensus

With billions of computers talking to each other daily, how do they decide anything? Even in a database or server deployment, how do the different computers that make up the database decide what values have been committed? How do they agree on what time it is? How do they come to a consensus?

But first, what is the concept of consensus in the context of computers? Boiled down, it is for all involved agents to agree on a single value. However, allowances for dissenting, incorrect, or faulting agents are designed into the protocol. Every correct agent must answer, and all proper agents must have the same answer. This is particularly important for data centers or mesh networks. What happens if the network becomes partitioned, some nodes go offline, or the software crashes weirdly, sending strange garbled data? One of the most common consensus algorithms is Raft. Continue reading “Building Your Own Consensus”