What Can You Do With Discarded Fish Aggregation Devices

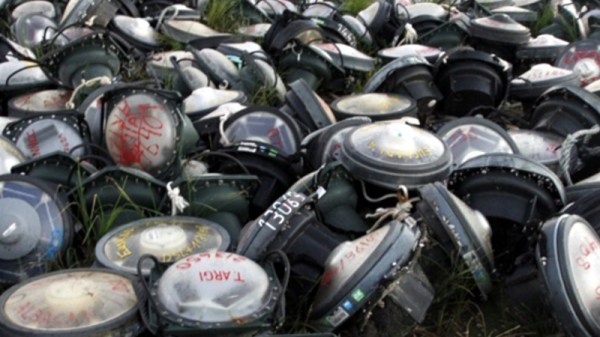
Often we bring you projects at the end of their trajectory so that you can marvel at a job well done, but sometimes we point you instead to the start of the story. Such is the case with [Brett Smith]’s investigation of discarded fish aggregation buoys, referred to as FADs. These 700-plus dollar devices are deployed in the ocean in the thousands by commercial fishing fleets, and most are not recovered. He’s looking at them from the point of view of re-using their technology in the marine conservation business.

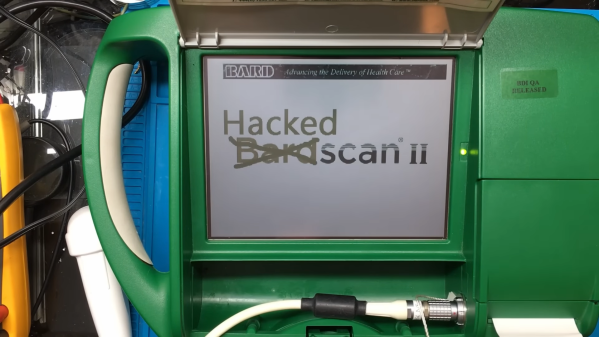
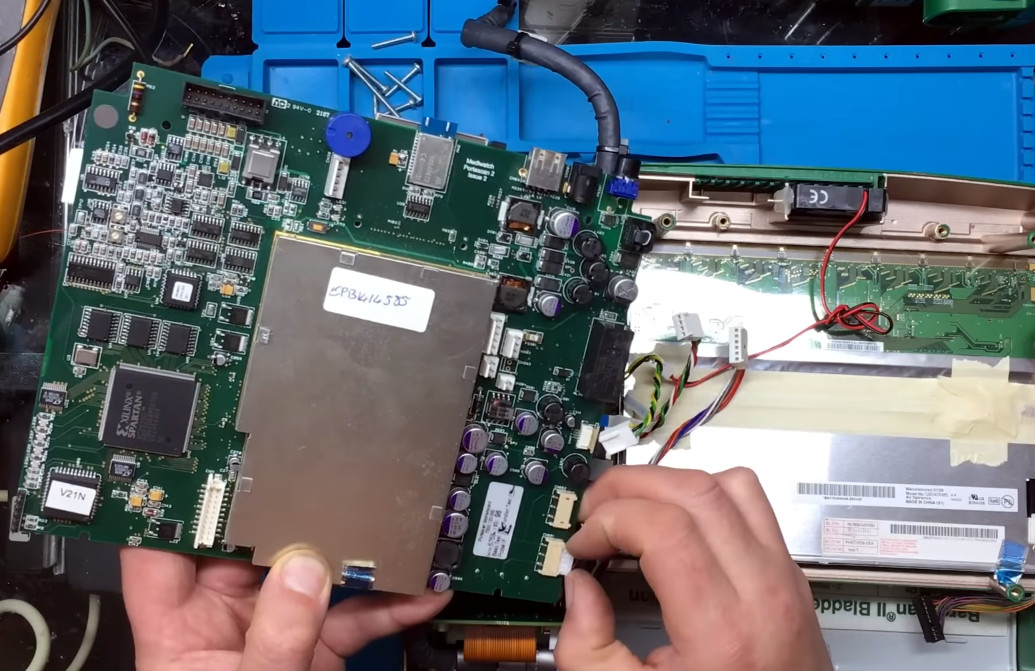
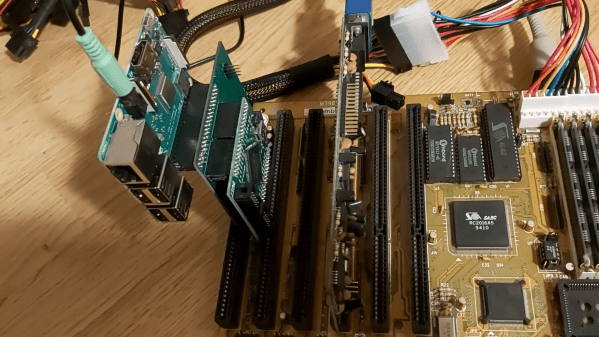
His progress has been documented in a series of short YouTube videos, starting with an introduction that we’ve placed below the break. So far he’s gone on to a complete teardown, and then a detailed look at the PCB. Inside they have a solar charger for a bank of NiCd cells, an echo sounder, a GPS receiver, and an Iridium satellite modem allowing the device to phone home. There’s certainly plenty in there to experiment with, including a few slightly exotic parts, so keep an eye on his channel as we’re sure to see more.

These devices have never made it to Hackaday before, but we have seen an echo sounder on a surfboard.

Continue reading “What Can You Do With Discarded Fish Aggregation Devices”

A small electronic board next to colorful stylized speaker

Soundscape Sculpture Is Pleasing Art For Your Ears

Artist and self-described “maker of objects” [Daric Gill] is sharing some of the world’s most pleasing and acoustically interesting soundscapes with museum patrons in his latest work, ‘The Memory Machine: Sound‘.

Now featured at the Center of Science and Industry museum, the interactive stereo soundscape generator resembles three decorated ‘tree trunks’, suspended high above the exhibition floor. When visitors approach the artwork, they are treated to a randomly selected soundscape sample.

The build, which is described in blog form here, teases just some of the sixty soundscape samples that can be heard. These include the noisy chattering of crowds underneath the Eiffel Tower in Paris, the mellow melodies of a meadow high in the Swiss Alps, and the pumping atmosphere of a baseball match played in Yankee Stadium, New York City.

Only the middle trunk reveals the electronic soul of the installation – an Adafruit M4 Feather Express, Music Maker Featherwing and a motion sensor. The flanking trunks house the speakers and amplifier. The motion sensor triggers the microcontroller, which then plays a randomly selected sample from an SD card.

[Daric] went to great lengths to reuse discarded materials, and even cannibalized parts from other sculptures to see his vision through. This focus underpins a substantial amount of woodworking and machining that went into this build, so the full video is certainly worth a watch to see the whole project come together.

Make sure to check out our coverage of other funky installations, like this mesmerizing ceiling decoration.

Continue reading “Soundscape Sculpture Is Pleasing Art For Your Ears”

The display of a medical ultrasound scanner showing "HackedScan II"

Medical Ultrasound Scanner Gives Up Its Secrets, Runs DOOM

Medical equipment often makes for interesting teardown videos: the strict requirements imposed by certification bodies mean you’ll find good quality components and a high standard of design and manufacturing. But when [Buy It Fix It] bought an ultrasound scanner on eBay, he wasn’t interested in tearing it down: his plan was to use it to find out if his sheep are in lamb, so he went on to repair it and modify it for its new purpose.

The device in question is a Mediwatch Bardscan II, which is meant to be used for scanning people’s bladders. The mainboard has a completely different model number however, which suggests that the basic design is used for several types of ultrasound scanners. The system is powered by an AMD Geode processor that runs Windows XP Embedded stored on a CompactFlash card, so examining the internal software is easy: the scanner interface even runs on a regular Windows PC.

Several files on the internal drive point at hidden features, with filenames like kidney.dib and liver.dib indicating that the instrument can scan more than just bladders. The drive also holds several versions of the scanning app, as well as a .ini file in which lots of features can be enabled or disabled. By running the executable through x32dbg, [Buy It Fix It] was even able to recover the password to enable the “Advanced Settings” menu — it’s “u10” in case you were wondering.

With a bit of file editing, [Buy It Fix It] managed to turn the rather basic system into a way more flexible ultrasound scanner. For example, he can now adjust the scan depth, replay previous scans and make notes on top of any captured images. It can even run DOOM, as he demonstrates at the end of the video — though we can imagine his sheep might not enjoy the sight of their owner approaching them with a box full of flame-throwing demons.

Medical ultrasound scanners, which have been around for quite a while, may appear to be complex machines, but it is possible to make a simple version with easily available components.

Continue reading “Medical Ultrasound Scanner Gives Up Its Secrets, Runs DOOM

A EuroRack synthesizer module with an oscilloscope in the background showing a waveform

Recreating The Sounds Of The ’90s With A YM3812 Synthesizer

One reason the x86 PC became the dominant game platform in the early 1990s was the availability of affordable sound cards like the AdLib and Sound Blaster. These provided a quantum leap in sound quality compared to the PC speaker’s tinny beeps, thanks to Yamaha’s YM3812 chip, also known as OPL2. [Tyler] has made a detailed study of the various OPL series chips and wrote a comprehensive guide describing their operation.

[Tyler] begins by explaining the theory of FM synthesis. The basic idea is that you generate sine waves of different frequencies, combine them through mixing and modulation, and then adjust their strength over time. This way, a few simple operations on the chip’s nine sound channels can generate an astonishing variety of sounds from clear notes to chaotic noise. He then delves into the details of the YM3812 chip, including its 279 different register settings that enable all these operations.

The final goal of [Tyler]’s research is the design of a YM3812 EuroRack module that fits inside standard modular synthesizers. He’ll go into detail on the board’s design and construction in future blog posts, but he already shows the finished product and demonstrates its features in the video embedded below. It’s a great introduction if you’re new to FM synthesis and want to recreate those magic DOS game sounds.

Of course, you can also just connect the OPL2 chip to your DOS computer, whether through a classic sound card or through a parallel port. The related YM2612 from the Sega Genesis also makes a fine synthesizer.

Continue reading “Recreating The Sounds Of The ’90s With A YM3812 Synthesizer”

Cardboard Game Tokens Become Shiny Click-Clacks With DIY Treatment

Tabletop games and cardboard tokens go hand-in-hand for a good reason: they are economical and effective. However, their tactile attributes leave a little to be desired. There’s something really great about high-quality pieces possessing a shiny, pleasing smoothness and click-clack handling that cardboard simply can’t deliver, but that all changes with [Dzhav]’s simple method for converting cardboard tokens into deluxe versions of themselves with a little work and a resin coating.

The result is a token with a crystal-clear, smooth, and slightly-convex coating of hardened resin on it. They feel (and sound) like plastic, rather than cardboard. The resin used is a two-part clear jewelry resin, used for casting things like pendants. It benefits from a long working time and unlike UV-cured resin (like the SLA 3D printer resin) it won’t be affected by light.

Careful application of resin relies on surface tension to prevent messes.

Like with most things, good results come from careful preparation and technique. [Dzhav] suggests preparing the tokens by sanding the edges completely smooth with fine sandpaper, then using a black marker to color them. Then, tokens are coated one side at a time with a paintbrush and correctly-mixed resin: while holding a token down with a toothpick, resin is brushed right to (but not over) the edges. Then, additional resin can be dropped in the center of the token, and gravity and surface tension will work together to ensure an even coating that doesn’t drip.

After the resin has had plenty of time to cure, the tokens are flipped over and the process repeated. The end result are tokens with both sides coated in a nice, smooth, ever-so-slightly-convex shield of resin.

They look fantastic, and sound even better. Turn up your volume and play the two-second video embedded below to listen for yourself. And when you’re ready for another gamer that didn’t settle for what was in the box, check out this redesigned Catan version.

Continue reading “Cardboard Game Tokens Become Shiny Click-Clacks With DIY Treatment”

A 386 motherboard with a custom ISA card plugged in

Emulate Any ISA Card With A Raspberry Pi And An FPGA

One of the reasons the IBM PC platform became the dominant standard for desktop PCs back in the mid-1980s was its open hardware design, based around what would later be called the ISA bus. Any manufacturer could design plug-in cards or even entire computers that were hardware and software compatible with the IBM PC. Although ISA has been obsolete for most purposes since the late 1990s, some ISA cards such as high-quality sound cards have become so popular among retrocomputing enthusiasts that they now fetch hundreds of dollars on eBay.

So what can you do if your favorite ISA card is not easily available? One option is to head over to [eigenco]’s GitHub page and check out his FrankenPiFPGA project. It contains a design for a simple ISA plug-in card that hooks up to a Cyclone IV FPGA and a Raspberry Pi. The FPGA connects to the ISA bus and implements its bus architecture, while the Pi communicates with the FPGA through its GPIO ports and emulates any card you want in software. [eigenco]’s current repository contains code for several sound cards as well as a hard drive and a serial mouse. The Pi’s multi-core architecture allows it to run several of these tasks at once while still keeping up the reasonably high data rate required by the ISA bus.

In the videos embedded below you can see [eigenco] demonstrating the system on a 386 motherboard that only has a VGA card to hook up a monitor. By emulating a hard drive and sound card on the Pi he is able to run a variety of classic DOS games with full sound effects and music. The sound cards currently supported include AdLib, 8-bit SoundBlaster, Gravis Ultrasound and Roland MT-32, but any card that’s documented well enough could be emulated.

This approach could also come in handy to replace other unobtanium hardware, like rare CD-ROM interfaces. Of course, you could take the concept to its logical extreme and simply implement an entire PC in an FPGA.

Continue reading “Emulate Any ISA Card With A Raspberry Pi And An FPGA”

Retrotechtacular: Programming By Card

The recent Supercon 6 badge, if you haven’t seen it, was an old-fashioned type computer with a blinky light front panel. It was reminiscent of an Altair 8800, a PDP-11, or DG Nova. However, even back in the day, only a few people really programmed a computer with switches. Typically, you might use the switches to toggle in a first-level bootloader that would then load a better bootloader from some kind of storage like magnetic or paper tape. Most people didn’t really use the switches.

What most people did do, however, was punch cards.  Technically, Hollerith cards, although we mostly just called them cards, punched cards, or IBM cards. There were a lot of different machines you could use to punch cards, but none were as popular, I would guess, as the IBM 029. Certainly, the models in the series were overwhelmingly what people used to punch cards.

For the uninitiated, a card was about the size of an old-fashioned dollar bill — the ones in style when Herman Hollerith invented them. The card was made of material not quite as thick as a standard file folder and was divided into 80 columns and 12 rows. Later cards had more columns, but those never really caught on to the same scale as the classic 80-column card. Continue reading “Retrotechtacular: Programming By Card”