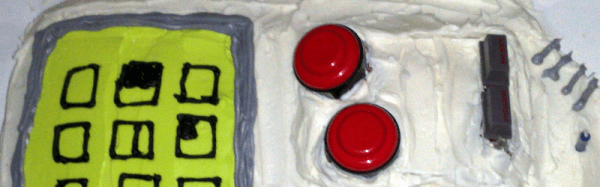
One of many ways that Americans are ridiculed by the rest of the world is that they don’t have chip and PIN on their credit cards yet; US credit card companies have been slow to bring this technology to millions of POS terminals across the country. Making the transition isn’t easy because until the transition is complete, the machines have to accept both magnetic stripes and chip and PIN.
This device can disable chip and PIN, wirelessly, by forcing the downgrade to magstripe. [Samy Kamkar] created the MagSpoof to explore the binary patterns on the magnetic stripe of his AmEx card, and in the process also created a device that works with drivers licenses, hotel room keys, and parking meters.
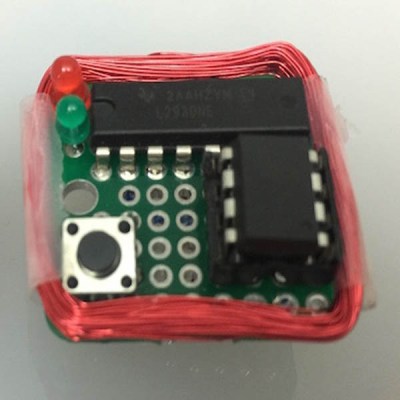 The electronics for the MagSpoof are incredibly simple. Of course a small microcontroller is necessary for this build, and for the MagSpoof, [Samy] used the ATtiny85 for the ‘larger’ version (still less than an inch square). A smaller, credit card-sized version used an ATtiny10. The rest of the schematic is just an H-bridge and a coil of magnet wire – easy enough for anyone with a soldering iron to put together on some perfboard.
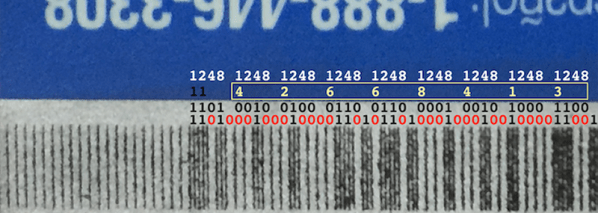
By pulsing the H-bridge and energizing the coil of wire, the MagSpoof emulates the swipe of a credit card – it’s all just magnetic fields reversing direction in a very particular pattern. Since the magnetic pattern on any credit card can be easily read, and [Samy] demonstrates that this is possible with some rust and the naked eye anyway, it’s a simple matter to clone a card by building some electronics.
[Samy] didn’t stop there, though. By turning off the bits that state that the card has a chip onboard, his device can bypass the chip and PIN protection. If you’re very careful with a magnetized needle, you could disable the chip and PIN protection on any credit card. [Samy]’s device doesn’t need that degree of dexterity – he can just flip a bit in the firmware for the MagSpoof. It’s all brilliant work, and although the code for the chip and PIN defeat isn’t included in the repo, the documents that show how that can be done exist.
[Samy]’s implementation is very neat, but it stands on the shoulders of giants. In particular, we’ve covered similar devices before (here and here, for instance) and everything that you’ll need for this hack except for the chip-and-PIN-downgrade attack are covered in [Count Zero]’s classic 1992 “A Day in the Life of a Flux Reversal“.
Thanks [toru] for sending this one in. [Samy]’s video is available below.


 The first video