How To Play A Game Boy Emulator On Chromecast

gameboy-on-chromecast

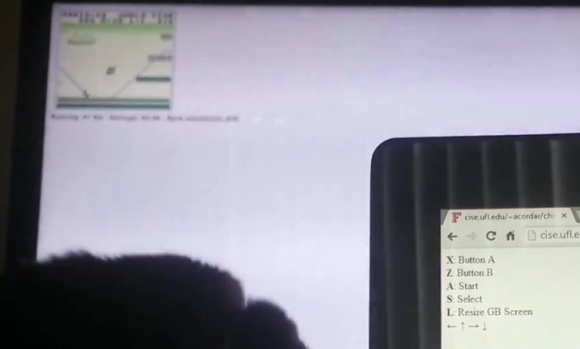
It’s small, it’s blurry, but it’s working. Here’s a proof of concept for playing emulators on a Chromecast which uses the original Game Boy as an example.

Notice that there are two screens shown in the demo. Out of focus in the background is the television with the Chromecast displaying the game play. In the foreground is a computer with a browser open which lists off the control setup. These are the button mappings for an Xbox 360 controller. The emulator is a JavaScript Game Boy emulator. This is loaded on the Chromecast through a simple html file (called the receiver in the repo). The sender — also a simple html file — loads another JavaScript package on the computer which translates the controller’s button presses to keyboard inputs and sends them out to the receiver.

This puts stars in our eyes about emulator hacks. We’d love to see this boiled down to smartphone and Chromecast as the two pieces of hardware, with the touchscreen as the gaming input.

Continue reading “How To Play A Game Boy Emulator On Chromecast”

FLAMEnco Guitar

flamenco

[John] says, “I noticed an unfortunate lack of many flamethrower guitars on the web so I filled the need. ” That’s just awesome by us.

This series of guitar-mounted flamethrowers started with a small build, able to shoot a six-foot flame for about 40 seconds. Yes, very theatrical, but not something you’d want to change out after every song. From there the builds progressed to systems with more barrels, more fuel tanks, and a huge system that shoots 18-foot long flames colored with standard pyrotechnic supplies.

It should go without saying that this stuff probably isn’t something you should try at home. That being said, you really have to admire the craftsmanship and tenacity to make a guitar mounted flamethrower. Just don’t bring it to an indoor gig.

Continue reading “FLAMEnco Guitar”

Trust Hacking: How The Bitcoin System Works

how-bitcoin-network-functions

[Scott Driscoll] sent us a link to his Bitcoin explanation a couple of weeks ago. We glanced at it but moved on rather quickly. It’s been popping up here and there and we finally gave it the time it deserved. This video is interesting in that it doesn’t just focus on what the Bitcoin actually is, but how the Bitcoin system works when it comes time for money to change hands.

Quite early on in the explanation he mentions that “The Bitcoin system is amazingly designed so that no trust is needed”. That’s a powerful statement. For instance, if you sell your car, one of your friends will probably tell you not to take a check. That’s because a check means you’re trusting that the buyer actually has a balance in their account to cover the transaction. With Bitcoin the transaction carries its own proof that the currency is available by including information about the past transactions through which those Bitcoins were acquired.

If you have some idea of what public/private key pairs are you’re already equipped to understand [Scott’s] lecture. After you make it through the 22 minute video maybe you should get down to work doing some Bitcoin mining at home.

An Introduction To Inertial Navigation Systems

acc_sens

Long before ships relied on GPS to determine their location – and even before radio navigation systems such as LORAN, vessels relied on a still impressively sophisticated means of determining their position: inertial navigation. The theory is simple: if you keep a few very accurate gyroscopes and accelerometers on board, you’ll be able to calculate where you are relative to your previous position. Since electronic gyros and accelerometers are all over the place, [Sebastian] thought he would have a go at creating his own inertial navigation system.

The difficulty in using this method is that every gyroscope invariably has some error. Since the measurements from the gyros and accelerometers are integrated together, the error is also integrated, resulting in an increasing positioning error as time goes on. With a few clever algorithms and very good sensors, it’s possible to minimize this error.

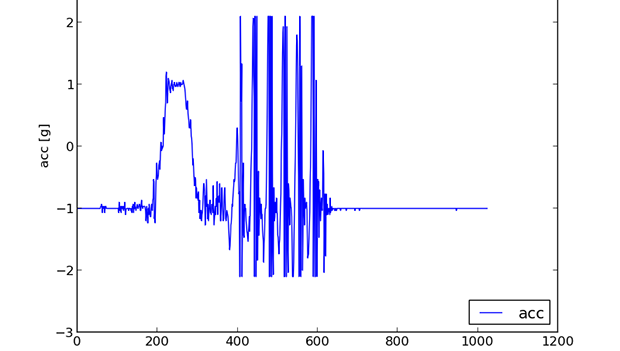
[Sebastian] doesn’t have really great hardware – he’s only working with a accelerometer/gyro breakout board that’s good enough for experimental purposes. After reading the accelerometer data with an Arduino, he’s able to capture all the sensor data and read it into a Python script.

The next steps are to figure out a decent algorithm to integrate all the sensor data, and possibly add a barometer and magnetic compass for better compensation for errors. The project is still in the early phases, but seeing as how an inertial navigation system is one of the engineering triumphs of the early 20th century, we’re eagerly awaiting any progress updates.

Xbox 360 Light Right And RF Module Connected To Raspberry Pi

rpi-connected-to-xbox-lightring

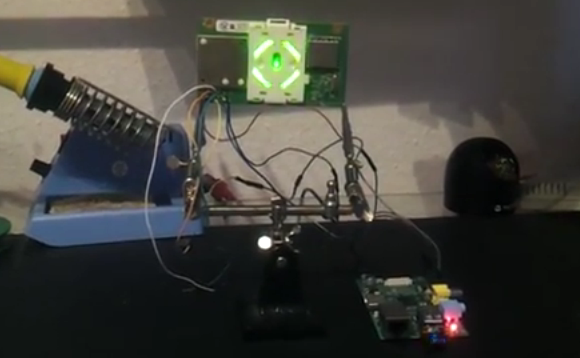
If you want to mess around with your Xbox 360 controllers on a computer Microsoft would be happy to sell you a USB dongle to do so. But [Tino] went a different route. The board that drives the Xbox 360’s status light ring also includes the RF module that wirelessly connects the controllers. He wired this up to his Raspberry Pi using the GPIO header.

The module connects via an internal cable and is treated much like a USB device by the Xbox motherboard. The problem is that it won’t actually handle the 5V rail found on a USB connector; it wants 3.3V. But this is no problem for the RPi’s pin header. Once a few connections have been made the lights are controlled via SPI I2C and [Tino] posted some example code up on Github to work with the RF module. He plans to post a follow-up that interfaces the module with a simple microcontroller rather than an RPi board. If you can’t wait for that we’re sure you can figure out the details you need by digging through his example code.

Any-size SIL Connector Kit

any-sized-SIL-cable-kit

Etching and populating a board is childs play compared to finding connectors which link several components. But Hackaday alum [Ian Lesnet] and his crew over at Dangerous Prototypes have come up with a solution that makes us wonder why we haven’t seen this long ago? They’re prepping an any-size ribbon cable kit.

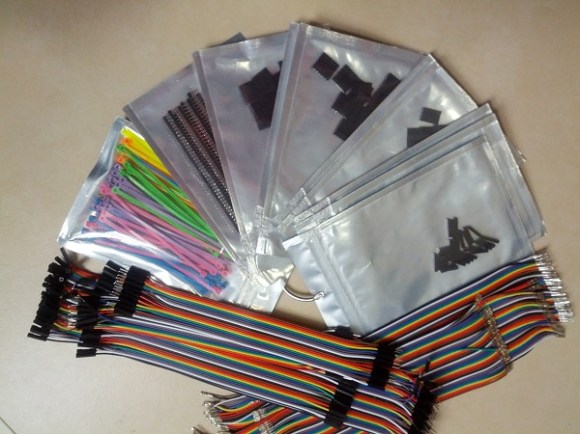
So lets say you do find the type of connector you want. You need to cut the ribbon cable to length, crimp on the connectors, then seat those connectors in the housing. We’ve done this many times, and being cheapskates we use needle-nose pliers instead of buying a proper crimper. This solution does away with that grunt work. The kit will ship several different lengths of ribbon wire with the connectors already placed by machine. This way you peel off the number of connectors you need, select the proper house size and plunk it in place. Also in the kit are several lengths of male, female, and male/female jumper cables you can peel off in the same way.

Now what are we going to do with the rest of the spool of ribbon cable sitting in the workshop?

Touch Control For Every Key On The Keyboard

keys

Of all the musical instruments out there, the keyboard is among the worst for changing the pitch and timbre of individual notes. Wind and stringed instruments can do this easily in the hands of a skilled player, but outside the wheel and joystick controls of a few electronic keyboards, tickling the ivories means the only thing you can really change about how something sounds is the volume.

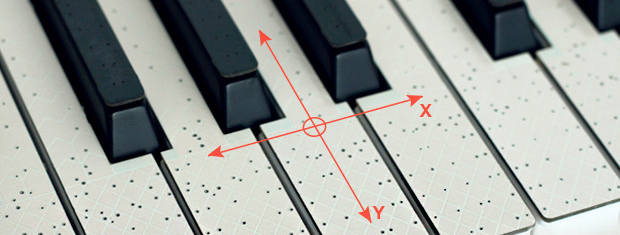
TouchKeys wants to put an end to this severe lack of dynamics available on keyboard instruments. Basically, it turns every single key on a keyboard into a multi-touch sensor, allowing any keyboardist to change the pitch, filter, timbre, or any other parameter of their instrument simply by moving their finger around on a key.

TouchKeys works by overlaying all the keys on a keyboard with circuit boards that plug into a module hidden under the hood. These boards are studded with capacitive sensing points, allowing a computer to recognize where the player is touching each key, and modifying filters or volume for each key independently.

The TouchKeys Kickstarter is offering a kit to equip a 25-key keyboard with these sensors for about $550. A hefty price tag, but hopefully we’ll see this tech in real production keyboards in the future.