Glockentar: A Guitar + Glockenspiel Mashup

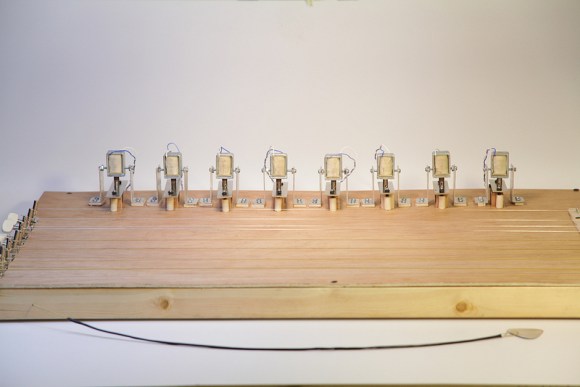
This unique electronic instrument combines a chopped up guitar and a hacked apart glockenspiel with an Arduino. [Aaron]’s Glockentar consists of guitar hardware and glockenspiel keys mounted to a wood body. Solenoids placed above the keys actuate metal rods to play a note.

Under the hood, an Arduino connects the pieces. The conductive pick closes a circuit, which is a digital input into the Arduino. This actuates the corresponding solenoid to play the glockenspiel key, and sends a character to a computer over serial.

On the computer, an openFrameworks based program creates lighting that is projected onto each string. MadMapper is used for projection mapping, which maps the openFrameworks output to each string. Video is passed between applications using the Syphon framework.

[Aaron] has provided a write up that goes into details, including the Arduino and openFrameworks source for the project. There’s also a video overview and demo of the Glockentar after the break.

Continue reading “Glockentar: A Guitar + Glockenspiel Mashup”
Cheap Biquad Antenna Extends LAN Between Apartments

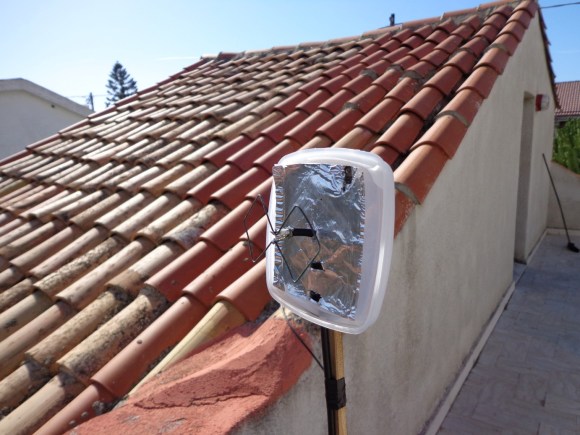
[Danilo Larizza] is sharing a network connection between a couple of apartments. They are not far apart, but they are also not right next to each other so a set of external antennas is necessary. He built this 2.4 GHz biquad antenna on the cheap (translated) just to test if it improved the signal before he tried to buy a proper antenna. It turns out to work well enough that this is all that he needs.

The antenna itself is about one meter of thick wire bent into two squares which are 31mm on each side. The coaxial cable going to the router connects to the center portion of this antenna. For a bit better directional reception he added some tin foil as a reflector. Since this is outdoors he used a food storage container for protection (the antenna is mounted to the lid, the body has been removed for this picture). The whole things is perched on a stake in a flower pot with proper line of sight to the other antenna.

We’ve seen a very similar design used for an NRF 24L01+ radio. If you need more details that [Danilo] posted that would be a good project to study.

Injecting Power Into A WiFi Dongle For The Raspberry Pi

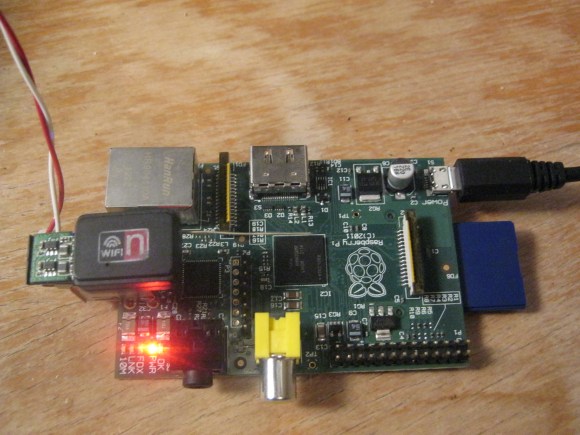
So the Raspberry Pi sometimes doesn’t have the juice needed to run power-hungry USB dongles. The most common issue is with WiFi adapters. The solution has long been to use a powered USB hub, but [Mike Worth] didn’t want to take up that much extra space. The solution he worked out injects power directly into the dongle itself.

The red and white wires coming out of the side provide the 5V source. This is coming from the same USB mains power adapter that supplies the RPi board itself. To connect the wires to the dongle he made an adapter out of some strip board and the shielding from the dongle. The end of the strip board pokes out of the shielding far enough for him to solder on some wire, which is then soldered to the traces on the dongle’s PCB.

You can just plug this in and get down to business. But while he was at it [Mike] added an improvised antenna for better reception. It’s the same type of hack we saw him use for a Bluetooth dongle in this links post.


RC Truck Has Working Windows, Steering Wheel, And Much More

This truck is not simply a drive train and a radio module. Great care was taken to fabricate every part to work like a full-sized vehicle. NSFW WARNING: The forum on which the details have been posted is Russian and may have sidebar ads you don’t want on your screen at work. That being said, here’s the link (translated).

The build starts with a custom-made frame which looks like it’s aluminum. The gearbox is assembled from a huge number of parts, with power is transferred to the wheels through a proper differential. But hey, why not go that extra mile? The rope and hook hanging off the front are connected to a functional winch. The doors have windows that crank down, the steering wheel moves when the wheels turn, and where would this thing be without windshield wipers and headlights? Don’t miss the pair of demo videos after the break.

We remember seeing a pretty neat stirling engine come out of the same forums earlier this year.

Continue reading “RC Truck Has Working Windows, Steering Wheel, And Much More”

Spare Parts Pulled Together Into A Nixie Clock

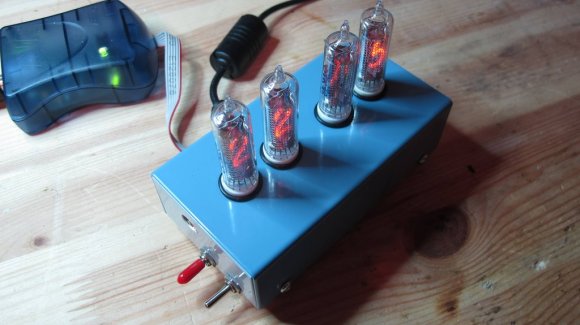
We’d like to dig around in [Small Scale Research’s] parts bin. Apparently there’s good stuff in there because he managed to build this Nixie tube clock using mostly leftovers.

The chip driving the device is an ATtiny1634. We weren’t familiar with it so here’s a datasheet (pdf) if you’re curios as well. The microcontroller communicates with an old GPS module in order to keep perfect time. There is an external antenna for it which connects through the hole next to the red switch seen above. The high voltage driver is a repurposed backlight inverter which is fed 12V power from an old laptop supply.

The album linked above shows the build quite well and even includes full schematics. There are some fireworks when he encountered an issue with a pretty large cap shorting to a resistor leg. If this isn’t enough juicy detail for you there are a few more nuggets shared in the Reddit comments.

DIY TSA Backscatter Body Scanner

[Ben Krasnow] built his own version of the TSA’s body scanner. The device works by firing a beam of x-rays at at target. Some of the beam will go through the target, some will be absorbed by the target, and some will reflect back. These reflected x-rays are called ‘backscatter‘, and they are captured to create an image.

In [Ben]’s setup a rotating disk focuses x-rays into beams that travel in arcs across the X-axis. The disk is moved along the Y-axis to fill in the scan. On the disk assembly, there is a potentometer to measure the y-axis position of the beam, and an optical sensor to trigger an oscilloscope, aligning the left and right sides of the image. Using these two sensors, the scope can reconstruct an X-Y plot of the scan.

To detect the x-rays, a phosphorous screen turns the backscattered x-rays into visible light, and a photo-multiplier amplifies the light source. A simple amplifier circuit connects the photo-multiplier to a scope, controlling the brightness at each point.

The result is very similar to the TSA version, and [Ben] managed to learn a lot about the system from a patent. This isn’t the first body scanner we’ve seen though: [Jeri Ellsworth] built a microwave version a couple years ago.

The impressive build does a great job of teaching the fundamentals of backscatter imaging. [Ben] will be talking about the project at EHSM, which you should check out if you’re in Berlin from December 28th to the 30th. After the break, watch [Ben]’s machine scan a turkey in a Christmas sweater.

Continue reading “DIY TSA Backscatter Body Scanner”

Pulse Oximeter Displays Blood Oxygen Levels On A PC

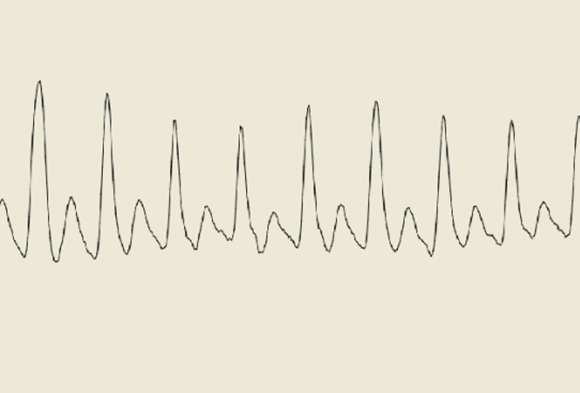
The last time you were in the emergency room after a horrible accident involving a PVC pressure vessel, a nurse probably clipped a device called a pulse oximeter onto one of your remaining fingers. These small electronic devices detect both your pulse and blood oxygen level with a pair of LEDs and a photosensor. [Anders] sent in a great tutorial for building your own pulse oximeter using a fancy ARM dev board, but the theory behind the operation of this device can be transferred to just about any microcontroller platform.

The theory behind a pulse oximeter relies on the fact that hemoglobin absorbs red and infrared light differently based on its oxygenation levels. By shining a red and IR LED through a finger onto a photoresistor, it’s possible to determine a person’s blood oxygen level with just a tiny bit of math.

Of course a little bit of hardware needs to be thrown into the project; for this, [Anders] used an EMF32 Gecko starter kit, a great looking ARM dev board. After connecting the LEDs to a few transistors and opamps, [Anders] connected his sensor circuit to the ADC on the Gecko board. From here it was very easy to calculate his blood oxygen level and even display his pulse rate to a PC application.

Yes, for just the price of a dev board and a few LEDs, it’s possible to build your own medical device at a price far below what a commercial pulseox meter would cost. FDA approval not included.