The Wedding Band: Milling Titanium And Wrapping It In Palladium

You’ve got to admit that custom milling your own wedding band is pretty hard-core. In this case [Jeremy Swerdlow] is making it for his friend, but that doesn’t diminish the fun of the project. After the break you can watch him mill a titanium ring and wrap it with a palladium inlay.

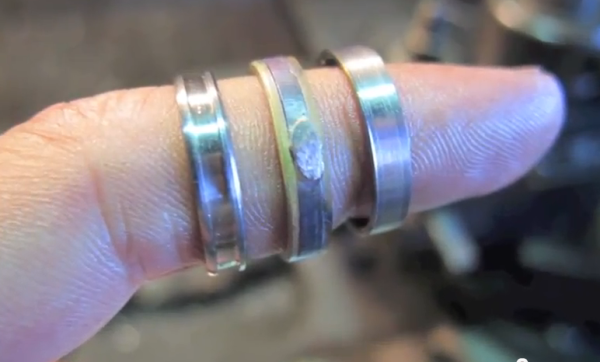
To solder palladium to titanium [Jeremy] would need special equipment, so he found another way to mate the dissimilar metals. He milled a dovetail groove in the center of the titanium band. To do that, he had to make a special cutting tool that was just the right size. Once had milled the ring’s rough dimensions, he had to fabricate a custom mandrel to hold the ring for the rest of the job. The dovetail was then filled with a palladium strip using a combination of heat and hammering. The two ends are soldered together using palladium solder. The ring in the middle shows this solder joint. To the right is a ring after the inlay is milled flush but before the final polishing which will bring out the best qualities of both metals.

If you don’t have the machine shop skills to pull this off you could always try your hand at 3d printed rings.

Continue reading “The Wedding Band: Milling Titanium And Wrapping It In Palladium”
Hand Soldering BGA Parts Should Be A Circus Act

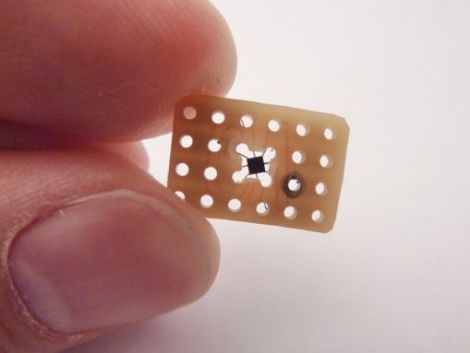
Okay, we think it’s questionable when people say they have no problem soldering QFN packages, but BGA? Granted this chip has far fewer balls on it than many, but it’s still quite impressive that [Xevel] was able to solder this BGA breakout by hand.

The chip you see above is a TMP006 infrared temperature sensor from TI. [Xevel] picked up the part but didn’t want to break the bank when prototyping by buying a proper PCB to host it. There are only eight conductors on it, arranged in a grid with 0.5mm pitch. That didn’t seem to scare him off, as the video after the break shows him connecting each to a conductor on a hunk of stripboard.

[Xevel] mentions that this is a dead-bug style project. Usually you glue the part upside down when using that technique, but it needs line of sight to get an accurate temperature reading so he first cut a hole in the substrate. We’d bet he’s using wire-wrapping wire to make the connections. It’s a very fine solid core wire which is perfect for this kind of work.

Continue reading “Hand Soldering BGA Parts Should Be A Circus Act”

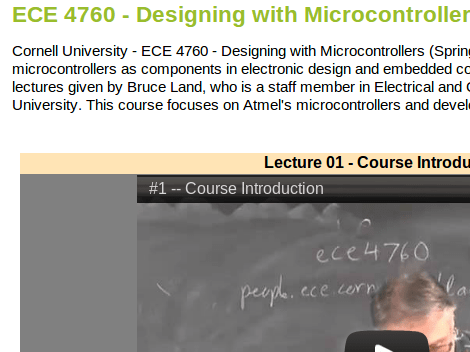
Cornell ECE 4760 Lecture Videos Now Online

Whenever we hear about ECE 4760 we take notice. That’s because a ton of fantastic hacked together projects have resulted from the class. It’s offered at Cornell University and focuses on designing projects based on microcontrollers. We look at it as a ‘how to connect everything to your microcontroller’ guide. The good news for you is that 34 lecture videos from the Spring 2012 ECE 4760 class are now available to watch for free online. When coupled with the course webpage itself (which outlines the reading, labs, and homework) this turns into an opportunity to work through the entire course on your own schedule.

If you need a brief preview, here’s a couple random things we’ve seen as final projects from the course: a digital saxophone, a handwriting decoder, and a haptic feedback unit for building your biceps.

We’re still working our way through the Nand2Tetris project, but we’re putting these lectures on our watch list for later.

[via Reddit]

How To Setup A Hackerspace From Someone Who’s Done It Before

We just got a tip from [PT] that a seven part series on how to start a Hackerspace will be posted this week. The blog over at Adafruit will be publishing one installment a day. Right now the introduction (linked above) and volume 1 are available. This covers what a Hackerspace is and who you might attract to help you get started. Tomorrow’s installment covers requirements you have to meet, which we assume delves into tax status (what you have to do to get 501c3 non-profit status) and financial reporting. But we’ll have to wait and see to know for sure.

The series is written by [Eric Michaud]. He founded HacDC in Washington, D.C. and Pumping Station: One in Chicago. He also helps others by consulting on startup spaces and embodies a wealth of knowledge on the topic.

If you’re area doesn’t yet have its own Hackerspace read this along with your buddies and see if you’ve got what it takes to get one going.

interesting fact: The hackaday logo is one of the watermarks in the lining of the hackerspace passport.

Building A Mechanical Counter Out Of Scrap Wood

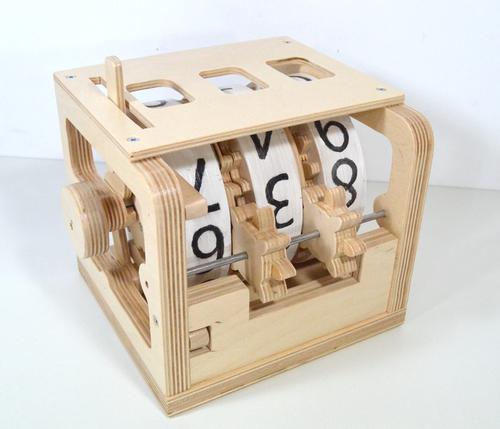
Watching [Matthias Wandel] fabricate this mechanical counter from scrap wood is just fascinating. He likens the mechanism to the counters you would find on decades-old cassette tape players.

You may recognize the quality of [Matthias’] work. We’ve seen several pieces, but his binary adder is still one of our favorites. This project gives us a very clear view of the development and fabrication process. He even posted a detailed guide if you want to build your own.

He started by prototyping a mechanism to increment and decrement the counter. With that proven design he started laying out the rest of the gears. These were cut from plywood scraps he had from other projects. Notice the small gears seen above which are missing parts of some teeth. Those sections were removed using a drill press with a Forstner bit. The missing teeth cause the next digit over to increment more slowly, resulting in a 1/10 ratio. This part of the design is demonstrated about three minutes into the video after the break.

Continue reading “Building A Mechanical Counter Out Of Scrap Wood”

Birthday Badges Teach Kids How To Solder

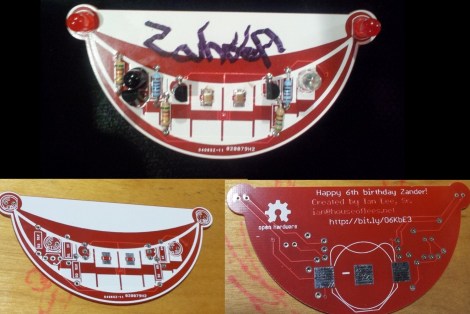
[Ian Lee, Sr] wanted to have an educational activity at his younger son’s birthday party. These were uncharted waters for him as he doesn’t remember education taking place at his own early birthday parties. But he came up with a great idea, with was to teach soldering using interactive badges which each guest could assemble themselves. He needed about twenty, so he tried to keep the BOM as small as possible. But that didn’t mean skimping on features.

You can see the black LED-type package on the left of the assembled badge above. This is an IR receiver whose counterpart transmitter is on the right side of the board. When two of these get within 6-8″ of each other the start talking back and forth. There is no microcontroller involved, instead the system relies on a multivibrator design. One of the red LEDs at the corner of the ‘smile’ is always blinking. When it is off, the IR transmitter is powered. This is picked up by another badge’s receiver, which lights the second ‘smile’ LED. You can see this happen in the short clip after the break.

Although there are relatively few components that went into this, it would take the kids a long time to put them together as they’re just learning. [Ian] and his eldest son soldered on all of the components except for the resistors beforehand.

Continue reading “Birthday Badges Teach Kids How To Solder”

Robot Stroller Lets Baby Steer Without Mowing Down Other Toddlers

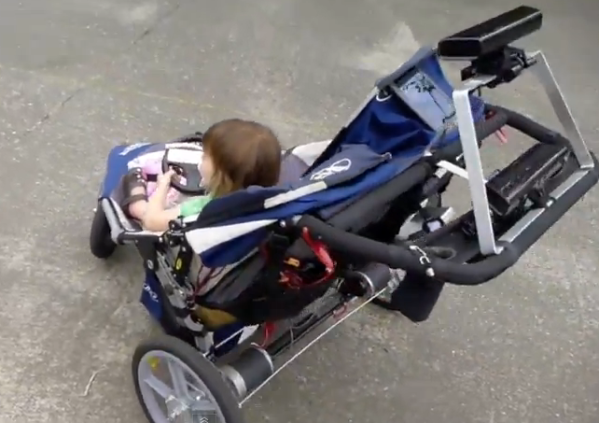
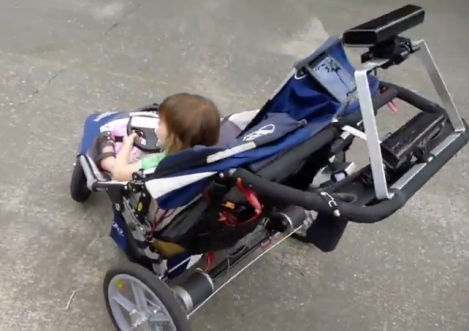
We’ve seen strollers and car seats that have a steering wheel for the baby to play with (like in the opening of The Simpsons). But what we hadn’t seen is a stroller that allows baby to actually steer. You might think that a putting a motorized vehicle in the hands of someone so young is an accident waiting to happen. But [Xandon Frogget] thought of that and used familiar hardware to add some safety features.

The stroller seen above is a tricycle setup, making it quite easy to add motors to the two rear wheels. These are controlled by a tablet which you can see nestled on the canopy of the stroller (look for the light reflected on the glass). This interfaces with two Kinect sensors, one pointing forward and the other pointing back. They continually scan the environment, looking for obstacles in the stroller’s path. You can see [Xandon’s] little girl holding a Wii Wheel, which connects with the tablet to facilitate steering. A test run at the playground is embedded after the break.

Continue reading “Robot Stroller Lets Baby Steer Without Mowing Down Other Toddlers”