Minimalist AVR Programmer Is Just Fab!

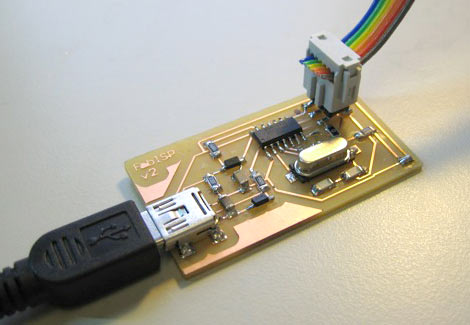
Whether you’re burning a new bootloader to an Arduino board, or doing away with a bootloader to flash Atmel chips directly, an in-system programmer (ISP) is an indispensable tool for working with AVR microcontrollers. If cost has held you back, it’s no longer an excuse: FabISP is a barebones USB-based AVR programmer that can be pieced together for about ten bucks.

FabISP was created by [David Mellis] as a product of MIT’s Fab Lab program, which provides schools with access to design and manufacturing tools based around a core set of fabrication capabilities, so labs around the world can share results. But the FabISP design is simple enough that you don’t need a whole fab lab. It’s a small, single-sided board with no drilling required; the parts are all surface-mounted, but not so fine-pitched as to require reflow soldering. Easy!

There’s still the bootstrap problem, of course: you need an AVR programmer to get the firmware onto the FabISP. This would be an excellent group project for a hackerspace, club or school: if one person can provide the initial programmer to flash several boards, each member could etch and assemble their own, have it programmed, then take these out into the world to help create more. We must repeat!

[Thanks Juan]

Makerbot Clone

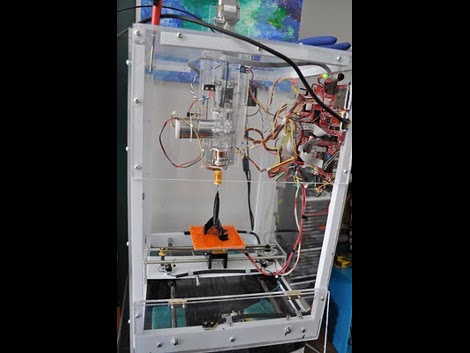
This table-top extruder was modeled after the Makerbot. Instead of laser-cut wood this is built from acrylic, uses salvaged rods from laser printers, some inexpensive stepper motors, and a homemade extruder. All said and done, [Peter Jansen] figures this build came in somewhere around $200-300. It may not look as nice, but at half the price of the Makerbot base kit you also get the fun of building from scratch. Hopefully your fabrication skills are up to the challenge. If so, you’ll be printing useful items soon enough.

3D Laser Printer

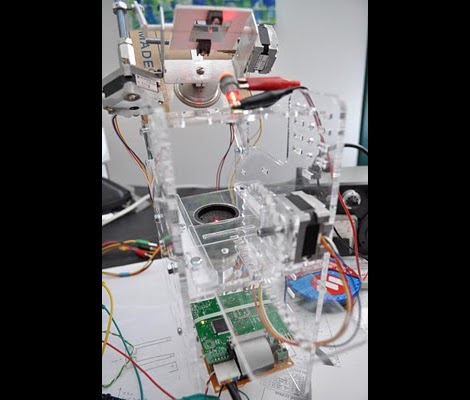
Working with easy replication in mind, [Peter] is building a 3D laser printer. The majority of the machine is made from laser-cut acrylic held together by parts that are inexpensive and available at your local hardware store. In the end this will lay down a layer of powder, use a laser to fuse the powder together in the outline of your choice, then repeat. This is known as selective laser sintering which is sometimes used in commercial rapid prototyping and, like a lot of other cool technologies, came into existence as a result of a DARPA project.

Sorry folks, this is not a fully functioning prototype yet. [Peter] is searching for the right laser for the job and a source for the powder. If you’ve got a solution please lend a hand and let’s see this project through to completion.

CNC Plotter From Old Parts

[vimeo=http://vimeo.com/10479779]

Get a quick fix of CNC for the day with this plotter. [Francisco Dulanto] grabbed the cartridge carriage from an old inkjet printer and turned it into a gantry by mounting it on two drawer sliders. The optical head assembly from a cd-rom provides the Z-axis movement with the whole thing controlled by three RepRap boards. [Francisco] called his project a joke compared to the Turing Machine, but we like it and we’re glad he tipped us off. There’s something zen-like about the projects that are thrown together with what you have available. After all, he’s certainly achieve a clean-looking build that does what it’s intended to do.

Heated Aluminum Bed For MakerBot

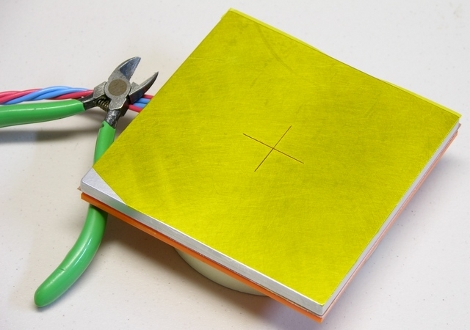
[Keith] built this aluminum-plate heated build stage for his MakerBot 3D printer. We just saw a different MakerBot heated build stage yesterday that relied on glass as the printing surface. Keith’s design is similar to the aluminum RepRap bed but scaled down for the MakerBot. He had a piece of aluminum machined the to correct dimensions, and perfectly flat to use as the printing surface. The yellow surface is caused by Kapton tape applied to the top of the plate. This heat-resistant covering is perfect to print on, resulting in glossy smooth surfaces that are easy to remove once the printed part has cooled. He’s working on improving his mounting technique to achieve prefect level so that he can print without a raft.

[Keith’s] writeup is phenomenal. He’s sharing knowledge in a way that is useful even if you’re not building the exact same kind of project. Follow his lead with your own write-ups, then let us know once you’ve posted them.

[Thanks Marty]

Heated MakerBot Build Stage

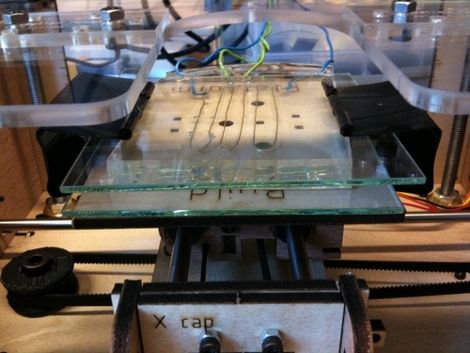
This heated build stage seeks to make 3D printing with the MakerBot a little easier. When hot ABS or PLA meet the cold, cruel world they have a tendency to warp. This was concern for [Devlin Thyne] when he was developing our Hackaday badges. What you see above is 10 Ohm nichrome embedded in clear silicone, then sandwiched in between two plates of glass. The device is made to interface with the MakerBot and includes a thermister for temperature sensing. With a small firmware upgrade you can now set the build stage temperature which should make larger printed objects a bit easier to deal with. A while back we saw a hotbed for the RepRap, but this implementation should be cheaper and easier for the smaller MakerBot applications.

3D Printing On A Much Larger Scale

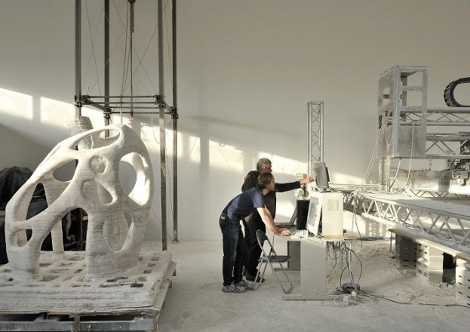
The end goal of this giant rapid prototyping machine is to print buildings. We’re not holding our breath for a brand new Flintstones-esque abode, but their whimsical suggesting of printed buildings on the moon seems like science fiction with potential. The machine operates similar to a RepRap but instead of plastic parts, it prints stone by binding sand with epoxy. This method is not revolutionary, but hasn’t really been seen in applications larger than a square meter or so. It’s fun to see the things we dabble in heading for industrial production applications.

[Thanks Juan]