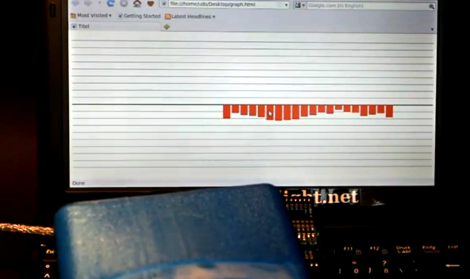
Reading Diodes To Create A Thermal Imaging System

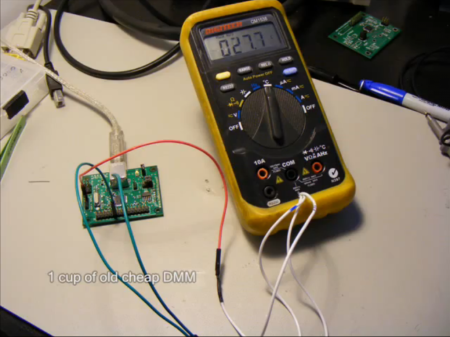
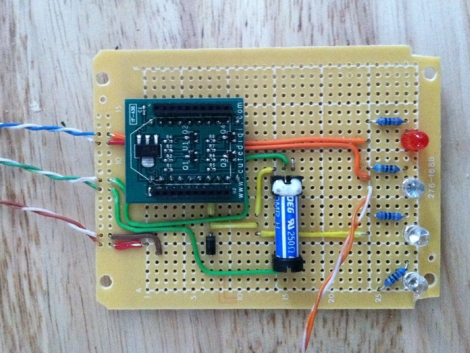
[Udo Klein] was working with some 1N4148 transistors and was interested in the specs relating to their performance at different temperatures. The forward voltage actually changes quite a bit depending on temperature and wondered if this could be reliably measured. He hacked his own LED shield for the Arduino to use as a 1×20 thermal imaging system.

The screenshot above is mapping the voltage measurements from a row of diodes (see the video after the break to get the full picture). He’s holding an ice pack over the row of diodes and observing the change. The on-screen display is facilitated by a Python script which is pulling data from the Arduino. Since there aren’t enough analog inputs to read all twenty diodes separately they have been multiplexed. Four I/O pins each enable five of the diodes, readings are taken with five analog inputs before moving on to the next set.

What can this be used for? That is precisely the wrong question… sometimes you’ve just got to go where your curiosity takes you. Continue reading “Reading Diodes To Create A Thermal Imaging System”


Hackaday Links: February 1, 2012

The only thing he needs now is a micro and RTC

For [Dino]’s 44th Hack A Week extravaganza, he made powered window blinds in five minutes. It’s a simple build with a small gear motor and a bit of tubing to adapt the shaft to the control rod of the blinds. Good job [Dino].

BecauseCamelCaseWillKillYourPinkieFinger

The wonderful [Lizzie] over at LUSTlab realized that typing meta keys really slows down the development process. The result? Foot pedals for the Shift and Command keys. No build log for this one, but it’s just a set of old racing pedals and a disused keyboard.

So much cooler than a potato

[mdevaev] out of Russia built a fully articulated GLaDOS replica. Here’s the build album and the relevant MLP forum post. This GLaDOS is tiny – probably less than a foot long, but it moves around and speaks (Russian, which is weird). Somebody get us a couple of motorcycle fenders so we can build the 1:1 scale version.

Visualizing a plane of fog

[greg] was looking for a way to visualize the chaotic turbulence of air. He mounted a laser on a computer fan and held some dry ice above the beam. The result looks like it could make for an interesting photography project, but check out the video if you don’t believe us.

We were asking for it

We asked for battery charging circuits that don’t use specialized parts. [Petr] found this one that only uses few transistors, a MOSFET and a voltage regulator. In one of the Hackaday comments, [atomsoft] had the idea of putting a USB plug on the traces to save a bit in component costs. [mohonri] said he designed one, but we have yet to see it. Perhaps next links post…

A USB-controlled Solder Reflow Oven

[Joel] of [Helion Microsystems] is at it again with his USB controlled solder reflow oven.  You may remember him from his crazy twitter-enabled Ewok model. Although these two projects are quite different, they both use the HU-320 USB breakout board that he’s in the process of getting funding for via [Pozible], or Australian Kickstarter for Yanks.

The reflow oven works using a thermocouple-enabled RS-232 voltmeter to output the temperature to the HU-320 board. [Joel] has been nice enough to provide us with the C# code to interface with many multimeters if you want to implement a similar project.  Temperature is controlled with a mechanical relay for what would appear to be a poor man’s PID controller.

Sadly, Fluke meters don’t seem to be listed, but your place of work probably wants their meter back anyway!  For another toaster reflow oven implementation, check out this [HAD] article.  Be sure to check out the video after the break for a video of the setup! (heat treat engineers may find the “recipe” format humorous).

Continue reading “A USB-controlled Solder Reflow Oven”

WiFi Garage Door Opener Makes Forgotten Keys A Thing Of The Past

wifi-garage-door-opener

[Tod’s] daughter has a habit of forgetting to take a house key along with her, so he was looking for a way to make accessing the house easier in a pinch. He had tried wireless garage door keypads in the past, but their performance was so-so at best. After scouring the market for commercial solutions and checking out the work of other hackers, he decided that he needed to craft a custom solution of his own.

He started shopping around for wireless-enabled microcontrollers and settled on a Roving Networks RN-XV module, which is designed as a drop-in replacement for an XBee. Paired with a 5v to 3.3v power adapter, the RN-XV is nearly all he needed to interface his iPhone with his garage door opener.

The microcontroller has enough GPIO pins to control the garage door, while also monitoring the door’s status using a simple magnet/reed switch combo. A web server in [Tod’s] house takes input from any phone connected to his wireless LAN and relays the open/close commands to the opener. The opener in turn returns status messages to him via the web interface.

We really like the system’s simple design, and as long as [Tod] has turned WPS off at home, he really shouldn’t have to worry too much about unauthorized entry.

Reverse Engineering A 1.5 Inch Photoframe

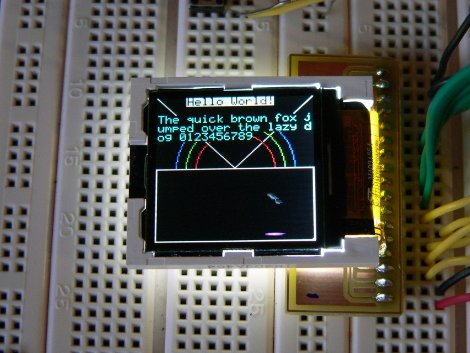
Little, no name, 1.5 inch LCD photo key-chains are all over the place for practically nothing. Not too surprisingly these things do not vary much in the parts that they use, some flash ram, a little lipo battery and a 16 bit color LCD. Wanting to find a way to reuse that LCD [Simon] Has an excellent tutorial on how to reuse a FTM144D01N LCD with a ILITEK ILI9163 LCD driver for your electronic projects.

Two units were used, one was ripped apart and soldered to a home made breakout board, the other was kept intact so its logic could be sniffed out with an oscilloscope. A pin-out was quickly determined since these things typically use a 8 or 16 bit data bus. Then a driver library was put together for AVR micro controllers, which includes some basic shape drawing and a 5×8 font.

While you may not be lucky enough to get this exact LCD screen from your local bargain store, there are a lot of pointers in here to hopefully get you up and going. We will be trying our luck on a very similar screen this afternoon as these things do have a decent picture and fairly quick response times already packaged in a hand-held case.

Join us after the break for a quick video.

Continue reading “Reverse Engineering A 1.5 Inch Photoframe”

Weapon Of Mass Graffiti

What uses a fire extinguisher, a bike pump, and provides hours of probation, community service, and possibly jail time? If you said an automatic graffiti writer you’re correct! [Olivier van Herpt] calls this little job the Time Writer. We call it defacing property… but tomato, tomahto.

Details are a bit scarce, but you get a fine overview of the system from the video after the break. [Olivier] tagged the post as Arduino; it’s obviously running the dot matrix printer made up of seven solenoid valves on a metal rod. These are fed ink via a tube connected to a fire extinguisher which serves as the reservoir. The bike pump is used to pressurize the enclosure so that a pump isn’t necessary when out and about.

Obviously you shouldn’t try this at home, but let’s talk about possible improvements as an academic exercise. First off the mix of the ink/paint needs to be reigned in to get rid of the dripping. We’d also like to see the inclusion of some proper spray can nozzles to tidy up the results. That, paired with an IMU board should be able to smooth out the printed designs.

This might make an interesting add-on to that rainbow graffiti writer.

Continue reading “Weapon Of Mass Graffiti”