Fattening A Thin Client To Run A Debian Desktop

While watching his thin client boot up [Nav] noticed that it’s using some type of Linux kernel. He wondered if it were possible to run a full-blow desktop distribution on the device. A little poking around he got a Debian desktop distribution running on a thin client.

The hardware he’s working with is an HP t5325. It’s meant to be a dumb client, connecting to a backend machine like a Windows Terminal Server or via SSH. But it’s got a 1.2 GHz ARM processor and [Nav’s] preliminary investigations revealed the it’s running a version of Debian for ARM. He used CTRL-C during the boot sequence to derail that process and dump him to a shell. The login was easy enough to guess as the username and password are both ‘root’.

Once he’s got that root access it was slash and burn time. He got rid of the HP-specific setup and made way for additional Debian modules like the apt system. This isn’t trivial, but he’s worked out a bunch of sticking points which makes the process easier. With the repository tools loaded you can install Xserver and Gnome for a full-blown desktop on the embedded hardware.

Using An LCD’s Poor Viewing Angle To Your Advantage

Early LCD monitors had some pretty awful issues when not viewed from directly in front of the screen. These days the technology has really minimized this flaw, but if you still have a cheap monitor on hand you might want to pull it out and give this hack a try. [Chris Harrison] is using oblique viewing angles to display additional information on cheap montiors.

Take a look at the two images above. The one on the left is taken from directly in front of the monitor and looks normal. But if you view the same screen from the side, the financial information is obscured. This is by design. Using very light colors, the obscuring characters are almost indiscernible from straight on, but you can just see them there a little bit (they look like burn-in does on a CRT screen). But from the side, these light colors become quite bold and blend with the rest of the data on the screen.

This works because of the polarizing filters on an LCD screen. You might want to watch [Bill Hammack] explain how an LCD works if you’re not familiar. Because the viewing angle color changes are a flaw and not a feature, manufacturers make the up-and-down angles the worst to improve on side-to-side viewing. [Chris’] experiments play into that by using a computer monitor on its side. Check out the video after the break to see some of the different applications that he uses this for.

Continue reading “Using An LCD’s Poor Viewing Angle To Your Advantage”

Logging Bubble Frequency And Pressure In Your Fermenter

In an attempt to add technology to his brewing process [hpux735] build a sensor rig that monitors bubbles and pressure during fermentation. What does this have to do with brewing great beer? We’re not sure and neither is [hpux735], but he’s got some preliminary readings to spark your imagination.

The bubble sensor itself was inspired by a SparkFun Tutorial where fermenting wine was monitored with a data logger. It uses an optical gate to detect the passage of air. But the goal here was to combine bubble frequency with internal pressure measurements to calculate how much CO2 is being vented. Perhaps it would be possible to get an idea of how close the batch is to completion based on those calculations. A hole was drilled into the fermenter side of an airlock to take these pressure readings.

This actually works quite well during secondary fermentation when the bubble frequency is quite slow. The hardware is able to discern a pressure difference before and after a bubble has passed the lock. Unfortunately the system breaks down during the vigorous bubbling that takes place soon after pitching yeast. See a few bubble-counting clips in the video after the break.

Continue reading “Logging Bubble Frequency And Pressure In Your Fermenter”

Altoid Tin Etching Tutorial

Eminent steampunker [Jake Von Slatt] wrote a small article on etching candy tins for The Steampunk Bible, but the limited space available in the book didn’t allow for a full exposition. To make amends for his incomplete tutorial, he posted this walk through to compliment the Bible’s article.

The process is very similar to the many tutorials we’ve seen on home-etching PCBs using the toner transfer method. Removing the paint from the Altoid tin, creating a mask, printing it on the Sunday circulars, and taking an iron to the tin is old hat for home fabbers.

Unlike PCB manufacturing, [Mr. Von Slatt] doesn’t bother with Ferric Chloride or other nasty chemicals – he does everything with electrolysis. After adding a few tablespoons of table salt to a bucket of water, [Jake] takes a DC power supply and connects the positive lead to the lid and the negative lead to the base. a bit of electrical tape around the corners of the lid keeps the metal from getting too thin.

A nice Copper finish can be applied to a finished tin by swabbing on a solution of Copper Sulfate – a common ingredient in “Root Kill” products. Of course that’s not a necessary step; you can easily enjoy and elegant Altoid tin bare metal.

Adding A Compact Flash Reader To A Korg Triton

[Roberto Barrios] has a Korg Triton sampling keyboard which he enjoys very much, but has grown tired of using media of yesteryear to store his work. He had the option of floppy disk or Jazz drive and for a time he was using a floppy-to-USB emulator, but the keyboard still insisted on a 1.44 Mb storage limit using that method. He decided to crack open the case and add his own CF reader.

It should be noted that this hack could have been avoided by using the 25-pin connector on the back of the keyboard. He didn’t want to have external hardware, which is understandable if you’re gigging–it’s just more equipment to keep track of. His solution uses the floppy disk drive opening to mount the card reader. His electrical connections are made with a ribbon cable. He cut off one end, and soldered the individual wires to the contacts on the motherboard. The reader is seen as a SCSI drive by the Korg firmware thanks to a SCSI-to-IDE adapter, so the storage limitation is based quite fittingly on the size of the CF card used.

Look at that cable management. You’d think it came straight from the factory like this!

Snooping Around In The Iclicker Hardware And Firmware

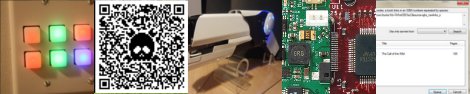
[Arko] was compelled to purchase an iclicker to use in some of his college courses. It’s similar in size to a television remote control except it only has six buttons and it communicates via radio frequency instead of infrared light. The idea is that classrooms have a base station that the instructor uses, and he or she can ask questions of the class and have instant feedback. Results are often projected on a screen for all to see but only the instructor can get at the breakdown of who answered in what way. In [Arko’s] case, the class awards participation points that you can only get by using this device. He decided to actually learn something from the expenditure by reverse engineering the device.

Preliminary hardware inspection told him that it uses an ATmega8 microcontroller and there’s a standard 6-pin ISP footprint just waiting to be populated with a surface mount pin header. Once he soldered on that header, he tried to read out the firmware but the iClicker reset itself. He guessed that there was something going on with the power and ground lines so he soldered directly to them and was able to dump the data–the security fuses are not set. He goes on to snoop in the EEPROM to find where the device ID is stored, and then to watch some of the SPI communications to see what the microcontroller is sending to the radio chip. But there’s a lot left to discover and he’s planning at least two follow-up post to share what he finds.

Just looking to repair your dead device? Check out this tip on battery problems with the iclicker.

Beating The Wrong Amateur Balloon Record

Friday, we covered a little project that attempted to beat the UK altitude record for an amateur balloon launch. Things don’t always go as planned, but the APEX team did manage to beat the several other UK records, including ones for the longest distance and flight duration for a latex balloon.

The APEX team was originally trying to beat the altitude record set by [Darkside] and his Horus 15.5 payload that made it to 40,575 meters. The APEX balloon was launched and slowly climbed over the North Sea to the expected burst point. Unfortunately for the trackers, the balloon leveled off at about 36km and just kept going.

The total Great Circle distance of the APEX Alpha flight was 1347km, with a total flight time of 12 hours, 20 minutes. The balloon eventually drifted out the radio range of anyone aware of the project. Despite the valiant efforts of HAMs across Europe, APEX Alpha was lost in the “HAM wastelands of Eastern Europe,” somewhere over Poland.

Even though the APEX team lost contact with their balloon, Alpha was still transmitting at the time. The balloon surely burst at this point, so it could have landed anywhere from Poland to Ukraine to Russia. The APEX team is offering a reward for finding Alpha, so if you see a small styrofoam box in Eastern Europe, drop the APEX boys a line.

Of course this flight couldn’t have taken place without the efforts of HAMs across Europe. [Darkside], [2E0UPU], and so many others helped out with the tracking as Alpha passed over the Netherlands and continued towards Berlin. The last contact was made by the awesome [OZ1SKY], who was very gracious to stay up until the wee hours of Sunday morning.

Not a bad flight for something that was supposed to take a swim in the North Sea. If you’d like to see the raw data from the flight, the APEX team posted everything they pulled down.