Simple NTP Clock Uses Custom RGB 7-Segment Displays

A great majority of hackers build a clock at some point. It’s a great way to get familiar with electronics and (often) microcontrollers, and you get to express some creativity along the way. Plus, you get something useful when you’re done! [Tadas Ustinavičius] recently trod this well-worn path and built a neat little NTP clock of their own.

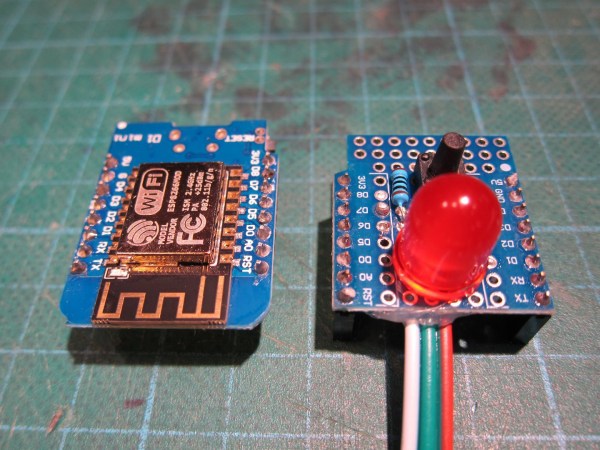
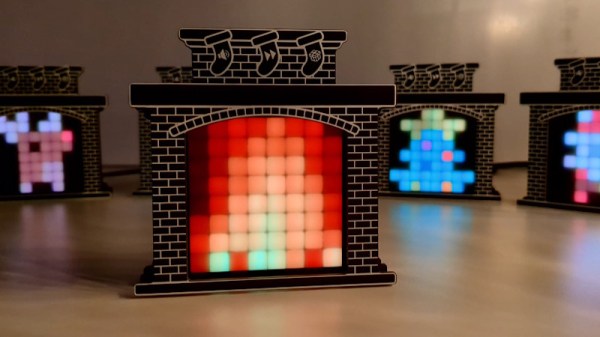
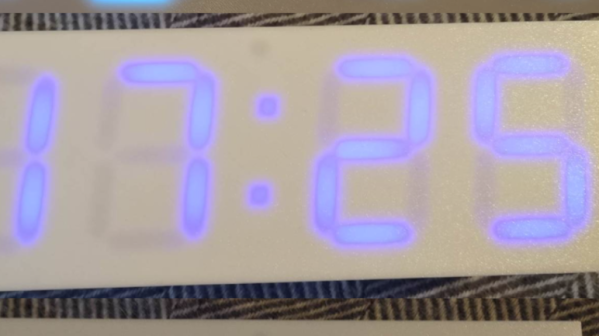
The build uses an ESP 12F as the core of the operation. It’s charged with querying an NTP time server via its WiFi connection in order to maintain accurate timekeeping around the clock. For display, it drives a series of custom 7-segment displays that [Tadas] built using 3D-printed housings. They use WS2812B addressable LEDs and thus can display a rainbow of colors.

For initial configuration, the phone creates its own WiFi hotspot with a web interface for changing settings. Once configured, it connects to the Internet over WiFi to query an NTP server at regular intervals.

It’s a simple build that does a simple job well. Projects like these can be very valuable, as they teach you all kinds of useful skills. If you’ve been working on your own clock design, don’t hesitate to let us know. You can use a microcontroller, relays, or even a ball.

Fail Of The Week: PCB LED Cube Fails Successfully

Remember LED cubes? We sure do — they were all the rage for a while, and then it seemed like everyone just sort of lost interest in them. There are probably a lot of reasons for that, not least of which is likely the amount of work it takes to put one together from discrete LEDs and separate pieces of wire. Could there be a better way?

Of course there could, and [Sasa Karanovic] thought he had it all figured out with this PCB-based LED cube. At first glance, it seems to make perfect sense; after all, weren’t PCBs invented to take the place of all that pesky point-to-point wiring in the early days of electronics? The boards [Sasa] designed are pretty cool, actually. They’ve each got room for 16 addressable WS2812 LEDs in 5 mm packages, with every possible bit of substrate removed to block the minimum amount of light. That left very little room for traces on the 2-mm-wide arms, so the PCBs had to have four layers, which raised eyebrows at the PCB house when [Sasa] submitted the design.

Such an airy and open design obviously has the potential for mechanical issues, which [Sasa] addressed by adding pads at three corners of each board; a vertical PCB connects to each LED board to provide mechanical support and distribute signals to the LEDs. The cube seems solid enough as a result, and even when handled the LED boards don’t really flop around too much. See the cube in action in the video below.

What’s nice about this design is the perfect spacing between the LEDs in all three dimensions, and the way everything lines up nice and straight. That would be really hard to do with wire, even for the most practiced of circuit sculptors. [Sasa] seems to agree, but still deems the build a failure because the PCBs block too much of the view. We suppose he’s got a point, and we’re not sure how well this would scale to an 8×8 cube. We’re not sure how we’d feel about paying for PCBs that are mostly air either, but as failures go, this one still manages to be pretty successful. Continue reading “Fail Of The Week: PCB LED Cube Fails Successfully”

1D Fireworks Are Nice And Quiet

Maybe you do it out of respect for the dogs and parents of young children in the neighborhood. Or maybe you do it because they’re harmful to the environment, or just because it’s too darn cold outside. Whatever your reasoning for not setting off fireworks, don’t fret — you can probably put together your own silent one-dimensional “fireworks” display from what you’ve got in the parts bin.

[Daniel Westhof]’s design is simple, requiring little more than a Wemos D1 Mini and a strip of WS2812 LEDs. Once activated, a red rocket shoots up from the ground and detonates, sending lights in both directions on the strip to imitate the bombs bursting in air. It’s controlled with a small push button switch, and there’s a deliciously large red LED indicator that shows the thing is ready for detonation.

You might be surprised to find that there’s a wide array of 1D gaming and animation projects out there, many of which made possible by the ubiquitous addressable RGB LED strip. We’ve seen a dungeon crawler, at least two different versions of the classic PONG, and even the makings of a simplified Wolfenstein.

An Animated LED Fireplace Powered By The CH32V003

Once you’ve mastered the near-magical ability of turning your ideas into a piece of hardware you can hold in your hand, it’s only natural that you’ll want to spread the joy. The holidays are a perfect time to produce a custom piece of electronics for friends and family, but there’s a catch: going from making one or two of something to making dozens of them can introduce some interesting challenges. Not only will you want to cost optimize your design, but to save yourself some aggravation, you’ll likely want to simplify the assembly process.

The fifty electronic fireplaces designed by built by [Adam Anderson], [Daniel Quach], and [Johan Wheeler] are a perfect example of both concepts, and while we’re coming across it a bit late for this year’s gift exchange, we wouldn’t be surprised if these MIT-licensed beauties end up under a few more trees in 2024.

Continue reading “An Animated LED Fireplace Powered By The CH32V003”

Mini Meters Monitor Microprocessor Maximization

[Lex] over at Computing: The Details loves to make fun projects. Recently, they have created a hardware CPU monitor that displays how PCs are parallelizing compile tasks at a glance. The monitor is built from 14 analog meters, along with some WS2812 RGB LEDs.

Each meter represents a core on [Lex]’s CPU, while the final two meters show memory and swap usage. The meters themselves are low-cost 5 mA devices. Of course, the original milliamps legends wouldn’t do much good, so [Lex] designed and printed graduations that glue over the top. The RGB LED strip is positioned so two LEDs fit under each meter. The LEDs allow a splash of color to draw attention to the current state of the machine. The whole bank going red would sure get our attention!

The system is controlled by an Arduino Mega, with the meters driven using the PWM pins. The only extra part is a 1 kΩ resistor. The Arduino wrangles the LEDs as well. Sadly [Lex] did not include the software. They did describe it though. Basically they are using a Rust program to call systemstat, obtaining the current CPU utilization data in Linux. A bit of math converts this into pointer values and LED colors. The data is then sent via USB-serial to the Arduino Mega. The software savvy will say it’s pretty easy to replicate, but the hardware-only hackers among us might need a bit of help.

This isn’t the first custom meter we’ve seen on Hackaday. Your author’s first project covered by Hackaday was for a meter created using an automotive gauge stepper motor. I didn’t include source code either – but only because [Guy Carpenter]’s Switec X25 library had me covered.

Continue reading “Mini Meters Monitor Microprocessor Maximization”

Add Some Blinkenlights To Your Supercon Badge

We’re not sure what is more amazing here: the glow of the blinkenlights themselves, the tedium involved in creating it, or the fact that [makeTVee] soldered 280 microscopic WS2812 LEDs while at Supercon.

This hack began before the con when [makeTVee] designed the LED-diffusing frame in Fusion 360 and printed it in clear resin. Rather than solder the LEDs straight, the frame has 280 teeth that support each one at a 55° angle.

Not only does this look cool, it makes the bridging of DOUT to DIN much easier. That leaves GND and VCC to be painstakingly connected with 30 AWG wire. How, you might ask? With a little help from 3.5x magnifying glasses and the smallest soldering iron tip available, of course.

But that’s not all. Since 280 addressable LEDs need a lot of power, [makeTVee] also designed a holder for the LiPo battery pack that fits into the existing AA holders.

Want to see more awesome badge hacks? Check out the compendium.

Build Your Own Nanoleaf-Like Hex Lights

Nanoleaf makes a variety of beautiful LED lighting products, with their hexagon tiles particularly popular with gamers and streamers alike. However, they do come at a significant cost, particularly if you want to put together a larger display. [Giovanni Aggiustatutto] decided to build his own version from scratch, with a nice wooden finish to boot.

The benefit of the wooden design is that the panels look nice both when they’re switched on, and when they’re switched off. [Giovanni] selected attractive okumè plywood for the build, which is affordable and has a lovely grain. The hexagons were then fitted on their back side with strips of WS2812B LEDs. The first hexagon is fitted with an ESP32 that runs the lights, with the other hexagons having their LEDs daisychained from there. 3D printed frames were then fitted to each hexagon to allow them to be connected together into a larger wall-hanging piece.

Ultimately, building your own wall lights lets you customize them to operate exactly as you want, and often lets you save a lot of money, too. We’ve featured other similar builds before, too. Video after the break.

Continue reading “Build Your Own Nanoleaf-Like Hex Lights”