Halloween Hacks: Diorama-rama

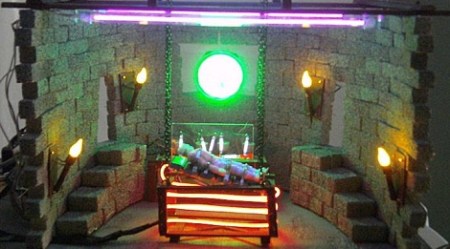
The folks down at LVL1, the Louisville hackerspace, are throwing a Halloween party. To showcase his building skills, LVL1 member [JAC_101] put together a Halloween diorama featuring the inner workings of Doctor Frankenstein’s laboratory.

There’s a bunch of really neat pieces that make this build great. First up is the LVL1 plasma sign. This sign is four circuits pumping a high voltage charge through Xenon flash tubes. Instead of a bright flash, a very Halloweeny Xenon plasma shoots though the tubes. The sign is constructed from four disposable camera flash circuits.

A few flickering-LED torches light Dr. Franenstein’s lair while the monster is a McDonalds happy meal toy wrapped in surgical tape and painted with UV reactive paint.

In the interests of repurposing existing materials, a plasma disc belt buckle was taken from [Seven of Nine]’s regeneration chamber LVL1’s rave supply cabinet and provides a suitable ‘mad scientist’ aesthetic. A bit of EL wire was thrown in for good measure along with some black lights to activate the UV paint.

While Frankenstein’s lab is missing a hilariously oversize knife switch on the wall, [JAC_101] still pulled off a great build.

Detecting DTMF Tones From Scratch

If you’ve ever wondered about the best way to detect dial and DTMF tones from a phone line, [Debraj] is your man.

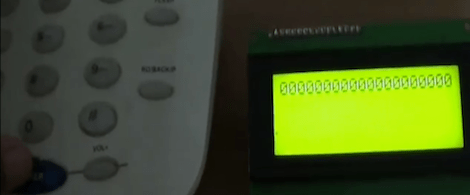
[Debraj] built a DTMF detector using the Goertzel algorithm. Normally, when we think about detecting tones, we pull FFT out of our bag of tricks. The Goertzel algorithm isn’t as computationally complex as FFT and can be implemented on even the smallest microcontrollers.

For the build, the first thing to solder is a nice audio transformer and some protection diodes. The ring tone from a phone line goes from +35 V to -35 V – a bit more than a microcontroller could handle. A PIC18F4520 dev board was used as the brain of the system with all the code is available on [Debraj]’s site.

Although implementations of the Goertzel algorithm are a little uncommon, [Debraj] has seen a few interesting projects using this technique. [Debraj]’s build could easily be modified into a guitar tuner with a few changes in the code, for example.

This project was built as the command and control for a home automation system and from the video after the break, we can’t wait for [Debraj] to get annoyed at the phrase, “To turn on the kitchen lights, please press 1…”

Continue reading “Detecting DTMF Tones From Scratch”

Rear Window LED Display Gives Other Drivers A Piece Of Your Mind

rear_window_led_matrix

[Gagandeep] was sick and tired of discourteous drivers on the highway, so he decided that he would put together a display to let them know what he thought of their poor driving skills. He planned on putting the display up in the rear window of his car, so he had to ensure that it did not obstruct his view while driving.

He decided that an LED matrix would be the best way for displaying images and text while on the go, so he got busy constructing a 40×16 mesh grid for his rear window. Using a wooden template to get the spacing and positioning just right, he spent several days soldering the 600+ LEDs to one another. He used 74HC595 shift registers to manage the LEDs in groups of 5 columns, while an ATmega AT89C51 was tasked with generating the text and images to be displayed. All of the ICs were deadbugged in place, helping achieve [Gagandeep’s] desire of keeping his view unobstructed.

While we’re not well-versed on the legality of such a display, it looks great when animated. There are plenty of pictures of the grid in various stages of construction as well as videos of it in action in his Picasa album, so be sure to check them out. If you are looking for code or Eagle files, you can find those here.

Analog Test Interface For Your Computer

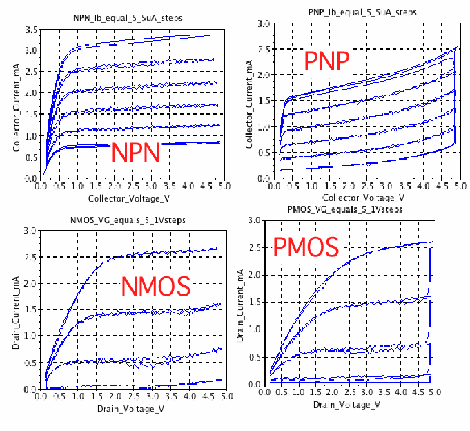
Wanting to test the response curves on some analog parts, [Don Sauer] devised a way of using simple tools to graph analog tests on a computer. Here you can see the results of testing NPN, PNP, NMOS and PMOS transistors, but modifying the input circuitry would let you test just about anything you want.

[Don] is using an Arduino as the hardware interface. He needed some additional parts, like an op-amp and some passives. Instead of building this on a breadboard, he printed the circuit out on a piece of cardboard, hot glued the components in place, then wired them up. This will let him reuse the interface in the future, but is quicker than designing and etching a PCB.

He uses a Processing sketch to capture the test data streaming in from the Arduino. Once recorded, he uses SciLab to create the graphs. He also covers a method of sifting through the data using Octave, another open source program that feels somewhat like MATLAB.

Video: Performing I/O With The ATmega328p

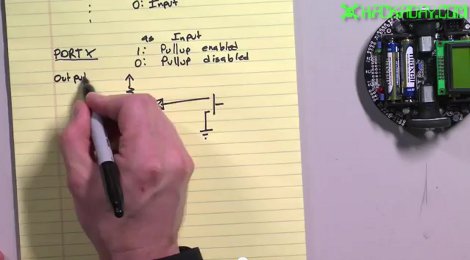
Today we continue on with part 2 of our series where [Jack] shows how to program for the ATmega328p processor using the Pololu 3pi robot. In this video, he starts to dig deeper than last week’s video by showing you how to program in C so that you are directly reading inputs and directly sending data to outputs. Specifically, this video shows how to set up your I/O pins and then how to interface with LEDs, buttons, and a beeper.

There were a few comments on last week’s video about not wanting to buy a 3pi robot to learn on. That’s fine. For this series there really is no reason that you need to use the 3pi robot. We picked it because it is a great device to learn about the ATmega processors since it has so many things that you can play around with to get your feet wet but there really is no reason that you couldn’t wire up a DIP version on a perfboard and still follow along with these videos. In fact, if you have a good writeup about the cheapest possible way to get started with the ATmega series of processors, we’d love to hear about it.

Looking for part 1 of this series? [Click Here]

Video is after the break.
Continue reading “Video: Performing I/O With The ATmega328p”

Creepy Delta Bot Follows Your Every Move

tim_tracking_interactive_mechanism

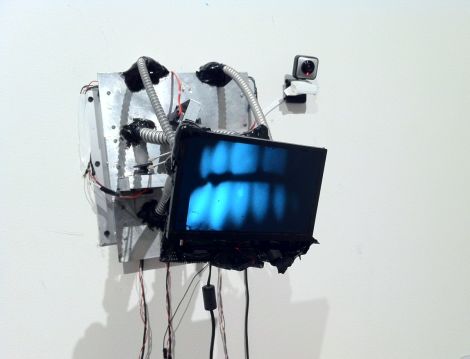
The creation you see above is the work of art student [Daniel Bertner] who is wrapping up his Bachelor of Fine Arts degree at the School of the Art Institute of Chicago. He calls the incredibly intriguing, yet somewhat disturbing device “TIM”, which is short for Tracking Interactive Mechanism.

A culmination of different projects he has tinkered with over the last year or so, TIM is an interactive delta bot with an attitude. Mounted on the wall of the Art Institute’s Sullivan Galleries, TIM is as interested in you as you are in it. While passers by investigate the curious device, it watches them back, following their every movement.

The robot’s motors are controlled using an Arduino, and its ability to track people standing nearby is provided via a video stream processed with Open CV.

It really is a cool project, and we think it would make for an awesome prop in some sci-fi horror flick. Check out the video below to see TIM’s personality in action – he doesn’t like it when people stand too close!

Continue reading “Creepy Delta Bot Follows Your Every Move”

A Wooden Computer Case, Monitor Stand, And Keyboard

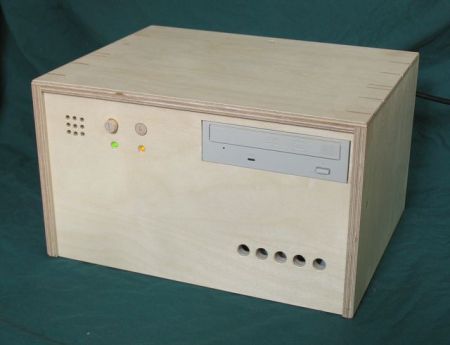
Wood and electronics don’t generally mix nowadays, but if you yearn back to a time when radios and the like had a nice wooden finish, this wooden computer case may be for you. Combine that with a Wooden keyboard enclosure, and maybe even a LCD monitor stand and you’ll have a setup that should fit in with any wood-themed decor!

The wooden computer case is actually more of a cover in that it uses most of the stock case to house all of the components.  It would definitely be a pain, and possibly a fire-hazard, to make a back mounting plate for all the components out of wood. To go along with this, the LCD monitor stand was engineered for a 21″ monitor when the owner of it wasn’t satisfied with the stability of the stock stand.  In the end, he ended up building something quite sturdy and nice looking to replace it.

The highlight for many for the keyboard would be that it was made, in part at least, out of a desire for a Commodore-64 keyboard.  It appears to function well andlooks great, so be sure to check out the other pictures after the break! Continue reading “A Wooden Computer Case, Monitor Stand, And Keyboard”