Addressing Microchip’s Open Source Problem

microchip_call_for_open_source

Hackaday alum and owner of Dangerous Prototypes [Ian Lesnet] recently wrote an editorial piece calling out Microchip on some of their less than friendly attitudes towards open source.

[Ian] and his company use PIC microcontrollers extensively in their projects, and they have quite a high opinion of their products overall. The gripe that he has (and thinks you should have too) is regarding Microchip’s approach to open source.

You see, Microchip invested in the Arduino IDE and released the chipKIT, a 32-bit Arduino compatible development board, along with big promises of “playing nice” with the open source community. The problem, according to [Ian], is that while Microchip’s compilers are based on GCC, they “keep some special sauce locked up”, which means that certain parts of the chipKIT toolchain are not open. Many in the community, including [Ian] had high hopes for the chipKIT based on the successes seen by Atmel’s open source initiatives, but many things are still locked up behind closed licenses.

An example of this unfriendly attitude towards open source can be seen in Digilent’s recently released network shield. It supports Ethernet and USB features of the chipKIT MEGA, but the TCP/IP and USB stacks are completely closed source. Digilent pushed hard to get the ability to release open drivers for the board, but it was a battle they ultimately lost. This behavior creates roadblocks for seasoned developers of open source products such as Dangerous Prototypes, as well as the curious beginner, which is why [Ian] is making a point in bringing these issues to light.

[Ian] urges Microchip to give something significant back to the community they are tapping, a result which can only be achieved by speaking up. Be sure to check out his editorial, and if after reading it you have any interest in letting your voice be heard, drop Microchip a line and let them know that their one-way relationship with the open source community is something you would like see change.
Dustbin Computer Lets You Clean And Prototype With A Neato XV-11

So you bought yourself a Neato XV-11 and your floors have never been cleaner. The only problem is that you want to hack around with the hardware without losing your floor-sweeping minion. [Hash] found a solution to the issue by building a computer inside of the dustbin module.

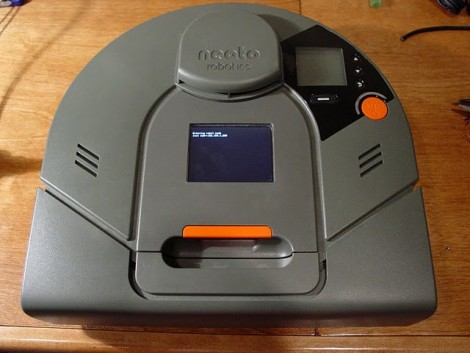
You can see at the center of the image above a touchscreen. Normally this is just blank plastic, as it’s the removable container where your floor sweepings go, but [Hash] was inspired by the modular design. Since that bin is intended to be removable, it’s a perfect way to make add-on hardware removable. All he needed to do was find a way to connect to the Neato’s own electronics. The solution was a non-standard USB cable.

Using the guts from an Insignia Infocast 3.5 (he picked several of them up on clearance at Christmas) he  milled an opening for the touch screen, added a cooling fan, and wired up a toggle switch (not pictured above) which powers everything from the 14-17V coming in from that USB cable. The Infocast is a Chumby with a different branding so there’s plenty of Linux-based power and it’s WiFi enabled. Watch [Hash’s] walk through video after the break to see all that went into this clever concept.

We haven’t seen too many hacks that make use of the Neato XV-11. [Hash] is the same guy who hacked the Lidar on the unit, but there must be others turning out impressive projects. Don’t hesitate to send in a tip if you know of one.

Continue reading “Dustbin Computer Lets You Clean And Prototype With A Neato XV-11”

My First Robot: A Simple Demo To Get Kids Excited About Robotics

revoltlab_balloon_popping_robot

[Will] from Revolt Lab needed a project to get the summer campers he supervises interested in electronics, but when your audience is 5 years old, your subject matter had better be simple, yet interesting enough to hold their attention at length. He settled on using a Lego NXT robot to keep their little minds engaged, because who doesn’t like robots?

He picked up a basic Lego NXT kit and paged through the manual. The first “example” robot looked pretty cool so he decided to give it a shot, though he still hadn’t figured out exactly what he would have the robot do. Inspiration struck, and he decided that he could take advantage of the NXT’s color sensor as well as its proximity sensor to construct a balloon hunting robot.

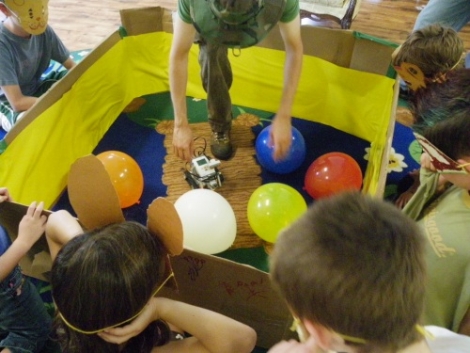
He constructed a “balloon corral” to keep the balloons in place and the kids out of his thumbtack-wielding robot’s reach. He let his creation loose, and as you can see in the video below, the robot hunts down the blue balloon and pops it, much to the children’s delight.

If you’re in the position to introduce a group of young kids to electronics, this balloon popping robot paired with some conductive Play Dough would make for a fun and educational afternoon workshop.

Continue reading “My First Robot: A Simple Demo To Get Kids Excited About Robotics”

Knock Lock With Logic Chips

[Eric] needed a project for his digital logic design class, and decided on a lock that open in response to a specific pattern of knocks. This is a fairly common project that we’ve seen a few builds with ‘knock locks,’ but this one doesn’t use a microcontroller. Instead, it uses individual logic chips.

The lock senses the knocks with a piezo, just like every other build we’ve seen. Unlike the other builds, the knock pattern is then digitized and stored in an EEPROM. [Eric] only used 12 chip for this build, a feat he could accomplish with a few digital tricks, like making an inverter by tying one XOR input high.

We’ve seen a 555-based knock lock before, but getting the timing right with that seems a little maddening. [Eric]’s build seems much more user-friendly, and has the added bonus of being programmed by knocking instead of turning potentiometers. Check out [Eric]’s knock lock after the break.

Continue reading “Knock Lock With Logic Chips”

Hunting Down Farmyard Pests With Technology

hunting_with_a_camcorder_night_vision_scope

[Snypercat] makes no bones about the fact that she despises rats, and does everything in her power to keep them off her farm. We can’t blame her though – they spread disease, eat other animals’ food, and can get your farm shut down if there are too many running about. While most of us might hire an exterminator or set out a ton of traps, she chooses to take a far more hands-on approach, hunting down each and every one of those little buggers with an air rifle.

If you’ve ever gone rat hunting in the dark (and who hasn’t?), you know that it can be difficult to aim in the dead of night. Night vision scopes can be expensive, but [Snypercat] shows how you can make your own scope that gives you the added benefit of recording your kills along the way. She happened to have a Sony camcorder with built-in night vision capabilities, and with a bit of tweaking she was able to mount it on her rifle’s scope. An IR flashlight was mounted on the rifle as well, giving her enhanced visibility without spooking her prey.

Be sure to check out the pair of videos below to see how [Snypercat] attached the camcorder to the scope, along with how well it works in the field.

[via HackedGadgets]

Continue reading “Hunting Down Farmyard Pests With Technology”

DIY Electron Accelerator

Reader [Xellers] sent in his newest instructable: DIY Electron Accelerator: A Cathode Ray Tube in a Wine Bottle. While not exactly what you might think of a cathode ray tube, the basics are in place. A wine bottle is used as a vacuum chamber and a 9kv neon transformer is attached to a stopped in the top. A cathode is placed mid way, the air is sucked out with a pump, and high voltage is applied.

Naturally as more air gets pumped out the electric arc intensifies into a pretty solid plasma filling the space between the two contacts. While mixing drilled glass with a vacuum and high voltage sounds like an awesome hospital story [Xellers] does cover some safety points including the possibility of this thing putting out some nasty waves.

One thing that is not mentioned (that I saw)  is this is very similar to how florescent light tubes work and without florescent material lining the chamber it will spit out quite a bit of UV light (notice germicidal UV lights are clear). So you will want to watch your eyes!

Join us after the break for a quick video.

Continue reading “DIY Electron Accelerator”

A Cellphone Based Interactive Voice Response System

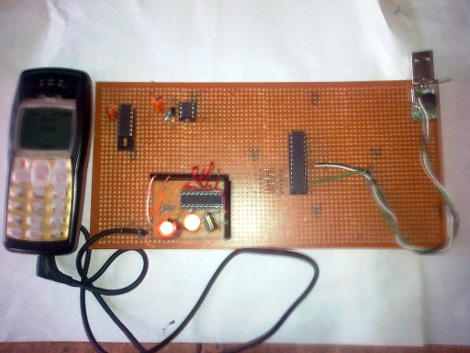
We’re all familiar with IVRS systems that let you access information using a touch-tone telephone. [Achu Wilso] built his own version which uses a cellphone, microcontroller, and computer.

The cellphone is monitored by an LM324 op-amp with an attached 555 timer chip. When a call comes in the voltage on the headphone output goes high, activating the timer circuit. If it goes low and does not go high again for about 25 seconds the call will be ended. Each incoming touch tone acts as a keepalive for the circuit.

An MT8870 DTMF (touch tone) decoder chip monitors the user input. An ATmega8 microcontroller grabs the decoded touch tones from that chip, and pushes them to a PC via USB. The PC-side software is written in Python, using MySQL bindings to access database information. eSpeak, the open source speech synthesizer software is used to read menu and database information back to the caller.

Not a bad little system, we wish there was an audio clip so we could hear it in action.