Working With I2C Port Expanders

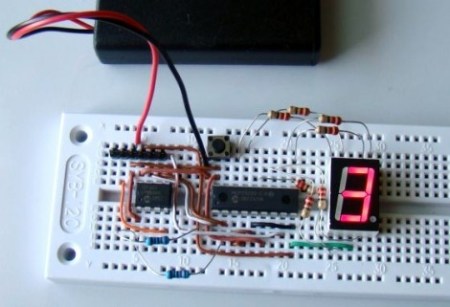
There are times when you don’t need much processing power for your project but you do need a lot of I/O pins. It often doesn’t make economic sense to choose a larger microcontroller just to get extra pins so the answer is to use a port expander chip. [Raendra] posted a guide for using one of these chips, it’s a Microchip MCP23008 chip that uses the I2C protocol for communications.

You are probably already familiar with using shift registers like the 595 series for port expansion. There can be benefits to using an I2C device instead. One of them comes when using multiple port expander chips. With cascading shift registers you must always shift in the data for the entire chain of chips. But I2C devices are individually addressable, so you only need to push data over the I2C bus for the chips that need to be changed, the others will remain unaffected. It is especially easy to use these if you already have another I2C device in your project design as the addition only requires the connection of the SDA and SCL lines. Keep them in mind for future undertakings.
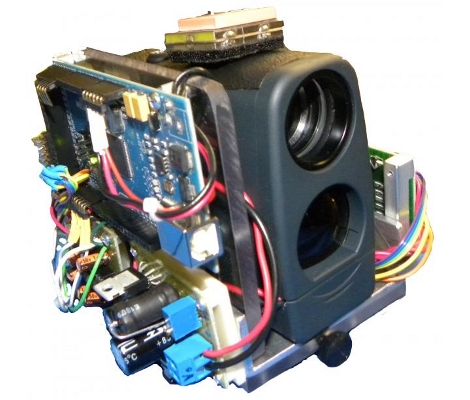

Arduino Hits The Battlefield — For Real

We’re not sure if this is the first time, but here’s some pretty solid proof that Arduino has found its way into the weapons of war. The creators, [Derek Wales], [John Eischer], and [George Hopkins] are all Electronics Engineering majors at West Point. They came up with this idea after seeing video footage of a firefight in Afghanistan where combat soldiers were calling in artillery strikes using a compasses and GPS devices. It’s an all-in-one unit that can provide the same information quickly and accurately. The prototype above, which they call the DemonEye, contains a laser range finder, digital compass, and a GPS module. The article also states that it contains a mini-computer but we recognize that as an Arduino Mega (thanks to Miguel over at Areopago 21 for noticing this first and sending in the tip about it).

The prototype apparently comes in at $1000. Okay, it seems a bit high but not out of the ballpark. What we can’t understand is how the second generation of devices was billed out at $100,000 for five more units. What’s the going rate for laying out military-grade PCBs?

FPGA Mandelbrot Fractal Engine

fpga_mandelbrot

[Mike Field] has always been interested in the Mandelbrot Set since he first read about it back in the ‘80s. Having coded it on a Commodore VIC20 back int he day, he always returned to the Mandelbrot set when he wanted to try out some new programming technology.

He wanted to delve deeper into the world of FPGAs, so [Mike] figured the best way to do so would be to use one to program a Mandelbrot fractal engine. He started out with a goal of creating a 640×480 Mandelbrot display, but over time, he found that he could push his Nexus 2 FPGA to 800×600. He didn’t stop there, and after tweaking a few things, he was amazed to find that he could push a 1024×768 display from the small board.

He kept a pretty detailed log as he went along, should you be interested in trying your hand at the process as well. Though there is no video of the FPGA in action, there are a few cool pictures showing off his handiwork.

Building A One-ton Linear Servo

one_ton_servo_jack

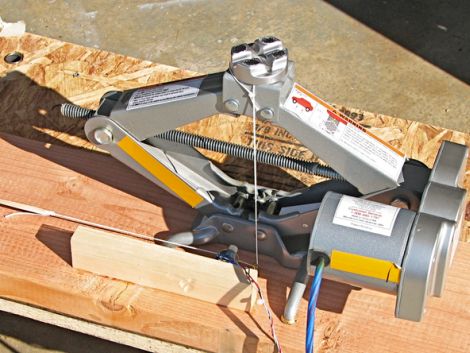
A while back, [Windell] from Evil Mad Scientist Laboratories wrote up an article for Make Magazine detailing how he built a one-ton, servo-controlled scissor jack for under $100. He dropped us a line to let us know that the project details have been released for free at Make Projects, so we stopped by to take a look.

The project starts out by pulling apart an electronic scissor jack to get access to the solder pads for the up and down buttons. Once wires are added there, a servo is the next victim. [Windell] recommends using an old servo with a busted motor, but you can use a good one just the same. The servo’s pots are replaced with 10 turn pots, and then wired up to a controller board, to which the jack is also connected. Then, to provide feedback to the servo, a string is looped around the top of the jack, which is used to turn the pots added in the previous step.

[Windell] says that the setup works quite well, though we imagine the duty cycle might be a bit short before adjustments are required. Regardless, it’s a quick way to get a heavy load lifted with servo precision.

Mini-cannon Built From A BBQ Lighter Fires Airsoft Pellets

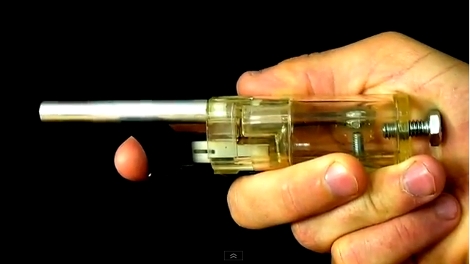
[Nighthawkinlight] has made his own palm cannon to shoot Airsoft pellets. His process, which he guides us through step-by-step in the video after the break, definitely invokes MacGyver buy using commonly available parts in a way they were not intended.

He starts with a barbecue lighter, removing the screws and plastic housing to get at the clear plastic butane reservoir which serves as the body of the cannon. The butane is carefully released from the tank, and the output valve is modified to receive the barrel. In this case the barrel from an old Airsoft gun was used, but a metal pen housing could do the trick as well. The spark igniter from the lighter is also reused, but two bolts have been screwed into the reservoir and are used as probes for the igniter wires. In order to fire this one-shot-wonder, a cotton swab soaked in 90% alcohol is inserted through the bolt on the left side. After inserting an Airsoft pellet the trigger is pulled to ignite the vapors.

Continue reading “Mini-cannon Built From A BBQ Lighter Fires Airsoft Pellets”

Apple ][ Converted Into USB Keyboard

Sometimes it’s apparent that there is no practical use for something featured on Hack a Day, but we don’t know if [Andrew Filer]’s Apple ][ USB keyboard qualifies for this.

After reading through the very thorough documentation available in electronic and dead tree formats, [Andrew] decided that Apple ][ would make a great USB keyboard. Unlike modern keyboards, vintage computers like the TRS-80, Commodore 64, and the Apple ][ return the 7-bit ASCII value of the key instead of a scan code. The ASCII codes generated by the keyboard were sent through a Teensyduino running [Andrew]’s keyduino sketch.

Modern PS/2 keyboards use MAKE and BREAK scan codes sent from a microcontroller that reads the keyboard matrix. For example the MAKE code for the letter ‘A’ is 1C, while the BREAK code is F0 1C. There is a reason for this design, but for the DIYer, interfacing a keyboard becomes a challenge without a separate microcontroller. We’re thinking [Andrew]’s keyduino could be a great way to put a keyboard in a project, but we’re not about to tear up our Apples and C64s to get a keyboard.

Wireless Mouse Li-Poly Retrofit With USB Charging

wireless_mouse_lipoly_retrofit

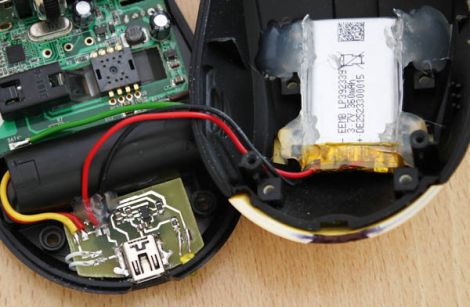
It’s no secret that wireless mice can eat through batteries pretty quickly. Rather than keep a fresh supply of AAs on hand at all times, [Phil] decided he would convert his mouse to use a rechargeable lithium polymer battery instead.

This isn’t the first time we’ve seen a cell phone battery crammed into a mouse to increase capacity, but we think this one has been done quite nicely. [Phil] managed to fit a 2.7 – 4.2v Li-Poly battery in the mouse’s palm rest, where there was a little extra empty space. The battery can be charged from any USB port via a custom-built charging module, which he constructed using a MAX1555 charge controller. Another custom-built circuit resides in the space previously occupied by the AA batteries, which uses an MC340063 DC to DC converter to drop the battery’s voltage down to the 1.25v required by the mouse.

The only part of the build that [Phil] is not pleased with is the power switch on the bottom, but since you rarely see that, we could care less. We think it is quite well done, and with a second version already in the works, we anticipate that it will get even better.

Be sure to check out [Phil’s] video tour of the hack, which you can see below.

Continue reading “Wireless Mouse Li-Poly Retrofit With USB Charging”