Geiger Counter Built In An Ohmmeter Enclosure

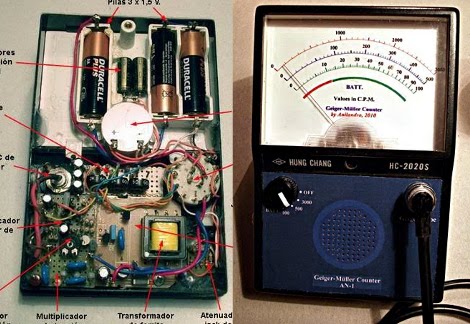
Here’s a Geiger Counter that makes itself at home inside of an old Ohmmeter (translated). [Anilandro] set out to built this radiation detector in order to learn how they work. Like other diy Geiger Counter builds we’ve seen, this project assembles a circuit to interface with a gas-filled tube which serves as the detector. [Anilandro] takes a few paragraphs to discuss how this works; the Geiger tube is basically a capacitor whose electrical characteristics change as an ionizing particle passes through it.

Once he had the theory worked out he scavenged some parts to use. A broken emergency light donated its transformer to provide the high voltage needed. The rest of the circuit was built on some protoboard, and a speaker was added to output the clicking noises that have become a familiar part of the detector hardware. The tube itself is housed in a wand that attaches to the base unit through a cable. Check out some test footage of the finished unit after the break.

Continue reading “Geiger Counter Built In An Ohmmeter Enclosure”
Shift Register Is All It Takes To Make A 3-wire Serial LCD

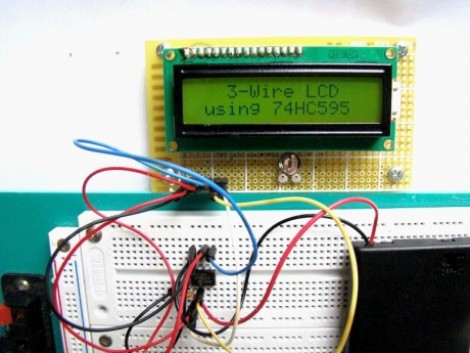
This hack is a bit older, but one aspect of the setup makes it worth sharing. Shift registers are a common component to include in a project when you need to increase the number of I/O pins available. We’ve used them to drive LCD screens before, but we never realize you could use a 595 chip to make a 3-wire serial LCD interface. That’s because we’ve always thought of shift registers as having three control pins which must be addressed: data, clock, and latch. But it seems that’s not the case. This hack gangs the pins for clock and latch (called the storage register clock input on this chip) together. This causes the shifted data to be latched to output register one clock cycle after it is shifted into the chip.

This means you can operate the 595 chip with just two pins, but alas, you do need one more connection to drive the LCD properly. This is an HD44780 compliant display. It is being used in 4-bit mode; four of the shift register pins provide that data, while a fifth controls the Register Select pin. Since the shifted data from the 595 appears on the pins after each clock strobe, you must control the Enable pin on the LCD separately or it will behave sporadically.

So there you have it, control an HD44780 display with just 3-pins by using a $0.42 part. Are we going a little too fast for you? Check out this 595 tutorial and give the shift register simulator a try. That should bring you up to speed.

[Thanks Rajendra]

Art Installation Lets You Be Your Own Souvenir

3d_souvenir_printer

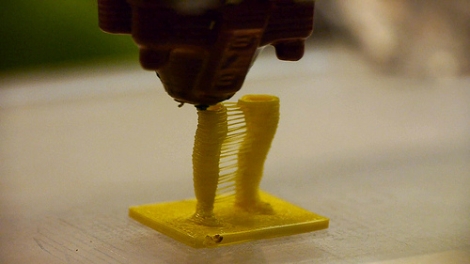
The team at [blablabLAB] have been hard at work on their latest project, which they unleashed on the streets of Barcelona in the La Rambla pedestrian mall. Their art installation allows you to pose in the middle of the mall and receive a plastic statue of yourself as a souvenir.

Not unlike the “Fabricate Yourself” installation we saw a short time ago, this project also uses the Kinect to create a 3D representation of the subject, though it uses three separate sensors rather than just one. Each sensor is positioned around a centralized platform, creating a complete 3D model, which is then sent to a RapMan 3D printer stationed nearby.

Each user is then gifted a plastic representation of themselves to take home – it’s almost like an interactive human Mold-A-Rama. While the figures are neat, it would be great to see what sorts of plastic statues could be made using a higher resolution 3D printer like the one we featured a week ago.

Check out the video below to see the souvenir printer in action.

Continue reading “Art Installation Lets You Be Your Own Souvenir”

Hacking Electronic Price Tags

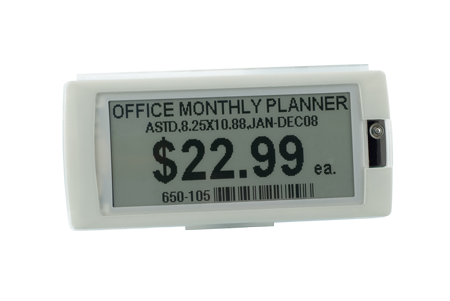
Something new is coming to a store near you: electronic price tags. [deadbird] decided to get one and see what makes it tick. First off it just looks like an LCD with some coin batteries and a simple board, but removing the batteries it was found that the text still appeared on the screen meaning its an E-Ink display.

Close examination of the chips on board shows that this model has an ATMEL ATMEGA16L, and a ATMEL952 25128AN (a 128k eprom with SPI interface), which makes this thing possible to bend to ones will. Also, dumping the eprom with an Arduino gets everyone a bit closer to decoding the instructions this thing needs to display its graphics, similar to the HP VFD hack we posted about not too long ago.

We have not seen these yet in our local shops, but give it time and it is bound to start popping up in our favorite surplus locations soon enough.

IR Remote Control Jammer Makes You Lord Of The Livingroom

Bring communications jamming technology into your TV viewing experience by building this infrared LED driver circuit. You’re probably familiar with the TV-B-Gone, which let’s you turn off any television at the touch of a button. But what if you actually want to watch the program that’s currently on the screen when the person with remote-in-hand doesn’t? That’s where this little marvel comes in.

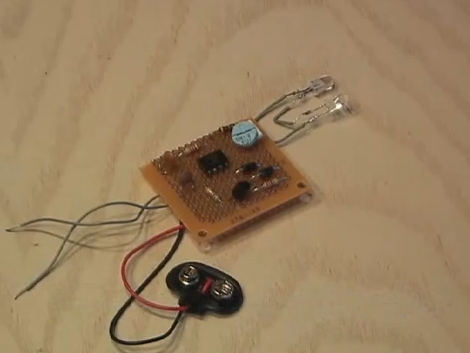
[KipKay’s] IR jammer uses a 555 timer to constantly transmit infrared traffic. The signals it’s sending out don’t correspond to commands the TV (or any other IR remote-controlled device) will respond to. But if the light intensity is strong enough, they will interfere with any signals coming in from a remote or even from a TV-B-Gone. [KipKay] wisely hides this circuit inside of another remote control so that the other couch potatoes you are thwarting won’t get wise to what’s happening. If they want to watch something else they’ll have to get up and walk over to the entertainment center to do something about it, and what’s the chance that’s going to happen?

Don’t miss [KipKay’s] infomercial-esque presentation of this gadget after the break.

Continue reading “IR Remote Control Jammer Makes You Lord Of The Livingroom”

Simulating VHDL Of An AVR8 Soft Processor

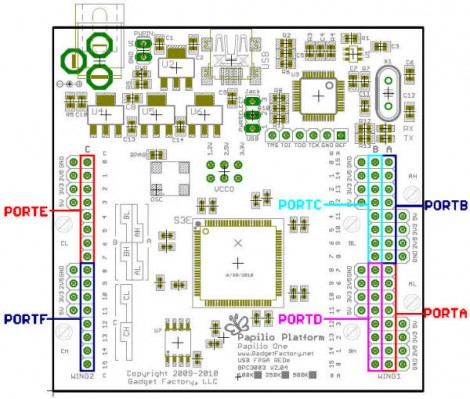
Okay, now we’re beginning to feel a bit like [Alice]. This tutorial shows you how to simulate VHDL code. This code is intended to run on an FPGA and includes a software-only version of the AVR 8-bit microcontroller core. Essentially, you’ll simulate VHDL code that simulates AVR hardware. Wrap your mind around that!

The code is intended to run on a Papilio Field Programmable Gate Array development board. We saw an early version of this board running the AVR8 core about a year ago. However, you don’t need to have any hardware to follow along and recreate this simulation yourself. It might be a great way to get your feet wet with FPGA programming before making that first hardware buy. Five different screencasts take you through the process of getting the AVR8 code, using an altered Arduino IDE for it, setting up a free version of Xilinx ISE to run the simulation, then setting it free and interpreting the data that the simulator spits out the other end.

Super VMW CPU Meter

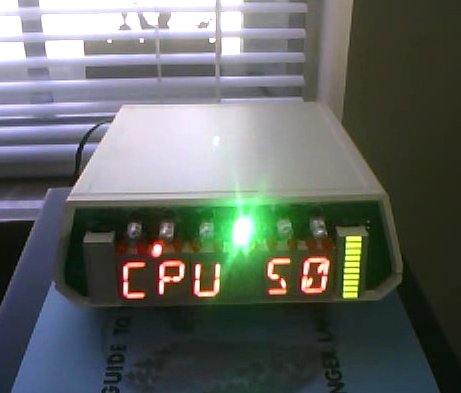
After many delays, restarts, and years, [Vince ] has finally finished his Super VMW CPU Meter. Featuring six alphanumeric red led displays, two 10 segment bar graphs, twelve red LEDs, and six color LEDs its got plenty of “screen” space to show all sorts of useful information.

Electrically its driven by four SAA1064 LED driver chips attached to an i2c bus which is banged by a PC’s parallel port and driven by software in linux. The software allows you to build displays for what ever application you may want, and even includes a color ASCII output so you can see what it will look like before you even have hardware.

Four examples are given, one is a cpu meter which uses the bar graph displays to show load per core. Another uses the bar graphs as a VU meter for your music while displaying the song’s information. There is a clock in all the normal formats + UNIX time, and some scrolling text demos.

Construction gets a little odd as overhang of chips and connectors was not really taken into account so some “lofting” was needed to raise the trouble spots above the rest of the board. It is not something we would want to do, but a handy trick if we are ever faced with that situation.

Join us after the break to see this wild light show in action. Continue reading “Super VMW CPU Meter”