LED Matrix Helmits Inspiried By You-Know-Who

Here is a post from [John’s Projects]. For the insane, satirical, and incredible 2011 Omaha Groundhog Prom [John] and his buddy fabricated  helmets reminiscent of our favorite robot rockers.  [John] needed something harder, better, faster, stronger than the competition and wound up creating LED matrices that mount behind aerodynamic motorcycle helmet visors.

The helmets were constructed in about a weeks time and in a similar fashion to the real helmets. [John] sourced some cheap motorcycle headgear and mounted the LEDs, their driving transistors, and ballast resistors to a 1/32″ (flexible) plexiglass sheet that sits face to face with the wearer. [John] walks through the whole process starting with a half inch grid drawn onto a paper template. The template is cut from the plexi using tin snips, then LED holes are carefully drilled in the thin plastic using various bits up to 13/64″. The 90 some odd LEDs are, one more time, fitted then hot glued in place and soldered in vertical columns to simplify things and prevent any short circuit. An Arduino Pro (via common emitter 2n2222 on/off circuits) provides some digital love to the 18 LED columns and is connected to a Velleman Sound-to-light kit which modulates the brightness of the whole visor based on da funk. Two pots are also wired to provide sensitivity and pattern selection to the human after all.

We can’t imagine the technologic setup is fresh after being subjected to the steam machine, high life, and whatever else for too long. Oh yeah, Some brighter LEDs could give the helmets night vision and make the whole thing come alive with emotion. Something about us is burnin to know what powers the helmets. Nice work [John]!

If you are looking to do some homework on these high fidelity rock’n roll outfits in the prime time of your life check out this very detailed example, a helmet construction video,  or finish the costume off with some EL wire.

Check out some videos of these superheros rollin’ & scratchin’ after the jump!

Continue reading “LED Matrix Helmits Inspiried By You-Know-Who”
Real-time Robotic Arm Control With Blender

robotic_arm

Last year, [Justin Dailey] was coming down the home stretch of his senior year as a Computer Engineering student and needed to build a final design project. He always wanted to construct a robotic arm, and figured that there was no better way to legitimize such a project, than to claim that it was “homework”.

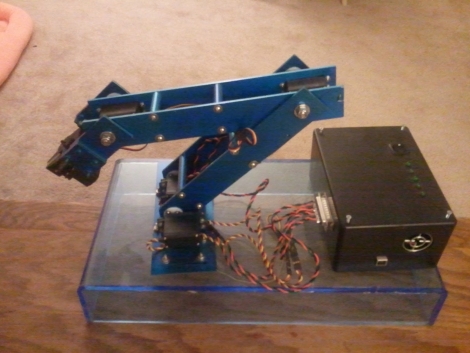
While he originally wanted to control the arm with a joystick, he had been messing with Blender quite a bit leading up to his final project, and thought it would be pretty cool to let Blender do the work. He started out by testing his ability to control a single servo with Blender, then slowly increased the complexity of the project. He prototyped the arm using cardboard, and satisfied with his progress thus far, began constructing the arm out of aluminum.

Once he had all six of his servos attached to the arm’s joints and wired to his Roboduino, he got busy constructing a 3D model in Blender. Using a few Python scripts, the movements inside Blender are translated to serial data in real-time, which is relayed to the Roboduino in order to control the arm.

Check out his site if you get a chance – there’s plenty of code to be had, as well as several videos of the arm in various stages of construction and testing.

A Weighted Companion Cube Worth Saving From The Incinerator

companion_cube

It’s honestly sad that Valve has not released any official Portal-related items to the masses, as a market for them clearly exists. As the saying goes, “necessity is the mother of invention”, and [Jamie] needed a Weighted Companion Cube in the worst way.

Actually he constructed his Companion Cube in order to test out some modifications and upgrades he performed on his homebrew CNC Mill. Judging by how the cube turned out, and the fact that he was able to keep tolerances within .005”, we would say that his mill is working just fine.

The cube was designed in Solidworks, and passed through the BobCAD plugin to generate the GCode for the mill. The base of the cube was machined out of a 3” solid block of aluminum, hollowed out on one side to give him access to the cube’s innards. He milled out heart shaped openings on each side, covering them with frosted Lexan.

He added a BlinkM to the mix, mounting it on the cover plate he milled for the open side of the cube. Once lit it cycles through several colors, including the pinkish tone anyone who has played Portal is quite familiar with.

We would say that it’s a great job, but it doesn’t do his work justice – it’s absolutely stunning. We’re not just saying that because we want one, though we do want one…badly.

3D Render Live With Kinect And Bubble Boy

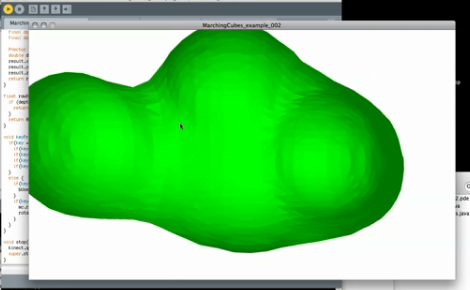
[Mike Newell] dropped us a line about his latest project, Bubble boy! Which uses the Kinect point cloud functionality to render polygonal meshes in real time.  In the video [Mike] goes through the entire process from installing the libraries to grabbing code off of his site. Currently the rendering looks like a clump of dough (nightmarishly clawing at us with its nubby arms).

[Mike] is looking for suggestions on more efficient mesh and point cloud code, as he is unable to run any higher resolution than what is in the video. You can hear his computer fan spool up after just a few moments rendering! Anyone good with point clouds?

Also, check out his video after the jump.

Continue reading “3D Render Live With Kinect And Bubble Boy”

Marble Machines Roundup

[Denha’s] been building marble machines for years and decided to look a back on some of his favorite marble-based builds  (translated). There’s a slew of them, as well as some thoughts about each. Our favorite part is the digital simulations of the projects. For instance, the image above shows a flip-flop marble machine that was built in a physics simulator. This makes it a lot easier to plan for the physical build as it will tell you exact dimensions before you cut your first piece of material. Both of these images were pulled from videos which can be seen after the break. But this isn’t the most hard-core of pre-build planning. SolidWorks, a CAD suite that is most often used to design 3D models for precision machining, has also been used to model the more intricate machines.

Continue reading “Marble Machines Roundup”

Building Your Own Router Lift-out Mechanism

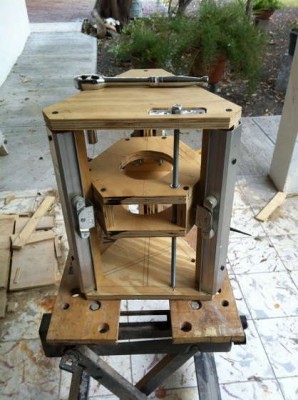
Adjusting the bit height on a router table can be a pain in the butt. Traditionally you needed to get into the cavity under the table top in order to make these adjustments, and it’s hard to make the adjustment and measure the height at the same time. Modern routers now offer the option to adjust height through a hole in the plate that sits in the router table, but this is usually only found on the more expensive models. Rather than buy a new tool [Urant] built his own router lift.

He’s using recycled closet rails to give his rig some smooth operation. These are the rails and runners that let closet doors hang from the top jamb. He saved them when replacing the closet doors in one of his rooms. There’s a triangular gantry which hosts the router, allowing it to move vertically on the three sets of rails. The threaded rod in the foreground of the picture above lets the woodworker adjust bit height by turning the nut at the top. Once mounted in the router table the nut is accessible through a small hole in the table surface.

LED Matrix Glasses Keep All Eyes On You

my_shades_are_so_bright_i_gotta_wear_um_something

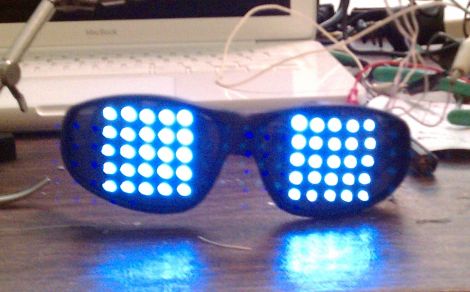
Instructables user [llopez-garcia] was looking for something that would make him stand out at music events or clubs, and decided that an LED matrix built into a set of sunglasses would do the trick.

He grabbed some LEDs and the biggest pair of sunglasses he could find at WalMart, then he got down to business. He had no experience in programming micro controllers, so he chose a PICAXE 20X2 to run his glasses, figuring that it would be easier to program in BASIC for his first project than C.

He drilled holes in the lenses and wired up two 5×5 LED grids, connecting them to the PICAXE as a single 10×5 array. That setup was chosen because the 20X2 limited him to 15 usable pins and he wanted to avoid using a shift register or LED driver to keep the part count down. The rest of the build is relatively straightforward with resistors in all the right places, and a pair of AAA batteries to power it – one strapped to either temple.

We think these are pretty cool, though we’re not sure if he can see anything while wearing them. Then again, who cares? You don’t need to be able to see with glasses this awesome.

If he had to do it all over again, [llopez-garcia] says he would beef up the LED structure a bit, as well as choose a different micro controller that can be programmed in C since he felt the PICAXE was a bit limited by BASIC.

Stick around to see a quick demo video of the glasses in action.

Continue reading “LED Matrix Glasses Keep All Eyes On You”