How To Work With EL Wire

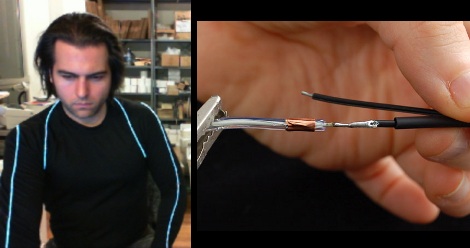
As you can see, [Phillip Torrone] has a nice start on his Tron costume for the movie premiere. Electroluminescent wire is what makes these costumes glow and if you’ve never worked with the stuff before you’re in for a treat. Adafruit posted a tutorial explaining how to work with EL wire. The process isn’t hard, but they’ve got a few nice tips, like using copper tape as a platform for soldering the corona wires. There is also a discussion of the math involved with properly powering your setup.

In this case, Adafruit is using ready-made power inverter units. If you’ve interested in hacking together your own inverter take a look at the background information from [Jeri Ellsworth].
Nails And Some Blacksmithing

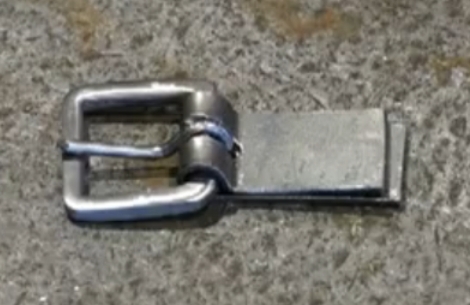
Here’s a blacksmith turning 4 inch framing nails into buckles. In the clip after the break he starts by heating and bending the nail around a square form. Next the excess gets cut off and both sides of the square frame are ground flat while in a vise. A smaller nail serves as the prong and a flat piece of metal is shaped so that this can be connected to a leather strap. This ends up as part of the support system for a full suit of armor.

We’ve seen a lot of great welding projects over the years, but today’s blacksmithing video leaves us wanting. If you’ve got a favorite project that involved this kind of work tip us off about it and we’ll see if we can get some more hacks for the Smithies out there.

Continue reading “Nails And Some Blacksmithing” →

Radio Controlled Hard Drive Security

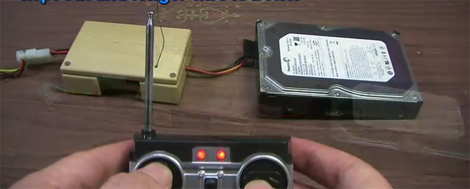
[Samimy] has put together this really neat video tutorial on building a Radio Controlled secure hard drive. How can a hard drive be radio controlled? That’s the first thing we thought too. He has torn apart a remote-controlled car and is using the guts to remotely switch on power to the drive. This means that the drive is only active if you boot the computer after you put the fob in the hidden security system. It looks like it would be fairly effective. We’re curious though, if he is putting the entire drive assembly inside his PC, why rely on batteries for the circuit? Why not pull from the PC power supply? Another neat upgrade might be connecting to an internal USB connection on the motherboard so a reboot isn’t necessary.

Check out the entire video after the break.
Continue reading “Radio Controlled Hard Drive Security” →

Project Hosting, A Common Question

Ok, you’ve finished your project, you’ve taken great notes along the way and photographed every step. Now you want to share. Where will you post it? There are a lot of options out there, private hosting, Hackaday,  instructables, and tons of others. How can you decide? Here are some handy break downs to help you figure it out at a glance.

Each has its own pros and cons. Take a peek at our list after the break and share your own as well.

Continue reading “Project Hosting, A Common Question” →

Tuesday Two-Fer: Battery Cases And ABS Lettering

These are both interesting, unrelated, and can’t quite stand on their own so we threw them into one post.

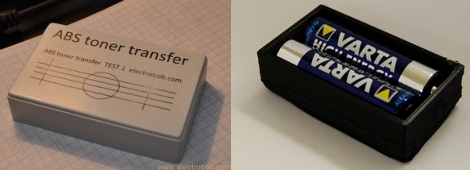
On the left you see the product of using toner transfer on ABS plastic. [Bogdan] tried this out as a way to make front panels for his enclosures. It really shouldn’t work very well because ABS has a lower melting point than toner does. But it seems that it takes a while for the ABS to heat up. If you’re quick, ironing for about 10 seconds, you can get the toner to stick to the plastic and then soak the paper off, leaving your printed design looking nice and clean.

To the right you see a printed battery case. [Nikolaus Gradwohl] ran across the same problem we’ve face many times: how to attach batteries to your projects? We’ve duct-taped them together, used the blister packs they’re sold in, Dremeled them out of thrift-store toys and just about every other thing you can imagine. He decided to make them easy to manufacture with a 3D-printer. This is accomplished with an OpenSCAD file he wrote. Plug in the size and number of batteries and a printable package will be automatically generated.

Original Shell Houses A Game Boy Advance SP

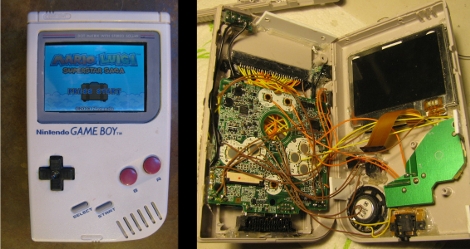
[Jackson] decided he wanted to give his original Game Boy a bit more power so he replace the internals with those from a Game Boy Advance SP. This keeps the case work to a minimum, as the original was larger than the SP. He kept the buttons, speaker, headphone jack, and power switch but modified the enclosure to use the volume, charger, and battery from the newer hardware. The cartridge connector was relocated to match the slot in the back half of the case, with the color screen being the biggest giveaway that someone’s monkeyed with the device. Not a bad use for a dead Game Boy, as least you’ll be playing this one instead of dedicating it to virtual storage.

Meter Clock With Pleasing Design Considerations

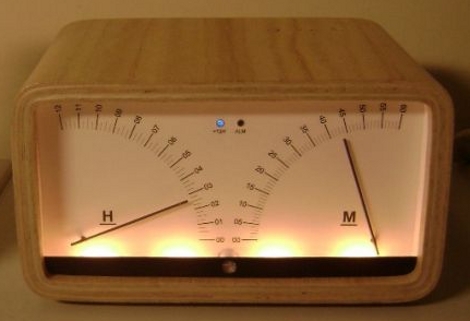
[AndyO] embraced his inner geek by building this meter clock. It exhibits a lot of features that you’d want to see in a home-built timepiece, include over-complexity, abundant features, and RGB LEDs. We’re fascinated by the design he put into this. For instance, the two indicator LEDs on the clock face are not poking through the surface, but use brass tubes as light pipes. Also, the three buttons on the top are almost indistinguishable, and have an RGB back light that places a halo around each. The case itself was built by first making a form, then laminating thin sheets of wood (a difficult task due to the tight curves). The needles themselves are not actually meters, like the clock the inspired the build, but are attached to servo motors. This all comes together into a fascinating build, and a great writeup.

[Thanks Graham]