Floppy disks

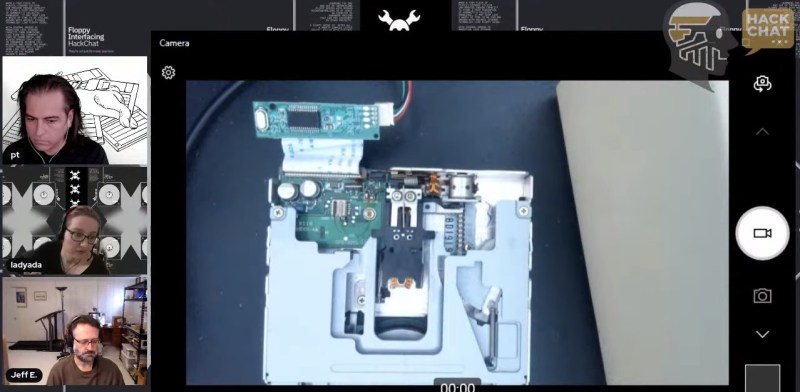
Floppy Interfacing Hack Chat With Adafruit

Join us on Wednesday, February 2 at noon Pacific for the Floppy Interfacing Hack Chat with Adafruit’s Limor “Ladyada” Fried and Phillip Torrone!

When a tiny fleck of plastic-covered silicon can provide enough capacity to store a fair percentage of humanity’s collected knowledge, it may seem like a waste of time to be fooling around with archaic storage technology like floppy disks. With several orders of magnitude less storage capacity than something like even the cheapest SD card or thumb drive, and access speeds that clock in somewhere between cold molasses and horse and buggy, floppy drives really don’t seem like they have any place on the modern hacker’s bench.

join-hack-chatOr do they? Learning the ins and out of interfacing floppy drives with modern microcontrollers is at least an exercise in hardware hacking that can pay dividends in other projects. A floppy drive is, after all, a pretty complex little device, filled with electromechanical goodies that need to be controlled in a microcontroller environment. And teasing data from a stream of magnetic flux changes ends up needing some neat hacks that might just serve you well down the line.

So don’t dismiss the humble floppy drive as a source for hacking possibilities. The folks at Adafruit sure haven’t, as they’ve been working diligently to get native floppy disk support built right into CircuitPython. To walk us through how they got where they are now, Ladyada and PT will drop by the Hack Chat. Be sure to come with your burning questions on flux transitions, MFM decoding, interface timing issues, and other arcana of spinning rust drives.

Our Hack Chats are live community events in the Hackaday.io Hack Chat group messaging. This week we’ll be sitting down on Wednesday, February 2 at 12:00 PM Pacific time. If time zones have you tied up, we have a handy time zone converter.

Continue reading “Floppy Interfacing Hack Chat With Adafruit”

The PawPet board in a 3D-printed case, with a d-pad on the right and four buttons on the left. On its small monochrome screen, there's a cat-like pet looking at you.

Reject Modernity; Return To Tamagotchi

Browsing through the recent projects on Hackaday.io, we’ve found this entry by [NanoCodeBug]: a single-PCB low-power trinket reviving the “pocket pet” concept while having some fun in the process! Some serious thought was put into making this device be as low-power as possible – with a gorgeous Sharp memory LCD and a low-power-friendly SAMD21, it can run for two weeks on a pair of mere AAA batteries, and possibly more given a sufficiently polished firmware. The hardware has some serious potential, with the gadget’s platform lending itself equally well to Arduino or CircuitPython environments, the LCD being overclock-able to 30 FPS, mass storage support to enable pet transfer and other PC integrations, a buzzer for all of your sound needs, and an assortment of buttons to help you create mini-games never seen before. [NanoCodeBug] has been working on the hardware diligently for the past month, having gone through a fair few revisions – this is shaping up to be a very polished gadget!

There’s no wonder that people love to start Tamagotchi-like projects – something special happens when an electronic device invokes the same feelings that we’d get while caring for our own pet, and this project does justice to the idea. With homebrew Tamagotchi projects, there’s a trend – once hardware is finished, the software doesn’t always get to a usable stage, feeling more like an afterthought. There’s a hacker twist that should help us subvert this trend, however – [NanoCodeBug] has shared all sources with us in a GitHub repository! If you would like to help with the “software” part, you can start working on that with just a few breakouts. The board files are also there, if you feel like the boards are marvelous enough for your liking to go through modern-day component sourcing pains.

Hackers have been playing with the “pocket pet” concept here and there, to delightful and unconventional results. If you’re on the lookout for other serious Tamagotchi recreation projects, this one takes the cake – otherwise, check out this furry Tamagotchi-like Tribble pet, disarming in its cuteness! If you’re one of our mischief-minded hackers, we have two posts to keep you entertained – one about dumping ROM on newer Tamagotchi toys, and another about building a WiFi-cracking one. And when it comes to the spirit of “what we have on hand” builds, this giant desktop-sized LED matrix Tamagotchi fits the bill pretty well!

Raspberry Pi Pico Gets A Tiny Keyboard On Its Back

With hackers and makers building custom computing devices that don’t necessarily follow conventional design paradigms, there’s been a growing demand for smaller and smaller keyboards. Many of the cyberdecks we’ve seen over the last couple of years have used so-called 60% or even 40% keyboards, and there’s been a trend towards repurposing BlackBerry keyboards for wearables and other pocket-sized gadgets. But what if you need something even smaller?

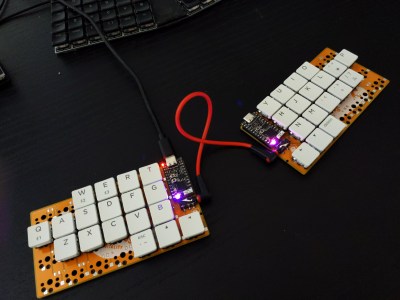
Enter this incredibly diminutive keyboard created by [TEC.IST]. With 59 keys crammed into an area scarcely larger than three US pennies, it may well be the smallest keyboard ever made. The PCB has been designed to mount directly onto the back of a Raspberry Pi Pico, which is running some CircuitPython code to read the switch matrix and act as a standard USB Human Interface Device. The board design files as well as the source code for the Pico have been released on the project’s Hackaday.io page, giving you everything you need to spin up your own teeny tiny input device.

The Pi Pico’s castellated pads make attaching the PCB a snap.

Of course, you probably won’t be breaking any speed records when banging out text on this thing. We know from past Hackaday badges that an array of microswitches make for a functional, if somewhat unpleasant, method of text entry.

Continue reading “Raspberry Pi Pico Gets A Tiny Keyboard On Its Back”

The Hackaday Remoticon 2 Badge: An Exercise In Your Own Ingenuity

The twin challenges of the pandemic and now the semiconductor shortage have been particularly hard on the designers of event badges, as events have been cancelled and uncertain supply issues render their task impossible. When an event goes virtual, how do you even start to produce a badge for it? Make the badge and rely on enough stalwarts buying one? Or maybe produce a badge that’s a fancy take on a prototyping board?

For Hackaday Remoticon 2021, [Thomas Flummer] has produced a novel take on the second option by distributing a badge as a set of KiCAD files that can either be ordered from a PCB fab as a prototyping board or used as the canvas for a PCB to use whatever components are to hand. To demonstrate this, he’s produced an example badge that’s a MicroMod carrier.

So if you’d like to chase the full Remoticon experience with a badge there should still be enough time to order a set of boards, but to design your own electronics you’ll need to get a move on. What you might build upon it is up to you, but if you have an ESP32 module lying around you might wish to consider cloning the SHA2017 badge or its successors with the badge.team platform.

We’ve seen Thomas’ work before more than once on these pages, most notably as the man behind the BornHack badges.

Halloween-Themed Talking Clock Relies On Pi Pico

Many of us learn to read clocks at a young age, however, talking clocks eliminate the need to do that entirely. [Alberto] whipped up one of his own, in this case designed with some Halloween holiday spookiness.

A basic clock movement is used to display the time in the typical fashion. However, the movement also features a built-in trigger signal, which it sends to an attached microcontroller on the hour, every hour. The build relies on the Raspberry Pi Pico for sound, chosen for its USB programming interface and its 2 MB of onboard flash storage. Sound is stored in simple 16-bit WAV files, and played out to a speaker via a PWM output. Alternatively, a CircuitPython version of the code is available that uses MP3s instead. A light sensor is used to avoid triggering any sounds at night time that could disturb one’s sleep. The entire circuit can be built on a single-sided board. [Alberto] etched one at home in the old-fashioned way, though one could also order one online, too.

Halloween is an excellent time for hacks, and this year we have the Halloween Hackfest contest to show them off. It’s ending soon though, you have until the stroke of midnight Pacific time on Friday (that’s the moment Thursday night ends) to enter your Halloween-themed hacks.

Talking clocks have been around for some time, but are nevertheless a fun and educational project to build. We’ve seen some other great Halloween hacks lately, too. If you’ve been busy with projects this fall holiday, don’t hesitate to drop us a line!

IoT flower pot monitors moisture and temperature levels.

Smart Flower Pot Build Is All About That Base

For some reason, it seems like most of the plant monitoring setups we see separate the plant and the monitoring system. This makes sense in a don’t-own-a-waterbed-and-a-cat kind of way, but it also doesn’t from an aestheitc standpoint. This build by [Jorge Enrique Gamboa Fuentes] sure does look nice and tidy as an all-in-one unit, and fortunately is built with obvious issues in mind. It tracks water level, soil moisture, and soil temperature with a single device — a STEMMA-connected soil sensor that does all the monitoring work.

This attractive beginner build is a Python-powered project that runs on a PyPortal Titano and has a speaker that anthropomorphizes the thing so it can berate you politely ask for water in English. But the real magic of this build is in the enclosure itself. Thankfully, it’s designed with a drip tray, but it also keeps the electronics out of the water, allowing just the tip of the sensor to get wet. You can view the vital signs directly on the device, or on a web dashboard whenever you’re away.

In the future, [Jorge] wants to experiment with GCP and Azure, connect more flower pots together, and add more sensors so that it is more autonomous. One of the major lessons learned was that you probably shouldn’t start with a succulent, because they need very little water and this will drag out your development time considerably unless you over-water it, which will kill it. Check it out after the break.

If [Jorge] wanted to go the easy route, they might stick this plant under an old Keurig that’s been converted to an automatic watering device.

Continue reading “Smart Flower Pot Build Is All About That Base”

Raspberry Pi Pico Makes For Expeditious Input Device

With its copious number of GPIO pins and native USB, the Raspberry Pi Pico is arguably the ideal microcontroller for developing your own platform agnostic USB Human Input Devices. But you don’t have to take our word for it. Check out how quickly the $4 USD board allowed [Alberto Nunez] to put together a pair of foot pedals for his computer.

Wiring doesn’t get much easier than this.

A peek inside the enclosure reveals…well, not a whole lot. All that’s hiding inside that heavy-duty plastic box is the Pi Pico and some screw down terminals that let [Alberto] easily wire up the female bulkhead connectors for the pedals themselves. Incidentally, while you could certainly make your own pedals, the ones used for this project appear to be the sort of commercially available units we’ve seen used in similar projects.

With the hardware sorted, [Alberto] just needed to write the software. While he could have taken the easy way out and hard coded everything, we appreciate that his CircuitPython script loads its configuration from a text file. This allows you to easily configure which GPIO pins are hooked up to buttons, and what key codes to associate them with. He didn’t really need to go through this much effort for his own purposes, but it makes the project far easier to adapt for others, so our hats off to him.

If you’re looking for a bit more inspiration, our very own [Kristina Panos] put together a Python-powered macro foot stool that you can put under your desk for rapid fire keyboard shortcuts. Plus you can stand on it to reach the top shelf, if need be.