3D Printering: Smartphone Resin Printers Actually Work

Last spring, the world saw something amazing. It was a device that would revolutionize the planet, save the world, and turn your smartphone into a 3D printer. Kickstarters aren’t known for selling themselves short. I speak, of course, of the OLO 3D printer, later renamed the ONO 3D printer, ostensibly because of a trademark dispute.

While filament-based 3D printers are extremely capable and slicing software is only getting better, resin-based printers are able to produce prints of nearly unparalleled quality. If you want high-resolution objects and fine detail, a resin printer is the way to go. These resin printers, however, are a bit more expensive than your traditional filament printers. A few hundred dollars will buy you a serviceable i3 clone, and less than a thousand will get you a real Prusa capable of printing in four colors. The premier desktop resin printer, the Form 2 from Form Labs, starts at $3500 USD.
Continue reading “3D Printering: Smartphone Resin Printers Actually Work”

Direct To Object 3D Printing

As the patents for fused-filament 3D printers began to expire back in 2013, hackers and makers across the globe started making 3D objects in their garages, workshops and hackerspaces. Entire industries and businesses have sprung up from the desktop 3D printing revolution, and ushered in a new era for the do-it-yourself community. Over the past couple of years, hackers have been pushing the limits of the technology by working with ever more exotic filament materials and exploring novel and innovative ways to make multi-colored 3D prints. One of the areas lagging behind the revolution, however, is finishing the 3D print into a final product. We’d be willing to bet a four meter reel of 5 V three-and-a-half amp NeoPixels that there are just as many artists and craftsman using 3D printers as there are traditional hackers and makers. These brave souls are currently forced to use the caveman technique of paint-and-brush in order to apply color to their print. We at Hackaday hereby declare this unacceptable.

Continue reading “Direct To Object 3D Printing”

New Part Day: Smoothie For RAMPS

When it comes to 3D printer controllers, there are two main schools of thought. The first group is RAMPS or RAMBo which are respectively a 3D printer controller ‘shield’ for the Arduino Mega and a stand-alone controller board. These boards have been the standard for DIY 3D printers for a very long time, and are the brains for quite a few printers from the biggest manufacturers. The other school of thought trundles down the path of ARM, with the most popular boards running the Smoothie firmware. There are advantages to running a printer with an ARM microcontroller, and the SmoothieBoard is fantastic.

Re-ARM for RAMPS — a Kickstarter that went live this week — is the middle ground between these two schools of thought. It’s a motherboard for RAMPS, but brings the power of a 32-bit LPC1768 ARM processor for all that smooth acceleration, fine control, and expansion abilities the SmoothieBoard brings.

Continue reading “New Part Day: Smoothie For RAMPS”

3D Printing Permanent Magnets

Researchers at TU Wien wanted to create magnets with exactly the right magnetic field for a particular application. Their solution? 3D printing of magnets. Previously, it has been difficult to produce permanent magnets with a specific shape of the magnetic field. The resulting magnets will be a boon to magnetic sensor construction.

Previously, after designing a magnet with a specific shape and magnetic field, a researcher would have to create tooling for injection molding. This is expensive and time-consuming and often not worth it for small quantities of magnets.

Continue reading “3D Printing Permanent Magnets”

Pi Zero Transforms To Game Boy

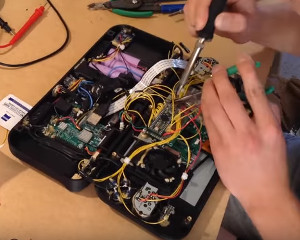
[GreatScott] bought a Game Boy case. Normally, you’d assume you wanted this to repair a damaged Game Boy, but in this case [GreatScott] used a Pi Zero and some 3D printing to build a game system into the tiny box. You can see some videos, below.

Two interesting parts of the project are the source of the LCD display (a rearview camera screen) and the selection of batteries. Lithium ion batteries are all the rage. But if you watch the news, you know there are some safety issues with using the batteries, especially if you use them improperly. [GreatScott] decided to go with nickel metal hydride cells which still need a protection circuit, but are typically less of a danger than the newer technology cells.

Continue reading “Pi Zero Transforms To Game Boy”

Simple Hearing Amplifier

Hearing aids are probably more high-tech than you think. They are tiny. They have to go through a lot of trouble to prevent feedback. They need a long battery life. The good ones match their amplification to the inverse of your hearing loss (amplifying only the bands where you don’t hear as well).

[NotionSunday] put together a hearing amplifier project that probably doesn’t hit many of those design criteria. However, thanks to a 3D printed case, it looks pretty good. The device uses a dual opamp to boost the output from two microphones and feeds it to a conventional headphone.

Continue reading “Simple Hearing Amplifier”

Fail Of The Week: Upcycling Failed 3D Prints

Is it possible to recycle failed 3D prints? As it turns out, it is — as long as your definition of “recycle” is somewhat flexible. After all, the world only needs so many coasters.

To be fair, [Devin]’s experiment is more about the upcycling side of the recycling equation, but it was certainly worth undertaking. 3D printing has hardly been reduced to practice, and anyone who spends any time printing knows that it’s easy to mess up. [Devin]’s process starts when the colorful contents of a bin full of failed prints are crushed with a hammer. Spread out onto a properly prepared (and never to be used again for cookies) baking sheet and cooked in the oven at low heat, the plastic chunks slowly melt into a thin, even sheet.

[Devin]’s goal was to cast them into a usable object, so he tried to make a bowl. He tried reheating discs of the material using an inverted metal bowl as a form but he found that the plastic didn’t soften evenly, resulting in Dali-esque bowls with thin spots and holes. He then flipped the bowl and tried to let the material sag into the form; that worked a little better but it still wasn’t the win he was looking for.

In the end, all [Devin] really ended up with is some objets d’art and a couple of leaky bowls. What else could he have done with the plastic? Would he have been better off vacuum forming the bowls or perhaps even pressure forming them? Or does the upcycling make no sense when you can theoretically make your own filament? Let us know in the comments how you would improve this process.

Continue reading “Fail Of The Week: Upcycling Failed 3D Prints”