[Matt Thomas] wanted to answer the question of whether 3D printed structures can be food-safe or even medical-safe, since there is an awful lot of opinion out there but not a lot of actual science about the subject. As a mechanical engineer who dabbles in medical technical matters, he designed as series of tests using a wide range of nasty-sounding pathogens, to find once and for all what works and what does not.
One common argument sprung up from the maker movement response to COVID-19, 3D printed masks and visors. Many of us (this scribe included) printed many thousands of visor frames and ear protectors, using the armies of 3D printers we had available, then distributed them to nursing homes and doctors’ surgeries, and anywhere else that couldn’t get ‘proper’ medical-grade items.
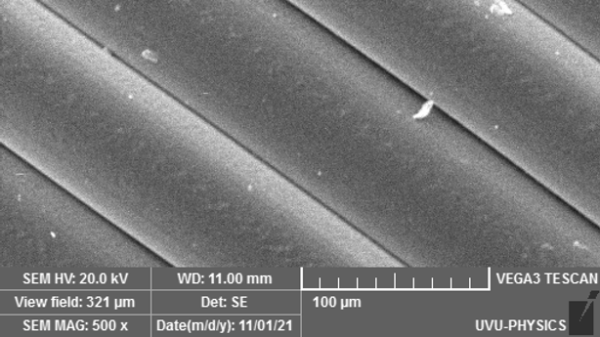
There was much opinion about the risks associated with contamination of such 3D printed structures, due to the allegedly porous nature of the prints. [Matt] has shown with some SEM imaging, that a typical 3D print does not have any detectable porosity, and that the grooves due to the layer lines are so positively huge compared to your average bacterium, as to also be irrelevant.
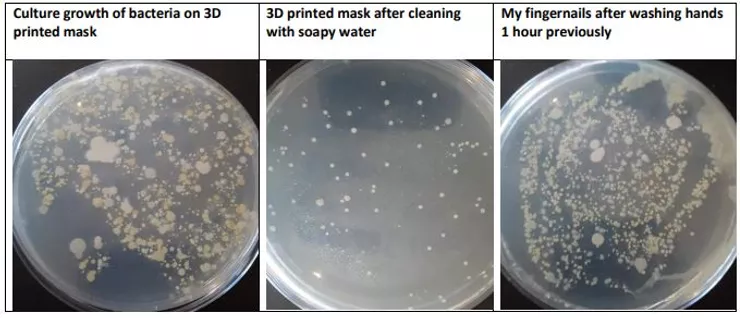
Cutting to the chase, [Matt] shows that ordinary dish soap and water are totally sufficient to remove 90% or more of all of the pathogens he tested, and that using a mix of culturing swap samples as well as protein detection, that 3D printed parts could be cleaned close to medical standards, let alone those of food handling. Even those pesky biofilms could be quickly dispatched with either a quick rinse in bleach-water or a scrub with baking soda. Does this article clear this up finally? Only you can decide!
We’ve obviously covered the subject of 3D printing masks a fair bit, but it’s not all about PPA, sometimes ventilators need some 3D printing love too. Prusa did some work on the subject of food safety, looking specifically at post-processing for 3D prints, and produced some interesting results.
Thanks to [Keith] for the tip!