Taking a picture with a single photoresistor is a brain-breaking idea. But go deeper and imagine taking that same picture with the same photoresistor, but without even facing the object. [Jon Bumstead] did exactly that with compressed sensing and a projector. Incredibly, the resulting image is from the perspective of the projector, not the “camera”.
This camera setup is very similar to one we’ve seen before, but far more capable. The only required electronics are a small projector and a single photodiode. The secret sauce in this particular design lies in the pattern projected and the algorithm to parse the data.
Have you ever finished up a bit of code and thought that typing “git push” in a terminal is just not a satisfying finish? So did [penumbriel], so he built a big red button he could smash instead.
This is a very simple hack: an Arduino sits inside a 3D-printed case that holds a big, red button. The case itself is very sturdily made to withstand a good satisfying smack: it has thick walls, brass insets, and rubber feet to protect the de The code for the Arduino is very, very simple: it spoofs a USB HID using the standard keyboard library, and automatically types out “git push” whenever the button is pressed. Or smashed, because you know you’re going to want to slam that thing. So far, so good– very innovative for 2006, right?
The detail that made this project stand out in 2025 was the technique [penumbriel] used for lettering– we’re always looking
With a simple soap-and-water mask, the cured silicone peels right off, leaving a clean label.
for new ways to make a good front panel. In this case, the letters were printed as a valley and filled with silicone adhesive. To protect the top surface of the print, soapy water was used as a mask. The silicone would not adhere to the wet plastic, so all [penumbriel] had to do was peel it off after it had cured, leaving solid white inside. It’s a neat trick, and a great way to use up an old tube of silicone before it goes hard. You could also use it for injection molding, but this is a great use for the dregs.
This might go well next to the programmer’s macro pad we featured a while back, but it really needs to stay as a big red button for maximum satisfaction.
Recently, [AlphaPhoenix] weighed an airplane. Normally, that wouldn’t be much of an accomplishment. Except in this case, the airplane happened to be in flight at the time. In fact we’re not sure what is more remarkable, as he not only weighed real actual airplanes but a paper airplane too!
The sealed box essentially acts as a pressure sensor.
To test the concept, a large scale is made from foamcore and four load cells which feed into an Arduino which in turn is connected to a laptop for a visualization. After a brief test with a toy car, [AlphaPhoenix] goes on to weigh a paper airplane as it flies over the scale. What we learn from the demonstration is that any weight from a flying object is eventually transferred to the ground via the air.
In the second part of the video a new, smaller, type of scale is created and taken to the airport where airplanes flying overhead are weighed over the course of three days. This new apparatus is basically a pressure sensor enclosed in a nominally air-tight box, essentially a fancy type of barometer. Measurements are taken, assumptions are made, and figures are arrived at. Unfortunately the calculated results are off by more than one order of magnitude, but that doesn’t stop this experiment from having been very cool!
Both small children and cats have a certain tendency to make loud noises at inopportune times, but what if there were a way to combine these auditory effects? This seems to have been the reasoning behind the creation of the Meowsic keyboard, a children’s keyboard that renders notes as cats’ meows. [Steve Gilissen], an appreciator of unusual electronic instruments, discovered that while there had been projects that turned the Meowsic keyboard into a MIDI output device, no one had yet added MIDI input to it, which of course spurred the creation of his Meowsic MIDI adapter.
The switches in the keys of the original keyboard form a matrix of rows and columns, so that creating a connection between a particular row and column plays a certain note. [Steve]’s plan was to have a microcontroller read MIDI input, then connect the appropriate row and column to play the desired note. The first step was to use a small length of wire to connect rows and columns, thus manually mapping connections to notes. After this tedious step, he designed a PCB that hosts an Arduino Nano to accept input, two MCP23017 GPIO expanders to give it enough outputs, and CD4066BE CMOS switches to trigger the connections. Continue reading “Meowsic Keyboard MIDI Adapter Aims For Purrfection”→
[Tommy] has a great write-up about designing and building a minimalistic handheld electronic game called “Higher Lower”. It’s an audio-driven game in which the unit plays two tones and asks the player to choose whether the second tone was higher in pitch, or lower. The game relies on 3D printed components and minimal electronics, limiting player input to two buttons and output to whatever a speaker stuck to an output pin from an ATtiny85 can generate.
Fastener-free enclosure means fewer parts, and on the inside are pots for volume and difficulty. We love the thoughtful little tabs that hold the rocker switch in place during assembly.
Gameplay may be straightforward, but working with so little raises a number of design challenges. How does one best communicate game state (and things like scoring) with audio tones only? What’s the optimal way to generate a random seed when the best source of meaningful, zero-extra-components entropy (timing of player input) happens after the game has already started? What’s the most efficient way to turn a clear glue stick into a bunch of identical little light pipes? [Tommy] goes into great detail for each of these, and more.
In addition to the hardware and enclosure design, [Tommy] has tried new things on the software end of things. He found that using tools intended to develop for the Arduboy DIY handheld console along with a hardware emulator made for a very tight feedback loop during development. Being able to work on the software side without actually needing the hardware and chip programmer at hand was also flexible and convenient.
We’ve seen [Tommy]’s work before about his synth kits, and as usual his observations and shared insights about bringing an idea from concept to kit-worthy product are absolutely worth a read.
You can find all the design files on the GitHub repository, but Higher Lower is also available as a reasonably-priced kit with great documentation suitable for anyone with an interest. Watch it in action in the video below.
What do you get when you combine an ESP32, a 16-bit DAC, an antique VFD, and an IDE CD-ROM drive? Not much, unless you put in the work, which [Akasaka Ryuunosuke] did to create ESPer-CDP, a modern addition for your hi-fi rack.
It plays CDs (of course), but also can also scrobb the disks to Last.fm, automatically fetch track names and lyrics for CDs, and of course stream internet radio. It even acts as a Bluetooth speaker, because when you have an ESP32 and a DAC, why not? Of course we cannot help but award extra style points for the use of a VFD, a salvaged Futaba GP1232A02. There’s just something about VFDs and stereo equipment that makes them go together like milk and cookies.
Between the panel and the VFD, this could almost pass as vintage Sony.
In terms of CD access, it looks like the IDE interface is being used to issue ATAPI commands to the CD-ROM drive to get audio out via S/PDIF. (Do you remember when you had to hook your CD drive to your sound card to play music CDs?) This goes through a now-discontinued WM8805 receiver — a sign this project has been in the works for a while — that translates S/PDIF into an I2S stream the ESP32 can easily work with.
Work with it it does, with the aforementioned scrobbing, along with track ID and time-sinked lyrics via CDDB or MusicBrainz. The ESP32 should have the computing power to pull data through the IDE bus and decode it, but we have to admit that this hack gets the job done — albeit at the expense of losing the ability to read data CDs, like MP3 or MIDI. [Akasaka Ryuunosuk] has plans to include such functionality into v2, along with the ability to use a more modern SATA CD-ROM drive. We look forward to seeing it, especially if it keeps the VFD and classic styling. It just needs to be paired with a classic amplifier, and maybe a DIY turntable to top off the stack.
Thanks to [Akasaka Ryuunosuke] for the tip. If you also crave our eternal gratitude (which is worth its weight in gold, don’t forget), drop us a tip of your own. We’d love to hear from you.
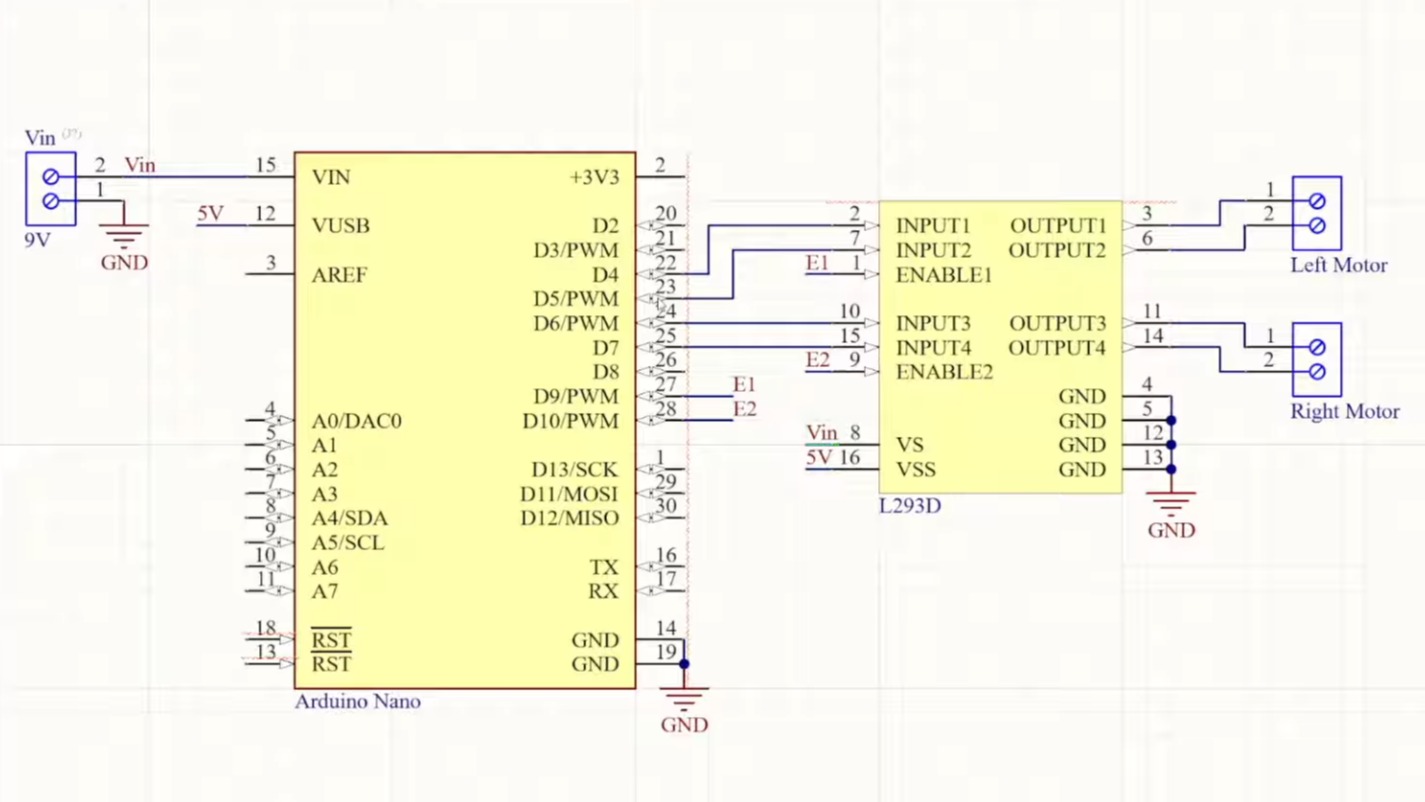
Do you ever get tired of stressing your neck looking for planes in the sky? Worry not! Here is a neat and cheap Arduino/Ras Pi project to keep your neck sore free! [BANK ANGLE] presents a wonderfully simple plane tracking system using an affordable camera and basic microcontrollers.
The bulk of the system relies on a cheap rotating security camera that gets dissected to reveal its internals. Here stepper control wires can be found and connected to the control boards required to allow an Arduino nano to tell the motors when and where to spin. Of course, the camera system doesn’t just look everywhere until it finds a plane, a Raspberry Pi takes in data from local ADS-B data to know where a nearby plane is.
After that, all that’s left is a nifty overlay to make the professional look. Combining all these creates a surprisingly capable system that gives information on the aircraft’s azimuth, elevation, and distance.
If you want to try your hand at making your own version of [BLANK ANGLE]’s tracker, check out his GitHub page. Of course, tracking planes gets boring after a while so why not try tracking something higher with this open-source star tracker?