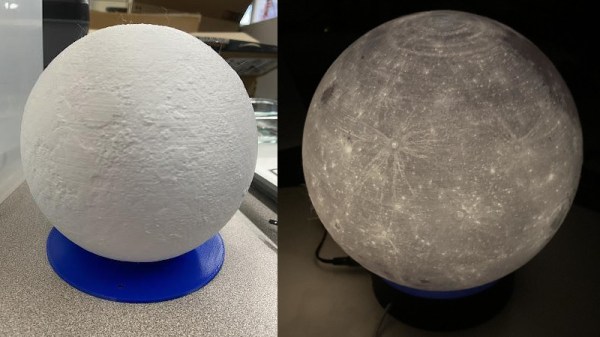
The Moon has fascinated humanity for centuries. These days, though, it’s a trial and a bore to go outside and stare upwards to check on the natural satellite. Instead, why not bring the Moon to your bedside with this rotating phase lamp?
The build comes to us from [payasa_manandhar], who did a good job of replicating the Moon in both form and function. It’s based around a lithophane of the lunar surface, which adequately duplicates the Moon’s grey pockmarked visage thanks to topographical data sourced from NASA. It looks a treat when backlit from the inside. However, this is no mere ornamental lamp. With the aid of a stepper motor controlled by an Arduino, a shade inside the lamp actually rotates to shadow the Moon as per the appropriate phase.
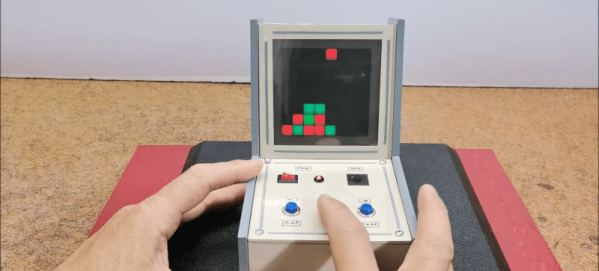
You might think that making your own electronic games would require some kind of LCD, but lately, [Mirko Pavleski] has been making his using inexpensive 8X8 WS2812B LED panels. This lets even a modest microcontroller easily control a 64-pixel “screen.” In this case, [Mirko] uses an Arduino Nano, 3 switches, and a buzzer along with some 3D printed components to make a good-looking game. You can see it in action in the video below.
The WS2812B panels are easy to use since the devices have a simple protocol where you only talk to the first LED. You send pulses to determine each LED’s color. The first LED changes color and then starts repeating what you send to the next LED, which, of course, does the same thing. When you pause a bit, the array decides you are done, and the next train of pulses will start back at the first LED.
It looks like the project is based on a German project from [Bernd Albrecht], but our German isn’t up to snuff, and machine translation always leaves something to be desired. Another developer added a play against the computer mode. This is a simple program and would be easy to port to the microcontroller of your choice. [Mirko]’s execution of it looks like it could be a commercial product. If you made one as a gift, we bet no one would guess you built it yourself.
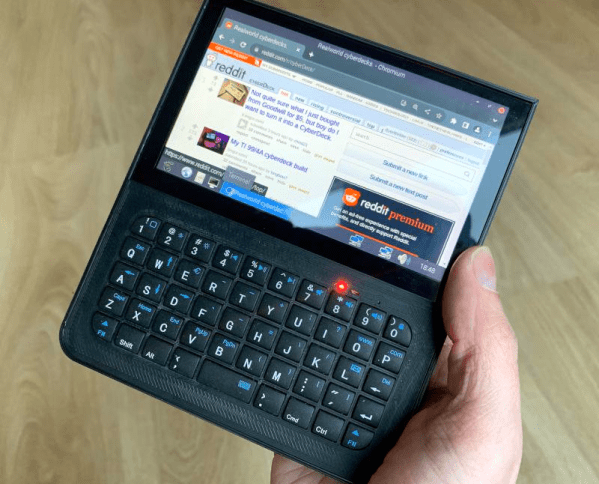
[Bytewelder] fondly remembers the Palm III and Sharp HC-4500, so taking on the design of Decktility, a custom handheld cyberdeck , was a natural next step. The blog post goes into much detail about the design decisions and challenges throughout the project. The end result, though, looks great.
The device uses a Raspberry Pi CM4 and an IPS touchscreen. The bulk of the design work was to get the power system working. There is a custom FET board and an Arduino that manages charging and battery state.
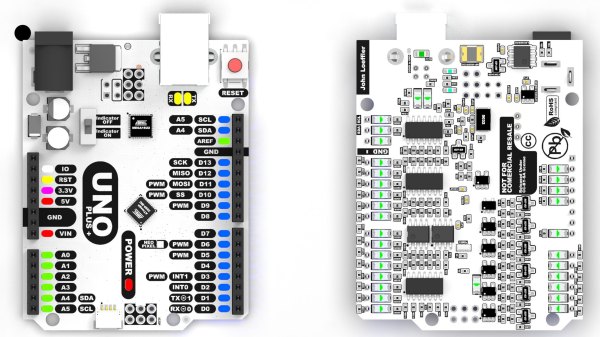
As an introduction to embedded electronics and programming in a straightforward environment, there isn’t much out there that can hold a torch to the Arduino Uno. Cheap (especially if you count the clones), easy to find, and quick to deploy, with countless support libraries, it’s a go-to for many a hack. This scribe simply can’t remember how many he’s bought, hacked, and deployed over the years. But can it be improved? [John Loeffler] thinks so, and his 2023 Hackaday Prize entry, the Uno Plus+ could be the one.
If this is too much bling for you, there is a version with LEDs adjacent to non-illuminated headers.
After clearing the top deck of extraneous components (by shoving them on the bottom) there was much more space to expand the header labeling, so there can be no accidental misplacement of those DuPont wires this thing will inevitably sprout randomly.
The board also has an additional Stemma/Qwiic connector and a Neopixel LED for indication duties. Also sitting on the PCB bottom are a ton of opamps, to drive the header indicators. Yes, this board has a full set of colour-coded LED bling indicators, showing the logical state of each and every pin on all headers, giving an easy way to check the desired activity is occurring. Plus it looks cool. Illuminated headers? YES!
Think the Uno too light on resources to perform any meaningful modern workloads? Think again!
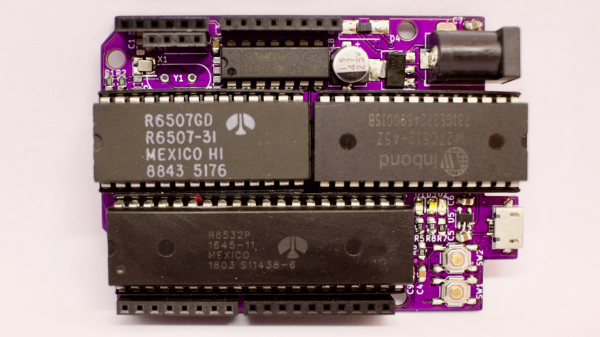
[Anders Nielsen] presents his entry for the 2023 Hackaday Prize: The 65uino. Which as you might be able to guess, is a 6502-based microcomputer wedged into an Arduino Uno form factor (well, almost wedged in, but we’ll let it slide) The premise is simple, older micros are easier to understand, the board can be build up from new-old or salvaged stock, and that’s more chips on boards and less sitting on a dusty shelf. After all, even though the 6502 in its original form is long obsolete, it’s far better to be pushing some electrons around, than sitting there decaying.
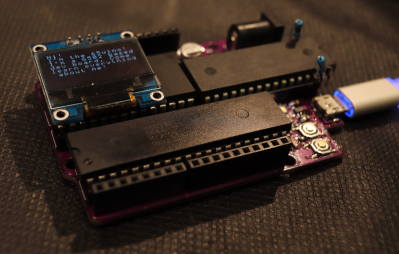
The OLED frame buffer is bigger than the host’s entire RAM. No problem!
From an educational perspective, the first lesson is the hand-soldering of through-hole DIP components and a smattering of straightforward surface mount parts in their supporting roles. Then on to setting up the cc65 toolchain. To say this is a pure 6502 system is a little misleading, it actually uses the 6507 device variant, which is a die-bond variant of the same device but with only 28 of the pins utilized.
The use of the 6532 RIOT (RAM-I/O-Timer) chip provides two 8-bit ports of GPIO as well as a timer and 128 bytes of SRAM, making the design more compact. There is a socket that will accept a 24 or 28-pin E(E)PROM device, with the extra four pins removable and the PCB snapped off if fitment into a standard ‘Uno case is desirable. Neat!
Full hardware build and PCB design (using KiCAD) are available on the 65uino GitHub page. Just remember folks, with everything minimal 6502 related — some assembly required :D
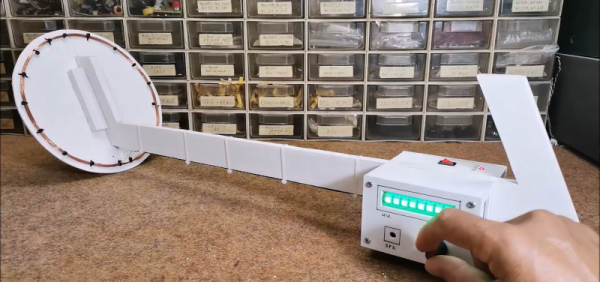
If you want to get rich by hunting with a metal detector, you might want to consider how much you invested in the hardware to start with. Finding a tin can with a $200 detector might not make economic sense. But building a metal detector yourself doesn’t have to be hard, as [Mirko] shows in a recent post. His STM32-based pulse induction metal detector looks good and works well, as you can see in the video below.
[Mirko] reports that the device can detect a coin at 30 cm and a large metal object at more than 80 cm. The project uses the Arduino IDE and a Blue Pill STM32 module. The project looks good with an LED module and a rotary encoder to set sensitivity.
Reddit user [nomoreimfull] posted code for a dynamic WiFi beacon to r/arduino. The simple, but clever, sketch is preloaded with some rather familiar lyrics and is configured to Rickroll wireless LAN users via the broadcast SSID (service set identifier) of an ESP32 WiFi radio.
The ESP32 and its smaller sibling the ESP8266 are tiny microcontrollers that featuring built-in WiFi support. With their miniature size, price, and power consumption characteristics, they’ve become favorites for makers, hackers, and yes pranksters for a wide variety of projects. They can be easily programmed using their own SDK or through a “board support” extension to the Arduino IDE.
For the dynamic WiFi beacon, the ESP32 is placed into AP (access point) mode and broadcasts its human readable name (SSID) as configured. What makes the SSID dynamic, or rolling, is that the sketch periodically updates the SSID to a next line of text stored within the code. Of course, in the Rickroll prank this means the next line of lyrics from “Never Gonna Give You Up” by Rick Astley himself.