Gesture Controlled Quadcopter

Controlling A Quadcopter With Gestures

[grassjelly] has been hard at work building a wearable device that uses gestures to control quadcopter motion. The goal of the project is to design a controller that allows the user to intuitively control the motion of a quadcopter. Based on the demonstration video below, we’d say they hit the nail on the head. The controller runs off an Arduino Pro Mini-5v powered by two small coin cell batteries. It contains an accelerometer and an ultrasonic distance sensor.

The controller allows the quadcopter to mimic the orientation of the user’s hand. The user holds their hand out in front of them, parallel to the floor. When the hand is tilted in any direction, the quadcopter copies the motion and will tilt the same way. The amount of pitch and roll is limited by software, likely preventing the user from over-correcting and crashing the machine. The user can also raise or lower their hand to control the altitude of the copter.

[grassjelly] has made all of the code and schematics available via github.

kickstarter notifications

Kickstarter Monitor Will Brighten Your Day

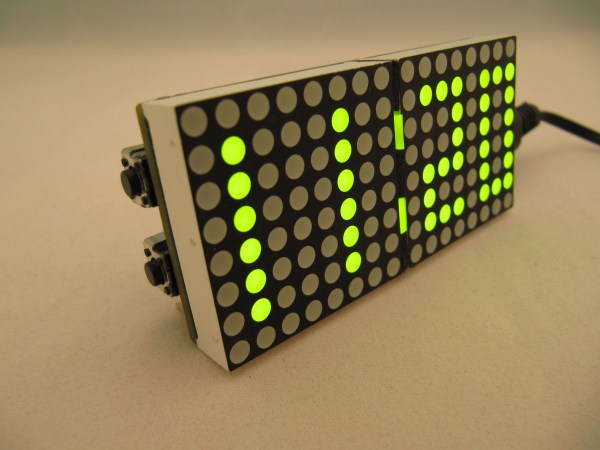
Keeping up with a kickstarter campaign can be quite a task, especially if your project is real (looking at you, Scribble Pen!) and you’re trying to keep up with product fabrication and all the other logistics involved in bringing a product to market. [macetech] are currently in the middle of a campaign themselves and built a loud, bright alert system to notify them of any new kickstarter backers.

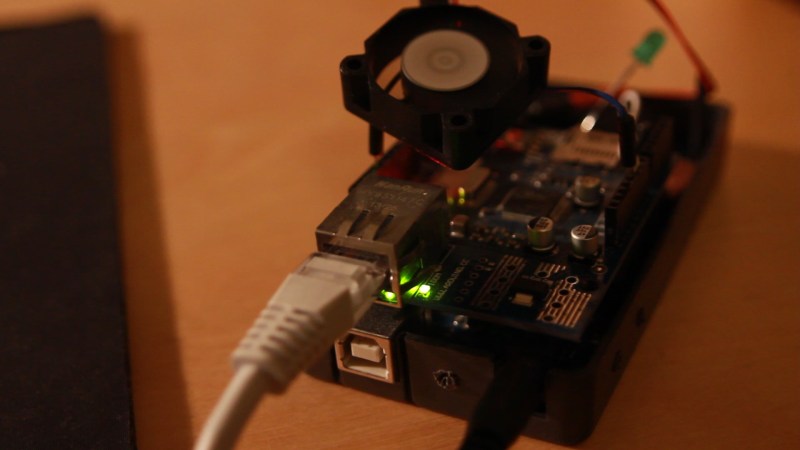
The project uses a LED marquee to display the current number of backers, but every time a new backer contributes to the project, a blindingly bright green arrow traffic signal is illuminated and a piezo speaker plays a celebration tune. All of these devices are controlled by an Arduino Yun which, with its built-in Atheros chipset, easily connects to the network and monitors the kickstarter page for changes.

[macetech] used some interesting hardware to get everything to work together. They used a USB-to-RS232 cable with and FTDI chip to drive the LED marquee and a PowerSwitchTail 2 from Adafruit to drive the power-hungry traffic signal. Everything was put together in a presentable way for their workshop and works great! All of the source code is available on their project page, and you can check out their RGB LED Shades kickstarter campaign too.

Goldilocks Climate Box Keeps Lager Fermentation Environment Just Right

September was warmish in many places around the world including [Ole]’s native Denmark. But that did not stop him from brewing lager flavored with plums from his own garden, and neither did his indifference to lagers in general.

Lager fermentation requires a consistent, low temperature. While many homebrewers might modify an electric refrigerator, [Ole] wasn’t interested in the cost of running a second one just for brewing beer. Instead, he built a climate box to work with the cool temperature in his garage. Starting with scrap wood from other projects, he lined the walls with polystyrene and put a layer of wood on the floor to help support the fermentation bucket.

Maintaining a consistent temperature in the box called for both heating and cooling. He pulled the Peltier from a 12V cooler meant to run off a car’s cigarette lighter, and used a spare ceramic heater that was lying around in case his primary reptile warmer went on the fritz.

An Arduino and a custom shield drive separate PID controllers for the Peltier and the heater. The shield has a temperature probe, and he extended the USB outside the climate box so the PIDs can be adjusted without disturbing the inside temperature. The schematic, board file, and code are all available in a zip you can get from his post.

The Peltier couldn’t quite compensate for the overly warm weather and the heat caused by the fermentation, but it was stable enough to produce a nice, plum-flavored lager he has dubbed Lektor Blom­mes malt­bol­che, which is a triple Danish pun he explains in the write-up.

Margarita Drip Infuser!

Margarita Drip Infuser Ensures A Perfect Mix

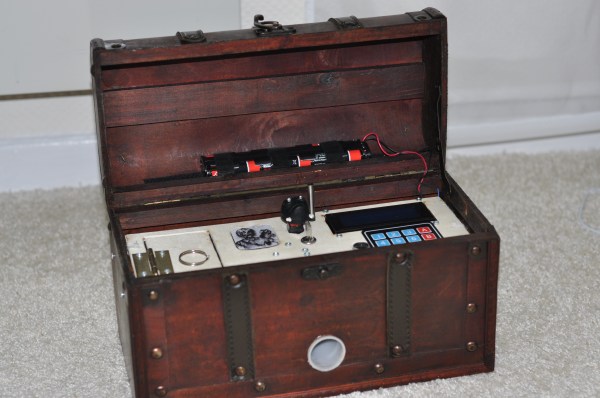
In order to get a margarita just right, the various ingredients need to be mixed together quite vigorously to over-come the different viscosity of the fluids. Looking to create his own barbot of sorts, [TVMiller] decided to make a Margarita Drip Infuser to help make margaritas a bit easier.

Using various chem lab supplies, [TVMiller] has cobbled together something pretty awesome. The Infuser can take up to 8 different ingredients into its test tube reserves, and after the drink ingredients are programmed on the computer, the magic begins.

An Arduino Uno controls a bank of 8 relays which control small fluid solenoids, with each control pulse releasing just a single droplet of fluid. An LED for each valve is run in parallel adding a bit of a light show to the mixing experience. If that’s not enough, he’s also created a copper cooling coil to chill the drink as it is poured.

Continue reading “Margarita Drip Infuser Ensures A Perfect Mix”

BORAT: Bathroom Monitor For The Future

A recent company move has left [kigster] and his 35 coworkers in a frustrating situation. Their new building only has two single occupancy bathrooms. To make matters worse, the bathrooms are located on two different floors. Heading to one bathroom, finding it occupied, then running upstairs to find the second bathroom also occupied became an all to common and frustrating occurrence at the office.

It was obvious the office needed some sort of bathroom occupancy monitoring system – much like those available on commercial aircraft. [kigster] asked for a budget of about $200 to build such a system. His request was quickly granted it by office management. They must have been on their way to the bathroom at the time.

borat1[kigster] began work on BORAT: Bathroom Occupancy Remote Awareness Technology. The initial problem was detecting bathroom occupancy. The easiest method would be to use door locks with embedded switches, much those used in aircraft. Unfortunately, modifying or changing the locks in a rented office space is a big no-no. Several other human detection systems were suggested and rejected. The final solution was a hybrid. Sonar, Passive Infrared (PIR), and light sensors work in concert to detect if a person is in the bathroom. While we think the final “observer unit” is rather cool looking, we’re sure unsuspecting visitors to the office may be wondering why a two eyed robot is staring at them on the throne.

The display side of the system was easy. The entire system communicates with the venerable nRF24L01+ radio modules, so the display just needed a radio module, an arduino, and a way of displaying bathroom status. Two LED matrices took care of that issue.

We really like this hack. Not only is it a great use of technology to solve a common problem, but it’s also an open source system. BORAT’s source code is available on [kigster’s] github.

Want to know more about BORAT? Kigster is answering questions over on his thread in the Arduino subreddit.

Build Your Own Stand Alone Web Radio

If you’re the type who enjoys passing idle time by keeping up with podcasts or listening to web stations but don’t always want to occupy your laptop or tablet, this Arduino based radio player will provide a base station for tunes.

The Web Radio project by [Vassilis Serasidis] outlines in a pleasing amount of detail exactly how to wire up a short list of four modules. These including an Ethernet shield, LCD screen, MP3 decoder, and USB serial converter, with an Arduino Mini in order to bookmark and play fourteen of your favorite channels. His hand-soldered board couples everything into one neatly stacked package. The instructional video shows this off and he even explains how to locate your favorite stations on internet-radio.com and copy their port and IP number directly into an example sketch which is provided for use. If you’ve been wanting to build a self contained radio node for your desk free of extra baggage, this is a no-sweat project for both the hardware savvy and those more oriented with code writing.

If you’re going to build your own radio, it’s always cool to disguise your high-tech creation as something more rustic. Check out this project by [Dominic Buchstaller] for a great example of a vintage radio given a second calling.

Continue reading “Build Your Own Stand Alone Web Radio”

DIY Optoisolator

MacGyvered Optoisolator Is A Great Introduction

Sometimes the best way to learn about a technology is to just build something yourself. That’s what [Dan] did with his DIY optoisolator. The purpose of an optoisolator is to allow two electrical systems to communicate with each other without being electrically connected. Many times this is done to prevent noise from one circuit from bleeding over into another.

[Dan] built his incredibly simple optoisolator using just a toilet paper tube, some aluminum foil, an LED, and a photo cell. The electrical components are mounted inside of the tube and the ends of the tube are sealed with foil. That’s all there is to it. To test the circuit, he configured an Arduino to send PWM signals to the LED inside the tube at various pulse widths. He then measured the resistance on the other side and graphed the resulting data. The result is a curve that shows the LED affects the sensor pretty drastically at first, but then gets less and less effective as the frequency of the signal increases.

[Dan] then had some more fun with his project by testing it on a simple temperature controller circuit. An Arduino reads a temperature sensor and if the temperature rises above a certain value, it turns on a fan to cool the sensor off again. [Dan] first graphed the sensor data with no fan hooked up. He only used ambient air to cool things down. The resulting graph is a pretty smooth curve. Next he hooked the fan up and tried again. This time the graph went all kinds of crazy. Every time the fan turned on, it created a bunch of electrical noise that prevented the Arduino from getting an accurate analog reading of the temperature sensor.

The third test was to remove the motor circuit and move it to its own bread board. The only thing connecting the Arduino circuit to the fan was a wire for the PWM signal and also a common ground. This smoothed out the graph but it was still a bit… lumpy. The final test was to isolate the fan circuit from the temperature sensor and see if it helped the situation. [Dan] hooked up his optoisolator and tried again. This time the graph was nice and smooth, just like the original graph.

While this technology is certainly not new or exciting, it’s always great to see someone learning by doing. What’s more is [Dan] has made all of his schematics and code readily available so others can try the same experiment and learn it for themselves.