Getting into home automation usually starts with lighting, like hacking your lights to automatically turn on when motion is detected, timer controls, or even tying everything into an app on your smart phone. [Ken] took things to a completely different level, by giving his lighting intelligence.
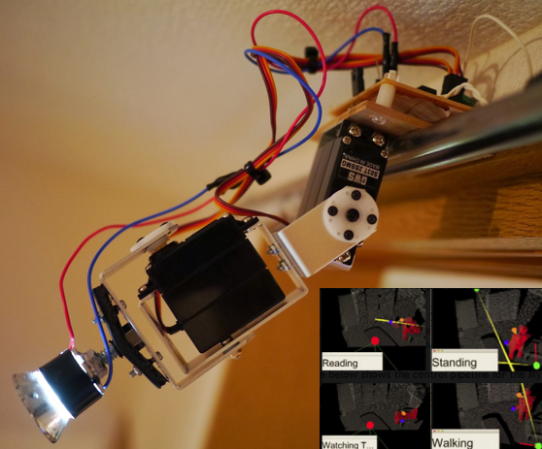
The system is called ‘Myra’, and it works by detecting what you’re doing in the room, and based on this, robotic lights will optimally adjust to the activity. For example, if you’re walking through the room, the system will attempt to illuminate your path as you walk. Other activities are detected as well, like reading a book, watching TV, or just standing still.
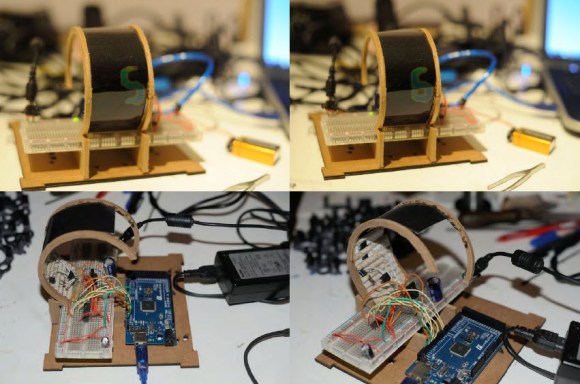
At the heart of the ‘Myra’ system is an RGBD Sensor (Microsoft Kinect/Asus Xtion). The space in the room is processed by a PC running an application to determine the current ‘activity’. Wireless robotic lights are strategically placed around the room; each with a 2-servo system and standalone Arduino. The PC sends out commands to each light with an angle for the two axis and the intensity of the light. The lights receive this command wirelessly via a 315MHz receiver, and the Arduino then ‘aims’ the beam according to the command.
This isn’t the first time we’ve seen [Ken’s] work; a couple of years ago we saw his extremely unique ‘real life’ weather display. The ‘Myra’ system is still a work in progress, so we can’t wait to see how it all ends up. Be sure to check out the video after the break for a demo of the system.
Continue reading “Autonomous Lighting With Intelligence” →


 In what we hope is a new trend in interviewing, some of the people at [Anthony]’s place of work asked him to
  Okay, so he doesn’t have Grandma riding in it that we know of, but [zim] recently decided to turn a Jazzy mobility chair into “a radio-controlled platform for mischief”. RC offers more range than wifi or bluetooth, and he was able to find a reasonably priced secondhand radio on Craigslist. However, he found out that in the event of signal loss, the receiver keeps sending the last commands to the speed controller. [zim] didn’t want his 150 lb (68kg) mischief platform getting loose, so