FLASH.IT: The RGB LED Climbing Wall

rockWallLEDs2

[Chris] and his friends were kicking around ideas for a Burning Man project, and this is the one that stuck: a rock climbing wall with RGB LEDs embedded in the holds. The holds themselves were custom made; the group started by making silicone molds of varying shapes and sizes, then added the electronics and poured in polyurethane resin to create the casting. The boards for these LEDs are equipped with a central hole that pairs up with a peg in the silicone mold. [Chris] also solved an annoying spinning problem by affixing a bolt to the far end of the LED board: once embedded in the polyurethane, the bolt provides resistance that the thin board cannot. The finished holds bolt onto the wall with all their wires neatly sticking out of the back to be hooked up to a central controller.

The Instrucables page suggests a few ways to get the lights working, including grabbing the nearest Arduino and relying on the Neopixel Library from Adafruit. [Chris] went the extra mile for Burning Man, however, designing Arduino-software-compatible controller boards capable of communicating via DMX, which expanded the system from a simple display to one capable of more complex lighting control. Stop by the Github for schematics and PCB layouts, and stick around for a video of the wall after the break. If the thrill-seeking outdoorsman inside you yearns for more, check out WALL-O-TRON from earlier this summer.

Continue reading “FLASH.IT: The RGB LED Climbing Wall”

Hacking A Disco Laser

hacked laser disco

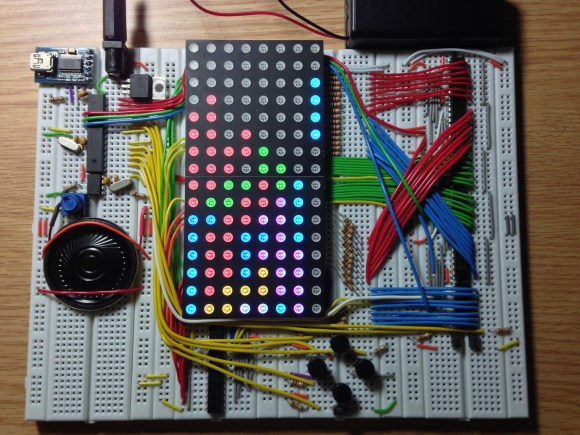
[Mark] was looking for a cheap disco laser projector for parties, and he found one. Unfortunately for him, the advertised features were a bit lacking. The “sound activation mode” was merely an on off circuit, as opposed to it actually being controlled by the music — he set out to fix this.

Taking the unit apart revealed a very convenient design for hacking. All of the components were connected to the main PCB by connectors, meaning the laser driver board was completely separate! He replaced the PCB completely using a prototyping board, an Arduino pro mini, a microphone with a simple preamp, a rotary encoder, and a MSGEQ7 chip to analyse the levels. Oh, and a MOSFET to control the motor via PWM output. It even ended up being close to the same size as the original!

If you happen to have one of these projectors and want to fix it too, he’s posted the source code and circuit diagram on github.

After the break, check out the before and after video. It’s still a cheap disco laser projector, but at least it works as advertised now!

Continue reading “Hacking A Disco Laser”

Stewart Platform Reinvents The Wheel So You Don’t Have To

StewartPlatform

[Dan Royer] has noticed that most university projects involving a Stewart platform spend more time building a platform than on the project itself. He hopes to build a standard platform universities can use as the basis for other projects.

Stewart platforms are six degree of freedom platforms often seen hefting flight simulators or telescopes. The layout of the actuators allows movements in X,Y,and Z as well as pitch, roll and yaw. While large platforms often use hydraulic systems to accelerate heavy loads quickly. [Dan] is looking at a smaller scale system. His platform is built of laser cut wood and uses six steppers to control motion.

One of the harder parts in designing a platform such as this is creating a mechanical system that is strong, precise, and smooth. With so many linkages, it’s easy to see how binding joints could bring the entire thing to a grinding halt. [Dan] is currently using RC helicopter ball joints, but he’s on the lookout for something even smoother.

Continue reading “Stewart Platform Reinvents The Wheel So You Don’t Have To”

A Touch Screen Geiger Counter Without A Geiger Tube

geiger

We’re assuming [Toumal] was desperately bored one day, because in the depths of the Internet he found some really cool components to build a solid state Geiger counter.

The Arduino and touchscreen are rather standard fare [Toumal] picked up on eBay for about $30. What really sets this project apart from all the other geiger counter builds we’ve seen is the solid state geiger counter [Toumal] used. This device uses a specially-made photodiode made by First Sensor to detect gamma emissions from 5 to 1000 keV.

[Toumal] put all the software for his Arduino touch screen radiation detector up on github. To be honest, we’re really impressed with the rad sensor [Toumal] used for this project, so if you ever decide to pick one of those up, he’s got your back with an Arduino library for it.

Using Google Authenticator With An Arduino

Google Authenticator is an app that generates one time passwords (OTPs). These passwords are often used as a second factor of authentication, along with your normal password. OTPs work by having a shared secret and a synchronized clock on two devices. When you generate the password, a hash based on the secret and timestamp is created. This proves that you have access to the secret, and can only be used once.

To secure his Lego mini-figures, [Luca] built an authentication system using Google Authenticator and Arduino. A web app is used to generate a secret that can be configured into the Arduino using an array, and into Google Authenticator using a QR code. The Arduino is using a library that implements Time-based One Time Password authentication (TOTP).

There are some challenges, including keeping a good clock source on the Arduino, but this look like an interesting way to do authentication. After the break, watch a quick video overview of the project (for English captions, hit the CC button).

Continue reading “Using Google Authenticator With An Arduino”

Adding A Display To A USB Digital Scale

arduino_scale

[Oleg] found himself in possession of a Stamps.com Model 510 5lb digital scale.  It’s a great scale, but only works as a USB HID device. In other words, it’s a digital scale without a digital display. He decided he wanted it to be more standalone, so he added a Toshiba HD44780 (compatible) display. An Arduino UNO and USB Host shield were used to make it happen. His sketch simply polls the scale and outputs the weight on the display.

In this case, he used the USB Host Shield from Circuits at Home, but a brief look shows they use the same MAX3421 controller chip as Sparkfun and other versions of the board. You might also be able to pull off the same functionality with an AVR running V-USB, though admittedly it wouldn’t be so easy.

We haven’t found a great way to add USB host mode to projects other than shields like the one [Oleg] used. If you know of a better way, share your ideas in the comments.

Of course, if this isn’t hardcore enough for you, forget using a consumer scale – make your own from scratch!

The Arduino YUN. YUN Means Cloud.

For the longest time, the creators of the Arduino have been looking at how to bring the Arduino platform into the cloud. Ethernet and WiFi shields technically work, but if you’re processing data scraped from a web page, a lowly microcontroller really isn’t the best option. Enter the Arduino YUN. At its core, it’s a regular old Arduino Leonardo. Underneath that metal plate on the board? That’s an SoC running Linux.

Basically, the Linux side of the Yun is pretty similar to a WiFi router running OpenWRT. There’s a USB port for plugging in peripherals, native WiFi support (802.11n, even!), an Ethernet connector, and enough RAM to do all the interesting stuff a small computer connected to the Internet can do.

To make all this web programming easier for Arduino neophytes, the YUN also includes a ‘bridge’ library that automates HTTP transactions between the Linux and microcontroller sides of the YUN. There’s also support for Temboo, an SDK for dozens of APIs that interact with Facebook, Dropbox, FedEx, and hundreds of other web services.

Below you can check out [Massimo] and [David] showing off their wares and going over how the YUN connects to the Internet and interacts with the microcontroller over the ‘bridge’. It’s an interesting device, and something we’ll surely check out at the World Maker Faire.

Continue reading “The Arduino YUN. YUN Means Cloud.”