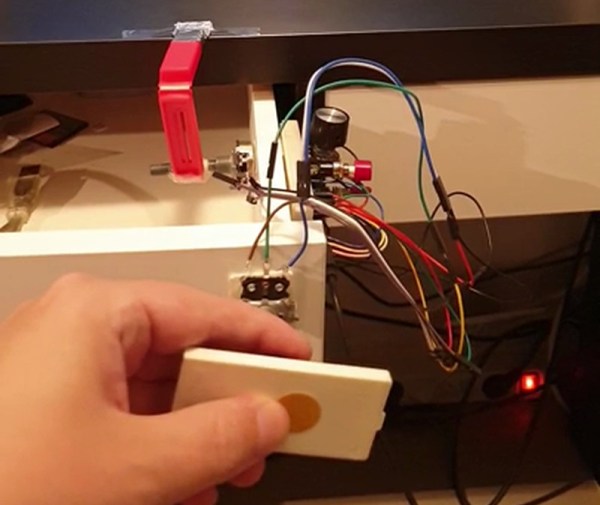
DropController Sets The Bar For Documentation

dropController has the kind of documentation we wish would spontaneously generate itself whenever we build something. [Martyn Currey] built a robust rig for water droplet photography, and we don’t want to dismiss the hardware, but the most impressive part might be the website. It might not be very fancy, but it’s thorough and logically organized. You can find parts lists, assembly manuals, tutorials, sketches, and schematics. If only all the projects that came our way were so well detailed.

Water droplet photography is pretty cool, although freehanding it will make your patience fall faster than 9.81 m/s². The concept is that a solenoid valve will flicker open to release a drop of water, wait for a certain number of microseconds, and then trigger your DSLR via a wired remote cable. The tricky part comes from controlling as many as six valves and three flashes. We don’t have enough fingers and toes to press all those buttons.

The bill of materials contains many commonly available parts like an Arduino Nano, an LM2596 voltage regulator, some MOSFETS, an HC-06 Bluetooth module, plus standard audio connectors to hook everything up. Nothing should break the bank, but if money is not an issue, [Martyn] sells kits and complete units.

Waterdrop controllers are not the newest kids on the block, and strobe photography is a time-honored tradition.

Continue reading “DropController Sets The Bar For Documentation”

Vintage Gauges Turned Classy Weather Display

It’s always good to see old hardware saved from the junk pile, especially when the end result is as impressive as this analog gauge weather display put together by [Build Comics]. It ended up being a truly multidisciplinary project, combing not only restoration work and modern microcontroller trickery, but a dash of woodworking for good measure.

Naturally, the gauges themselves are the real stars of the show. They started out with rusted internals and broken glass, but parts from a sacrificial donor and some TLC from [Build Comics] got them back in working order. We especially like the effort that was put into making the scale markings look authentic, with scans of the originals modified in GIMP to indicate temperature and humidity while retaining the period appropriate details.

To drive the 1940s era indicators, [Build Comics] is using an Arduino Nano and a DHT22 sensor that can detect temperature and humidity. A couple of trimmer pots are included for fine tuning the gauges, and everything is mounted to a small scrap of perfboard hidden inside of the custom-made pine enclosure.

This is hardly the first time we’ve seen analog gauges hooked up to modern electronics, but most of the projects are just that: modern. While the end look might be somewhat polarizing, we think maintaining the hardware’s classic style was the right call.

Official Arduboy Upgrade Module Nears Competition

We’ve been big fans of the Arduboy since [Kevin Bates] showed off the first prototype back in 2014. It’s a fantastic platform for making and playing simple games, but there’s certainly room for improvement. One of the most obvious usability issues has always been that the hardware can only hold one game at a time. But thanks to the development of an official add-on, the Arduboy will soon have enough onboard storage to hold hundreds of games

Even the rear silkscreen was a community effort.

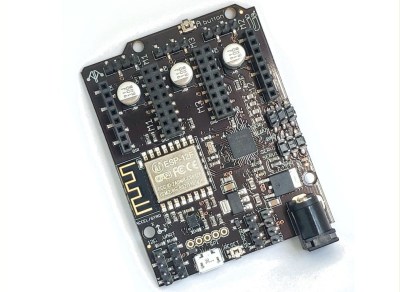
The upgrade takes the form of a small flexible PCB that gets soldered to existing test points on the Arduboy. Equipped with a W25Q128 flash chip, the retrofit board provides an additional 16 MB of flash storage to the handheld’s ATmega32u4 microcontroller; enough to hold essentially every game and program ever written for the platform at once.

Of course, wiring an SPI flash chip to the handheld’s MCU is only half the battle. The system also needs to have its bootloader replaced with one that’s aware of this expanded storage. To that end, the upgrade board also contains an ATtiny85 that’s there to handle this process without the need for an external programmer. While this is a luxury the average Hackaday reader could probably do without, it’s a smart move for an upgrade intended for a wider audience.

The upgrade board is currently available for pre-order, but those who know their way around a soldering iron and a USBasp can upgrade their own hardware right now by following along with the technical discussion between [Kevin] and the community in the “Project Falcon” forum. In fact, the particularly astute reader may notice that this official upgrade has its roots in the community-developed Arduboy cartridge we covered last year.

Continue reading “Official Arduboy Upgrade Module Nears Competition”

Optimizing GIF Playback For Microcontrollers

Despite being cooked up by Compuserve back in the late 1980s, GIFs have seen a resurgence on the modern internet, mostly because they’re fun. However, all our small embedded systems are getting color screens these days, and they’d love to join in the party. [Larry Bank] has whipped up a solution for just that reason, letting embedded systems play back short animated GIFs with limited resources.

[Larry] does a great job of explaining how the GIF format works, using LZW compression and variable-length codes. He talks about how the design of the format presents challenges, particularly when working with microcontrollers. Despite this, the final code works well, and is able to work with most animated GIFs of the right dimensions and construction. 24K of RAM is required, and image width is limited to 320 pixels. Images can be loaded from flash, memory, or SD cards, and he notes that best performance is gained with a microcontroller with fast SPI for writing to screens quickly.

It’s a great piece of software that promises to add a lot of charm, or silliness, to microcontroller projects. It also simplifies the use of animations, which can now be designed on computers rather than by using onboard graphics libraries. GIF really is the format that never seems to die; we’ve featured cameras dedicated to the form before. Video after the break.

Continue reading “Optimizing GIF Playback For Microcontrollers”

Tiny Circuit Sculpture Keeps The Night Watch

If you’re planning to get into circuit sculpture one of these days, it would probably be best to start with something small and simple, instead of trying to make a crazy light-up spaceship or something with a lot of curves on the first go. A small form factor doesn’t necessarily mean it can’t also be useful. Why not start by making a small automatic night light?

The circuit itself is quite simple, especially because it uses an Arduino. You could accomplish the same thing with a 555, but that’s going to complicate the circuit sculpture part of things a bit. As long as the ambient light level coming in from the light-dependent resistor is low enough, then the two LEDs will be lit.

We love the frosted acrylic panels that [akshar1101] connected together with what looks like right angle header pins. If you wanted to expose the electronics, localize the light diffusion with a little acrylic cover that slips over the LEDs. Check it out in the demo after the break.

There’s more than one way to build a glowing cuboid night light. The Rubik’s way, for instance.

Continue reading “Tiny Circuit Sculpture Keeps The Night Watch”

Hex Matrix Clock Is Spellbinding

Just when we think we’ve seen all possible combinations of 3D printing, microcontrollers, and pretty blinkenlights coming together to form DIY clocks, [Mukesh_Sankhla] goes and builds this geometric beauty. It’s kaleidoscopic, it’s mosaic, and it sorta resembles stained glass, but is way cheaper and easier.

The crucial part of the print does two jobs — it combines a plate full of holes for a string of addressable RGB LEDs with the light-dividing walls that turn the LEDs into triangular pixels. [Mukesh] designed digits for a clock that each use ten triangles. You’d need an ESP8266 to run the clock code, or if you’d rather sit and admire the rainbow light show unabated by the passing of time, just use an Arduino Uno or something similar.

Most of the aesthetic magic here is in the printed pieces and the FastLED library. It has a bunch of really cool animations baked in that look great with this design. Check out the demo video after the break. The audio is really quiet until the very end of the video, so be warned. In our opinion, the audio isn’t necessary to follow along with the build.

The humble clock takes many lovely forms around here, including pop art.

Continue reading “Hex Matrix Clock Is Spellbinding”

Versatile Energy Meter Has Multiple Functions

If you are dealing with solar or battery power, you might want to have one of these little energy meters built by [Open Green Energy] around. The Arduino-based instrument measures DC voltage, current, power, energy, capacity, and temperature. The range is only up to 26 volts and 3.2 amps, but you could extend that with some external circuitry.

Of course, measuring a voltage with the Arduino is old hat. But the addition of a INA219 current sensor provides voltage, current, and power measurements in a single module that talks I2C back to the host computer.

Continue reading “Versatile Energy Meter Has Multiple Functions”