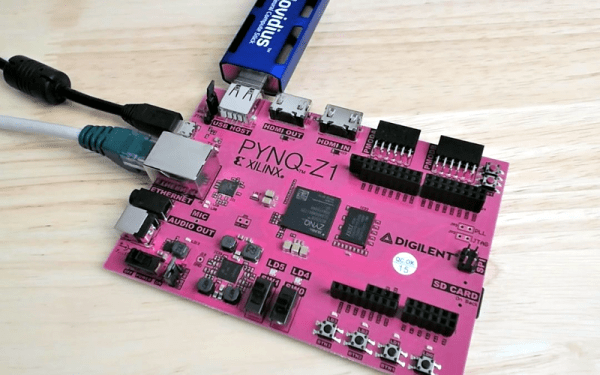
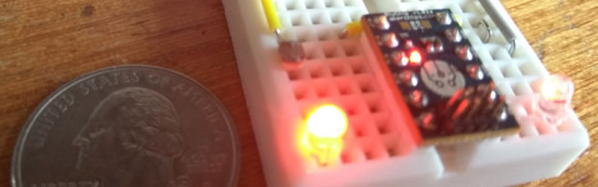
It’s Curtains For Blu Chip

In theory, there is no reason you can’t automate things all over your house. However — unless you live alone — you need to consider that most people won’t accept your kludgy looking circuits on a breadboard hanging everywhere. Lighting has become easy now that there are a lot of commercial options. However, there are still plenty of things that cry for automation. For [jeevanAnga], the curtains were crying out for remote control.

Since cellphones are ubiquitous, it makes sense to use the phone as a controller and BlueTooth Low Energy (BLE) is perfect for this kind of application. But you can’t hang a big ugly mess of wires off the curtain rods. That’s why [jeevanAnga] used a tiny (16.6 x 11.5 mm) BLE board knows as a BluChip.

We didn’t verify it, but [jeevanAnga] claims it is the smallest BLE board available, and it is certainly tiny. You can see the result in the video below.

Continue reading “It’s Curtains For Blu Chip”

Hands On With PocketBeagle

[Ken Shirriff] is no stranger to the pages of Hackaday. His blog posts are always interesting, and the recent one talking about the PocketBeagle is no exception. If you are old enough to remember the days when a Unix workstation set you back tens of thousands of dollars, you won’t be able to help yourself marveling at a Linux computer with 45 I/O pins, 8 analog inputs, 512M of RAM, and a 1 GHz clock, that fits in your pocket and costs $25. What’s more the board’s CPU has two 200 MHz auxiliary CPUs onboard to handle I/O without having to worry about Linux overhead.

These last parts are significant, and although the Beagles have had this feature for years ([Ken] talked about it earlier), the access and communication methods for using these slave processors has become easier. [Ken] shows a small snippet of C code that outputs a 40 MHz square wave no matter what the Linux OS is doing. In this way you can use Linux for the parts of your application that are not that critical, and use the slave processors to handle real time processing.

Continue reading “Hands On With PocketBeagle”

DS212 Oscilloscope Review: Open Source And Great For Hacking

We’ve seen plenty of oscilloscopes that look like repurposed cell phones. Usually, though, they only have one channel. The DS212, has two channels and a signal generator! [Marco] gives his review and a quick tear down in the video below.

The scope isn’t going to replace a big bench instrument, but for a portable scope with a rechargeable battery, it isn’t bad. The 1 MHz analog bandwidth combines with a 10 megasample per second front end and 8K of sample memory. The signal generator can produce basic waveforms up to 1 MHz. We were somewhat surprised the unit didn’t sport a touch screen, which is why you can see [Marco’s] fingers in the screenshot above. He seems to like the dual rotary encoder system the devices uses for navigation.

Where this really stands out is that it is open source for the the firmware running on the STM32 processor inside. We so rarely see this for commercially available bench tools and it makes this a fine hacking platform. It’s easy to imagine adding features like digital signals out and decoding digital data. It would be interesting to marry it with a WiFi chip and use it as a front end for another device over WiFi. Lots of possibilities. [Marco] shows that even though he’s not familiar with the STM32, he was able to add a custom waveform output to the device easily. This has the potential to be a custom troubleshooting platform for your builds. Lining up all of the sensing and signal generation settings for each specific type of test means you don’t need a guru to walk through the common failure modes of a product.

There are many small inexpensive scopes out there that might not match a big bench instrument but can still be plenty useful. [Jenny List] just reviewed one that comes in at around $21. And last year, we saw a sub-$100 scope that would net you just one channel scope. That’s progress!

IoT Garage Door Opener From Scrap

[Hans Nielsen] has a couple roommates, and his garage has become a catch-all for various items. And like any good hacker’s garage, it boasts an IoT controlled garage door opener. It had a problem though, it used a Particle Photon – a popular IoT board that required internet access and a web server to operate. So [Hans] raided his roommate’s spare parts bin and set-forth to rebuild it!

One of his main goals was to make something that did not require internet access to operate. Anyone connected to the local WiFi should be able to open and close the door via a web interface, and he would give our good friend [Linus Torvalds] a call to make it happen. The key component in the build is the C.H.I.P SBC that made the news a while back for being ridiculously cheap.

Be sure to check out [Han’s] blog if you’re at all interested in working with the C.H.I.P. He does a fantastic job of documenting the ins and outs of getting a project like this working.

Build One, Get Two: CPLD And STM32 Development On A Single Board

Programmable logic devices have claimed their place in the hobbyist world, with more and more projects showing up that feature either a CPLD or their bigger sibling, the FPGA. That place is rightfully earned — creating your own, custom digital circuitry not only adds flexibility, but opens up a whole new world of opportunities. However, this new realm can be overwhelming and scary at the same time. A great way to ease into this is combining the programmable logic with a general purpose MCU system that you already know and are comfortable with. [Just4Fun] did just that with the CPLD Fun Board, a development board connecting an Arduino compatible STM32F103 Cortex-M3 controller to an Altera MAX II CPLD.

The PCB itself has some standard development board equipment routed to the CPLD: LEDs, buttons, a seven-segment display, and additional GPIO. The rest of the CPLD’s pins are going straight to the STM32 and its SPI, I2C and UART pins. Let’s say you want to create your own SPI device. With the CPLD Fun Board, you can utilize all the pre-existing libraries on the STM32 and fully focus on the programmable logic part. Better yet, every connection from MCU to CPLD has its own pin header connection to attach your favorite measurement device for debugging. And in case you’re wondering — yes, you can attach external hardware to those connectors by setting either MCU or CPLD pins to Hi-Z.

The downside of all this is the need for proprietary design software and a dedicated programmer for the CPLD, which sadly is the everyday reality with programmable logic devices. [Just4Fun] did a great job though writing up a detailed step-by-step tutorial about setting up the environment and getting started with the board, but there are also other tutorials on getting started with CPLDs out there, in case you crave more.

Tiny Tensor Brings Machine Deep Learning To Micros

We’ve talked about TensorFlow before — Google’s deep learning library. Crunching all that data is the province of big computers, not embedded systems, right? Not so fast. [Neil-Tan] and others have been working on uTensor, an implementation that runs on boards that support Mbed-OS 5.6 or higher.

Mbed of course is the embedded framework for ARM, and uTensor requires at least 256K of RAM on the chip and an SD card less than (that’s right; less than) 32 GB. If your board of choice doesn’t already have an SD card slot, you’ll need to add one.

Continue reading “Tiny Tensor Brings Machine Deep Learning To Micros”

Alexa, Hack My TV

If you have an Alexa, one of the best things you can buy to go with it is a Harmony Hub remote. Sure, you get a universal remote to control all your home theater equipment, but you’ll hardly use it because the Alexa can virtually push the Harmony buttons for you. The negative word in this paragraph, though, is “buy.” The Harmony Hub isn’t inexpensive. Fortunately [Michael Higginis] has you covered. He has an ESP8266 universal remote that you can control with Alexa. You can see a video of setting the system up below.

On the one hand, the idea is fairly simple. An ESP8266 has plenty of horsepower to read and recreate IR codes. However, we were very impressed with the web portal used to configure the device and integrating it with Alexa is a neat trick.

Continue reading “Alexa, Hack My TV”