For the past few years, many have become used to having virtual meetings in their homes. Spaces like kitchen tables, couches, spare bedrooms, and hammocks in the yard have all become “offices”. As you can imagine, many of these spaces aren’t well known for their acoustic qualities. [Zac] built a sound diffusion art piece out of scrap pieces of wood to help his office sound better when recording.
Reverb is caused by sound bouncing off hard, flat surfaces like drywall. These reflections are picked up by the microphone and lead to a noticeable drop in perceived sound quality. There are generally two ways to kill reverb in a space: diffusion and absorption. Diffusion is the technique that [Zac] is going for, with thousands of faces at different angles and locations, it breaks up the harsh reflections into millions of tiny reflections. Absorption is usually accomplished with foam and other typically soft substances.
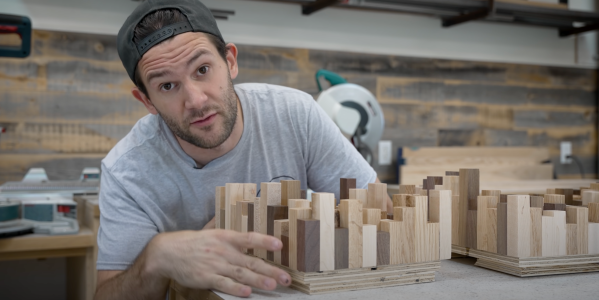
[Zac] happened to have a large pile of offcuts and extra material from past projects of various wood species, making it easy to make a visually interesting piece. He used a table saw to rip them to a consistent width and a drum sander reduced them all to the same depth. Next, the long sticks were cut with a miter saw into 5 different lengths, leaving him with thousands of little pieces of wood. The hard part began when he had to glue several thousand pieces to a plywood backer board with CA glue. Sanding, finishing with poly, and a french cleat made the three pieces ready to hang on the wall.
Overall, the effect is stunning. While we’d love more hard data on the improvement, it certainly does sound better anecdotally. If you’re interested in more woodworking, take a look into making an inlay without a CNC. Video after the break.
Continue reading “Taking The Bark Out Of Reverb With Wood Scraps” →