Lightning is a force to be reckoned with: ever since ancient times, humans have been in awe of the lethal power of lightning strikes and the deafening roar of thunder. Quite reasonably, they ascribed these events to acts of angry gods; today, modern science provides a more down-to-earth explanation of the physics involved, and a world-wide network of sensors generates a real-time record of lightning strikes around the globe.
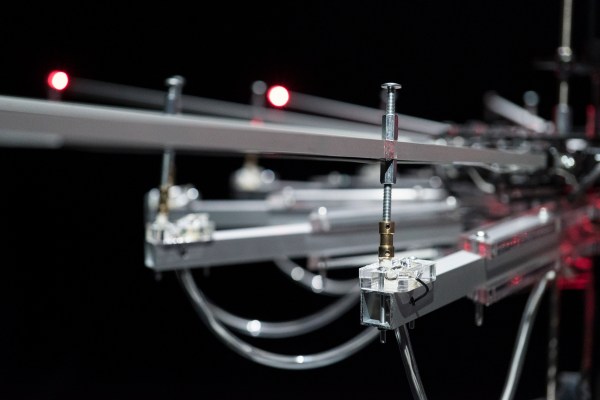
[Dmitry Morozov]’s latest kinetic art installation called Adad is driven by this stream of data. Named after a Mesopotamian god of thunder, it consists of a set of arms that suddenly jerk upwards when a lightning strike is detected anywhere in the world. When an arm falls down again, it strikes a piezo crystal, which generates an electric charge that triggers a bright flash of light as well as a sound effect. Those crystals are pieces of potassium sodium tartrate (also known as Rochelle salt) and were grown specifically for this project. They are housed in plexiglass holders which also provide electrical connections.
Adad‘s spider-like design, its eerie sounds as well as the sudden pops and flashes make this a rather unsettling yet beautiful display of Nature’s violence. And it’s a piece of beauty from an engineering point of view as well: sleek aluminium tubes, servo-driven motion and those transparent crystal holders, all controlled by an Arduino that receives live lightning data through an internet connection.
We’ve seen several types of lightning detectors, usually based on a standard radio receiver or a specialized chip. If you’re interested in growing your own piezo crystals, we’ve covered that too. Continue reading “Kinetic Art Installation Brings All The World’s Lightning To One Place”