Using Glow-in-the-Dark Fish Gut Bacteria To Make Art

In New Orleans, a Loyola University professor has been creating original art out of glow-in-the-dark fish gut bacteria, enough to fill 1000 Petri dishes. Her first major foray into art was biomorphic abstractions, inspired by Impressionist painters, with her current work reflecting much of the abstraction of the earlier style.

The bacteria comes from the Pacific Rock Fish and glows a vibrant electric-blue. It is typically kept in a freezer and has a texture and color similar to water when it’s being used. The luminescence only lasts for 24 hours, presenting timing challenges when preparing artwork for a photoshoot, as artist [Hunter Cole] often does. With a Q-tip, [Cole] paints roses, lilies, and insects onto the Petri dishes and arranges them for surreal photography shoots. In addition to painting shapes in agar, she uses a light painting technique by filling clear water bottles with the bacteria for long-exposure shots.

[Cole] is planning on presenting her work at an art exhibit in New Orleans, along with showcasing a performance piece featuring models clad in chandelier-like costumes glowing with bioluminescent bacteria in petri dishes.

Add LEDs To Your Stained Glass

Stained glass is an art form that goes back many centuries, with the churches and cathedrals of Europe boasting many stunning examples from the mediaeval masters of the craft. You do not however have to go to York or Chartres cathedrals to experience stained glass, for it remains a vibrant and creative discipline with many contemporary practitioners. One thing the stained glass of today has in common with that of yesteryear though is that it remains static, being composed of pieces of glass held together by metal strips. This is something that [Frank Zhao] has addressed as he has evolved a technique that allows him to incorporate LEDs into static stained glass, making for a particularly eye-catching effect.

It’s likely that we join many readers in not knowing the intricacies of making a piece of stained glass, so his is a fascinating write-up for its step-by-step run-through. His stained glass cat has pieces of glass edged with copper tape, which he then solders together. Driving the LEDs is not something that should be alien to us, but his method of using the copper-and-solder stained glass joints as conductors for them by creating strategically placed cuts is very effective. The final effect is of a homogeneous piece without the cuts being particularly visible , but with a pleasing array of lights on the cat’s tail. Those of us for whom stained glass production is new have learned something of the technique, and stained glass artists have seen their craft do something completely new.

Stained glass hasn’t featured here too often, the closest we’ve come is this striking fake stained glass Iron-Man themed panel a few years ago.

Replica Marshmello Helmet Is A Tidy Halloween Build

As the saying goes – you don’t need a stylized, bedazzled helmet to have a successful career in EDM, but it helps. Marshmello is the latest in a long line of musicians to sport bespoke headgear, and [MikeTheSuperDad] undertook the construction of a replica for Halloween.

The build starts with a piece of concrete form tube as the base of the helmet. This is combined with 3D printed components to create a grid in which to place WS2812B LED strings. These are controlled by an Arduino Pro Mini, which is responsible for handling the animations. Further 3D printed parts are used as templates to cut out the characteristic eyes and mouth, as well as to cover the top. Plastic sheeting is then used over the top of everything to diffuse the LEDs and provide the final look, with black mesh behind the eyes and mouth making them properly stand out.

Marshmello should be lauded for creating a helmet with a distinctive visual style, while remaining easy to replicate, unlike popular Daft Punk builds of years past. Building a replica could serve as good practice before starting out on your own unique build. Video after the break.

Continue reading “Replica Marshmello Helmet Is A Tidy Halloween Build”

Add A Bit Of PCB Badge Glamour To Your Boring ID Badge

When we talk about badges and printed circuit boards, it is usually in the context of the infinite creativity of the Badgelife scene, our community’s own art form of electronic conference badges. It’s easy to forget when homing in on those badges that there are other types of badge, and thus [Saimon]’s PCB badge holder is an entertaining deviation from our norm. His workplace requires employees to carry their credit-card-sized ID pass with them at all times, but the plastic holder that came with his had broken. So he did what any self-respecting engineer would do, and designed his own holder using PCBs.

It’s a three-way sandwich with identical front and back PCBs featuring a nice design, but the clever bit is the middle PCB. It is U-shaped to slide the card in from the side, but to retain the card it has a couple of springy milled PCB arms each with a small retaining tooth on the end. This is an ingenious solution, with just enough give to bend, but not so much as to break.

The three boards are glued together, it seems his original aim was to reflow solder them but this was not successful. The result is an attractive and functional badge holder, which if Hackaday required us to have a corporate ID you can be sure we’d be eyeing up for ourselves.

Mechanical Seven-Segment Display Mixes Art With Hacking

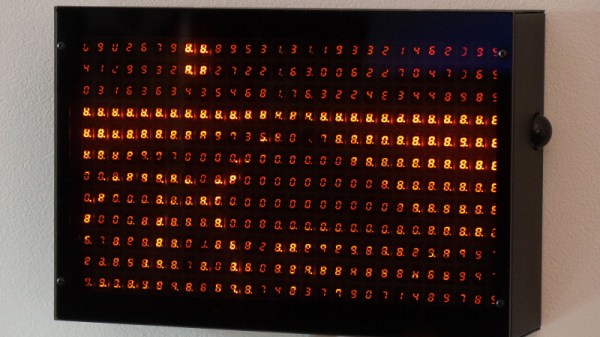
We’re not sure what to call this one. Is it a circuit sculpture? Sort of, but it moves, so perhaps it’s a kinetic circuit sculpture. Creator [Tomohiro Tsuchita] calls it “something beautiful but totally useless,” which we find a tad harsh. But whatever you call it, we think this mechanical seven-segment display is really, really cool.

Before anyone gets to thinking that this is something like the other mechanical seven-segment displays we’ve seen lately, think again. This one is not addressable; it simply goes through the ten digits in order. So you won’t be building a clock from it, although we suppose the mechanism could be modified to allow that. Then again, looking at that drive train of laser-cut acrylic cams, maybe not. Each segment has its own cam with lobes or valleys for each segment. A cam follower lowers and raises the segments as the cams rotate on a common shaft. A full-rotation servo powers the display under the control of a Micro:bit; the microcontroller is overkill for now but will be used in version two, which will allow the speed to change in response to sensors.

Watching this display change at its stately pace is strangely soothing. We love the look of this, but then again, we’re partial to objets d’art-circuit. After all, we ran a circuit sculpture contest earlier in the year, and just wrapped up a Hack Chat dedicated to the subject.

Continue reading “Mechanical Seven-Segment Display Mixes Art With Hacking”

Faux Cow Munches Faux Grass On A Faux Roomba

Out in the countryside, having a cow or to two wouldn’t be a big deal. You can have a cattle shed full of them, and no one will bat an eyelid. But what if you’re living in the big city and have no need of pet dogs or cats, but a pet cow. It wouldn’t be easy getting it to ride in the elevator, and you’d have a high chance of being very, very unpopular in the neighbourhood. [Dane & Nicole], aka [8 Bits and a Byte] were undaunted though, and built the Moomba – the Cow Roomba to keep them company in their small city apartment.

The main platform is built from a few pieces of lumber and since it needs to look like a Roomba, cut in a circular shape. Locomotion comes from two DC geared motors, and a third swivel free wheel, all attached directly to the wooden frame. The motors get their 12V juice from eight “AA” batteries. The free range bovine also needs some smarts to allow it to roam at will. For this, it uses a Raspberry Pi powered by a power bank. The Pi drives a 2-channel relay board which controls the voltage applied to the two motors. Unfortunately, this prevents the Moomba from backing out if it gets stuck at a dead end. For anyone else trying to build this it should be easy enough to fix with an electronic speed controller or even by adding a second 2-channel relay board which can reverse the voltage applied to the motors. The Moomba needs to “Moo” when it feels like, so the Raspberry Pi streams a prerecorded mp3 audio clip to a pair of USB speakers.

If you see the video after the break, you’ll notice that making the Moomba sentient is a simple matter of doing “ctrl+C” and “ctrl+V” and you’re good to go. The python code is straight forward, doing one of four actions – move forward, turn left, turn right or play audio. The code picks a random number from 0 to 3, and then performs the action associated with that number. Finally, as an added bonus, the Moomba gets a lush carpet of artificial green grass and it’s free to roam the range.

At first sight, many may quip “where’s the hack” ? But simple, easy to execute projects like these are ideal for getting younglings started down the path to hacking, with adult supervision. The final result may appear frivolous, but it’ll excite young minds as they learn from watching.

Continue reading “Faux Cow Munches Faux Grass On A Faux Roomba”

Portrait Painter Turns G-Code Into Artworks

Portrait painting is, by and large, a human endeavour. But, like any and all skills, there are machines ready and willing to take a crack at it. [Jose Salatino] has built just such a machine, and the results are impressive.

Samples of the artwork created by [Jose’s] portrait painter.
[Jose’s] portrait painter relies on a Cartesian CNC setup, with an X-Y gantry fitted with a retractable brush carrier. The carrier holds four brushes, allowing the device to paint with different sized strokes as per the artistic requirements. An algorithm is used to turn images into a series of brushstrokes, which are then turned into G-code to drive the system. Colors are mixed just like a human painter would, with the brush dipping into a series of paint pots. Using the hue-saturation-brightness (HSB) color system makes this easy.

While it’s much slower than your average printer, the goal here isn’t to create photorealistic images, but to create something with artistic appeal. The artworks painted by the ‘bot have a remarkable likeness to oil paintings by human artists, thanks to using similar techniques. We’re sure [Jose’s] experience as an oil painter helped out here, too.

We’ve seen other ‘bots produce custom artworks before, too. Video after the break.

Continue reading “Portrait Painter Turns G-Code Into Artworks”