Titanium Knob Doesn’t Grind Our Gears

Manual transmissions! Those blessed things that car enthusiasts swear by and everyone else pretends no longer exists. They’re usually shifted by using the gearstick, mounted in the centre console of the car. Swapping out the knob on the gearstick is a popular customization; you can have everything from 8-balls to skulls, to redback spiders mounted in epoxy, sitting proud atop your gearstick. It’s rare to see anything new under the sun, but [John Allwine] came up with something we’d never seen before.

[John]’s design leans heavily on the unique ability of additive manufacturing to produce complex hollow geometries that are incredibly difficult or impossible to produce with traditional subtractive methods. The part was designed in CAD software, and originally printed on a Makerbot in plastic. After this broke, it was decided to instead produce the part in stainless steel using Shapeway’s custom order process. You can even buy one yourself. This is a much smarter choice for a part such as a gearknob which undergoes heavy use in an automotive application. The part is printed with threads, but due to the imperfect printing process, these should be chased with a proper tap to ensure good fitment.

The design was eyecatching enough to grab the attention of a professional engineer from a 3D printing company, who worked with [John] to make the part out of titanium. It’s a very tough and hardy material, though [John] notes it was an arduous task to go about tapping the threads because of this.

It’s a great example of what can now be achieved with 3D printing technology. No longer must we settle for plastic – through services like Shapeways, it’s now possible to 3D print attractive metal parts in complex designs! And, if you’ve got the right friends, you can even step it up to titanium, too.

We’ve seen other takes on the 3D shifter handle, too – like this head.


Roll A Black Box For Your Wheels

Telemetric devices for vehicles, better known as black boxes, cracked the consumer scene 25 years ago with the premiere of OnStar. These days, you can get one for free from your insurance company if you want to try your luck at the discounts for safe driving game. But what if you wanted a black box just to mess around with that doesn’t share your driving data with the world? Just make one.

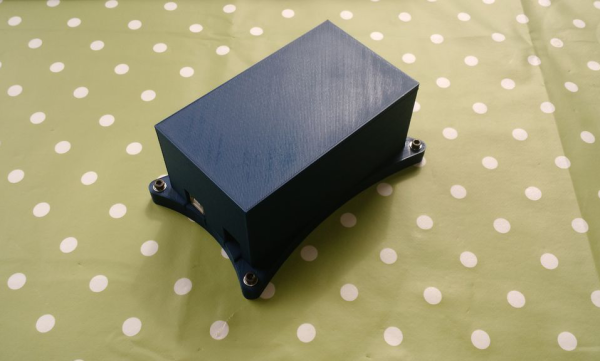
[TheForeignMan]’s DIY telematics box was designed to pull reports of the car’s RPM, speed, and throttle depression angle through the ODBII port. An ODBII-to-Bluetooth module sends the data to an Arduino Mega and logs it on an SD card along with latitude and longitude from a NEO-6M GPS module. Everything is powered by the car’s battery through a cigarette lighter-USB adapter.

He’s got everything tightly wrapped up inside a 3D printed box, which makes it pretty hard to retrieve the SD card. In the future, he’d like to send the data to a server instead to avoid accidentally dislodging a jumper wire.

If this one isn’t DIY enough for you to emulate, start by building your own CAN bus reader.

The Hacky Throttle Repair That Got Me On The Road Again

Old cars are great. For the nostalgia-obsessed like myself, getting into an old car is like sitting in a living, breathing representation of another time. They also happen to come with their fair share of problems. As the owner of two cars which are nearing their 30th birthdays, you start to face issues that you’d never encounter on a younger automobile. The worst offender of all is plastics. Whether in the interior or in the engine bay, after many years of exposure to the elements, parts become brittle and will crack, snap and shatter at the slightest provocation.

You also get stuck bolts. This was the initial cause of frustration with my Volvo 740 Turbo on a cold Sunday afternoon in May. As I tried in vain to free the fuel rail from its fittings, I tossed a spanner in frustration and I gave up any hope of completing, or indeed, starting the job that day. As I went to move the car back into the driveway, I quickly noticed a new problem. The accelerator was doing approximately nothing. Popping the hood, found the problem and shook my head in resignation. A Volvo 740 Turbo is fitted with a ball-jointed linkage which connects the accelerator cable to the throttle body itself. In my angst, the flying spanner had hit the throttle body and snapped the linkage’s plastic clips. It was at this point that I stormed off, cursing the car that has given me so much trouble over the past year.

Continue reading “The Hacky Throttle Repair That Got Me On The Road Again”

Reverse Engineered Media Controller From Car Is Best Friends With Android

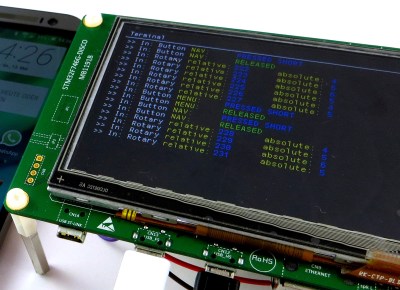
The CAN bus is a rich vein to mine for a hacker: allowing the electronic elements of most current vehicles to be re-purposed and controlled with ease. [MikrocontrollerProjekte] has reverse engineered a CAN bus media and navigation controller and connected it to an STM32F746G-Discovery board. The STM32 is in turn connected to an Android phone, and allows the media controller to trigger a large number of functions on the phone, including music playback, maps, and general Android navigation.

When reverse engineering the controller, [MikrocontrollerProjekte] employed a variety of approaches. A small amount of information was found online, some fuzzing was done with random CAN bus IDs and messages, as well as some data logging with the device inside the car to identify message data to the relevant IDs on the bus.

The STM32F746G-Discovery board acts as a Human Interface Device (HID), emulating a mouse and keyboard connected to the Android phone via USB OTG. The LCD screen shows the output of the keystrokes and touchpad area. We’re not sure how useful the mouse-emulation would be, given that the phone has a touchscreen, but the media functions work really well, and would also make a really snazzy music controller for a PC.

We’ve covered plenty of other cool CAN bus hacks, like reverse-engineering this Peugeot 207, or this general purpose CAN sniffer.

Continue reading “Reverse Engineered Media Controller From Car Is Best Friends With Android”

Tesla Model 3 Battery Pack Teardown

The Tesla Model 3 has been available for almost a year now, and hackers and tinkerers all over the world are eager to dig into Elon’s latest ride to see what makes it tick. But while it’s considerably cheaper than the Model S that came before it, the $35,000+ USD price tag on the new Tesla is still a bit too high to buy one just to take it apart. So for budget conscious grease monkeys, the only thing to do is wait until somebody with more money than you crashes one and then buy the wreckage cheaply.

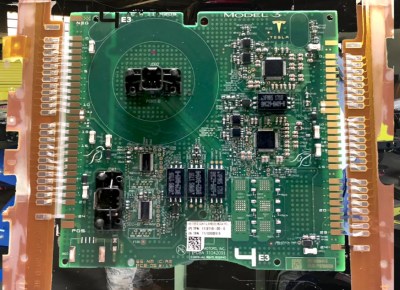
Tesla Model 3 battery monitor board

Which is exactly what electric vehicle connoisseur [Jack Rickard] did. He bought the first wrecked Model 3 he could get his hands on, and proceeded to do a lengthy teardown on what’s arguably the heart and soul of the machine: its 75 kWh battery pack. Along the way he made some interesting discoveries, and gained some insight on to how Tesla has been able to drop the cost of the Model 3 so low compared to their previous vehicles.

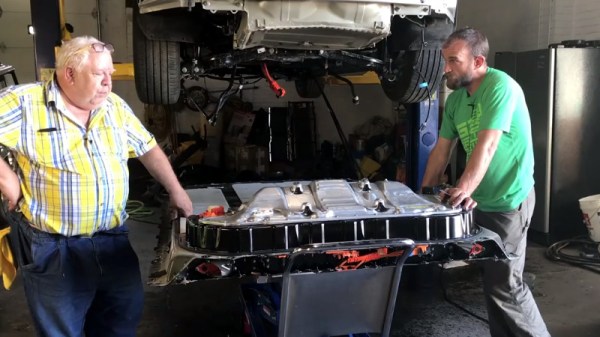
On a Tesla, the battery pack is a large flat panel which takes up effectively the entire underside of the vehicle. To remove it, [Jack] and his assistant raise the wreck of the Model 3 up on a standard lift and then drop the battery down with a small lift table. Here the first differences are observed: while the Model S battery was made for rapid swapping (a feature apparently rarely utilized in practice), the battery in the Model 3 battery is obviously intended to be a permanent piece of the car; removing it required taking out a good portion of the interior.

With the battery out of the car and opened up, the biggest change for the Model 3 becomes apparent. The battery pack actually contains the charger, DC-DC converter, and battery management system in one integrated unit. Whereas on the Model S these components were installed in the vehicle itself, on the Model 3, most of the primary electronics are stored in this single module.

That greatly reduces the wiring and complexity of the car, and [Jack] mentions the only significant hardware left inside the Model 3 (beyond the motors) would be the user interface computer in the dashboard. When the communication protocol for this electronics module is reverse engineered, it may end up being exceptionally useful for not only electric vehicle conversions but things like off-grid energy storage.

A little over a year ago we featured a similar teardown for the battery back in the Tesla Model S, as well as the incredible project that built a working car from multiple wrecks.

[Thanks to DarksideDave for the tip.]

Continue reading “Tesla Model 3 Battery Pack Teardown”

Headlight Mod For An Audi A3

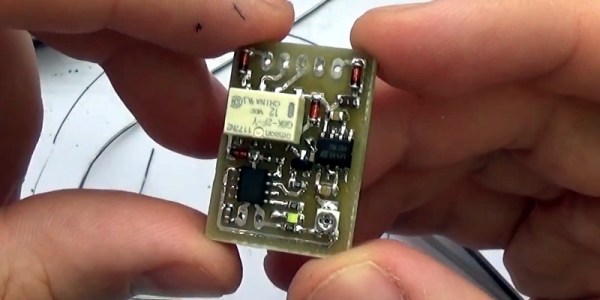
If you have a car that is getting on in years, it may be missing some of the latest frills and features that the latest models sport. [Muris] has a slightly dated Audi A3 8P which did not have an AUTO setting for the headlights. In the newer models, this feature turns on the headlights when the ambient light falls below a threshold level (overcast conditions or when going through a tunnel), or when the windshield wipers are turned on. The light sensor is integrated behind the rear view mirror in a special mount, requiring an expensive windshield upgrade if he were to opt for the factory retrofit. Instead, he decided to build his own Automatic Headlights Sensor upgrade for his Audi A3.

His local regulations require the car headlights to be on all the time when the vehicle is in motion. So adding this feature may seem moot at first sight. But [Muris] programmed the headlights to be powered at 70% during daytime conditions and switch to 100% when his sensor detects low ambient light conditions. In the power save mode, all of the other non-essential lights (number plate, tail light) are also turned off to hopefully extend their life. He achieved this by using the VCDS (VAG-COM Diagnostic System) – a widely used aftermarket diagnostics tool for VW-Audi Group vehicles. His tiny circuit switches the lights between the two power settings.

His plan was to install the device without disturbing the original wiring or light switch assembly in any way. The low-powered device consists of a PIC micro-controller, an LDR (light dependent resistor) for light sensing and a low current relay which switches between the two modes. Setting the threshold at which the circuit switches the output is adjusted by a variable trimpot acting as a voltage divider with the LDR. [Muris] wired up a short custom harness which let him install this circuit between the default light switch and the car electronics. After switching on power, he has 15 seconds to enable or disable his unit by toggling the light switch five times, and that status gets stored in memory. The tiny board is assembled using SMD parts and is protected with a heatshrink sleeve. The circuit would work equally well with a lot of other cars, so If you’ve got one which could do with this feature upgrade, then [Muris] has the Eagle CAD files and code available for download on his blog.

Check out the video below where he runs a demo, describes his circuit in detail and then proceeds to assemble the PCB without using a vise or a third hand to hold the PCB. That’s a fancy watch he’s sporting at 00:50 s down the video.

Continue reading “Headlight Mod For An Audi A3”

Spared No Expense: Cloning The Jurassic Park Explorer

While you’d be hard pressed to find any serious figures on such things, we’d wager there’s never been a vehicle from a TV show or movie that has been duplicated by fans more than the Staff Jeeps from Jurassic Park. Which is no great surprise: not only do they look cool, but it’s a relatively easy build. A decent paint job and some stickers will turn a stock Wrangler into a “JP Jeep” that John Hammond himself would be proud of.

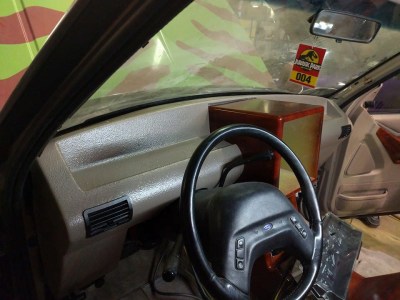
While no less iconic, there are far fewer DIY builds of the highly customized Ford Explorer “Tour Vehicles”. As a rather large stretch of the film takes place within them, the interiors were much more detailed and bears little resemblance to the stock Explorer. Building a truly screen accurate Jurassic Park Tour Vehicle was considered so difficult that nobody has pulled it off since the movie came out in 1993. That is until [Brock Afentul] of PropCulture decided to take on the challenge.

In an epic journey spanning five years, [Brock] has created what he believes is the most accurate Jurassic Park Tour Vehicle ever produced; and looking at the side by side shots he’s done comparing his Explorer to the ones from the movie, it’s hard to disagree. A massive amount of work went into the interior, leaving essentially nothing untouched. While previous builds have tried to modify the stock dashboard to look like the one from the movie, he built a completely new dash from MDF and foam and coated it in fiberglass. The center console featuring the large display was also faithfully reproduced from the movie, and runs screen accurate animations, maps, and tour information. The seats also had to be replaced, multiple times in fact, as he had a considerable amount of trouble getting somebody to upholster them to his standards.

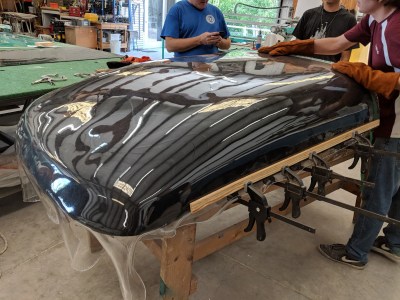
But perhaps the most difficult component of all was the clear acrylic roof bubble. These were critical to filming the movie, as they not only let the viewer see down into the Tour Vehicles but also let the characters see out during the iconic tyrannosaurus attack. But because the roof bubble was created only for the movie and never existed as a real aftermarket product, it usually gets ignored in Tour Vehicle builds. It’s simply too difficult to produce for most people. The omission of the bubble was always considered a case of artistic license; in the same way nobody expects a replica DeLorean from Back to the Future to actually fly or travel through time.

But [Brock] wanted to take his Tour Vehicle all the way, so he partnered up with a local glass shop that let him rent time in their oven so he could heat up acrylic sheets. Once heated to the appropriate temperature, they could be removed and wrapped around a mold to make the bubble. The process took weeks to perfect, but in the end he and a few friends got the hang of it and were able to produce a gorgeous roof bubble that they fitted to the already very impressive Explorer.

While previous Jurassic Park Tour Vehicle replicas were unquestionably awesome, this build really does take it to the next level. Short of equipping the garage with a movie-accurate super computer, it’s hard to see how the bar can get any higher.