You’d think that something called “white fuming nitric acid” would be more than corrosive enough to dissolve just about anything. Heck, it’s rocket fuel – OK, rocket fuel oxidizer – and even so it still it wasn’t enough to pop the top on this vintage Fairchild μL914 integrated circuit, at least not without special measures.
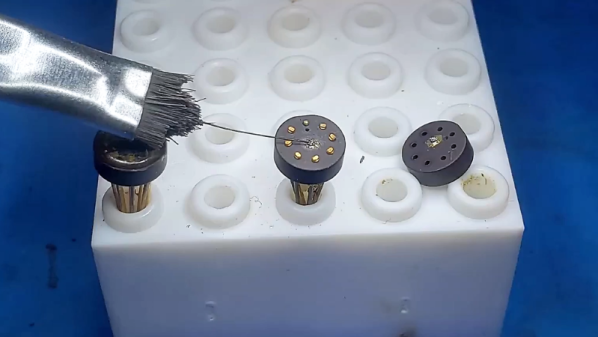
As [John McMaster], part of the team that analyzed the classic dual 2-input NOR gate RTL chip from the 1960s, explains it, decapping modern chips is a straightforward if noxious process. Generally a divot is milled into the epoxy, providing both a reservoir for the WFNA and a roughened surface for it to attack. But the Fairchild chip, chosen for dissection for the Maker Faire Bay Area last week specifically because the features on the die are enormous by modern standards, was housed in an eight-lead TO-99 case with epoxy that proved nigh invulnerable to WFNA. [John] tried every chemical and mechanical trick in the book, going so far as to ablate epoxy with a Nd:YAG laser. He eventually got the die exposed, only to discover that it was covered with silicone rather than the silicon dioxide passivation layer of modern chips. Silicone can be tough stuff to remove, and [John] resorted to using lighter fluid as a solvent and a brush with a single bristle to clean up the die.
We applaud the effort that this took, which only proves that decapping is more art than science sometimes. And the results were fabulous; as Hackaday editor-in-chief [Mike Szczys] notes, the decapping led to his first real “a-ha moment” about how chips really work.
Continue reading “Vintage Fairchild IC Proves Tough To Decap”